Table of Contents
Advertisement
Quick Links
Life Gets Better With
USE AND CARE GUIDE
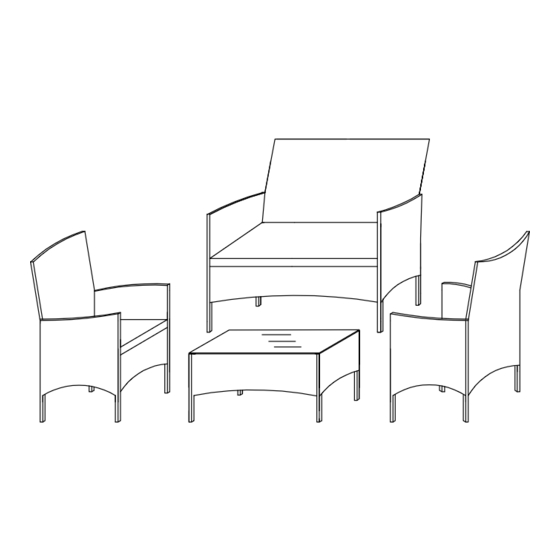
E02GA003-BL-N/E02GA003-GR-N
PV-461
h
Questions, problems, missing parts? Before returning to the store,
please contact our Customer Service
THANK YOU
We appreciate the trust and confidence you have placed in PHI VILLA through the purchase of our product. We strive to continually create quality
products designed to enhance your home. Visit us online to see our full line of products available for your home improvement needs.
Thank you for choosing PHI VILLA!
1
Advertisement
Table of Contents

Subscribe to Our Youtube Channel
Related Manuals for PHI VILLA PV-461


Summary of Contents for PHI VILLA PV-461
- Page 1 THANK YOU We appreciate the trust and confidence you have placed in PHI VILLA through the purchase of our product. We strive to continually create quality products designed to enhance your home. Visit us online to see our full line of products available for your home improvement needs.
- Page 2 Notice 1.50% Tighten before fixings all screws, Allen wrench is recommended instead of an electric drill. 2.Place the item on a flat ground to adjust and make sure it remains stable. 3.Tighten up all screws with tools gradually. 4.If the screws are not aligned with holes during assembly, please loosen all all the other screws to 50% and continue the assembly process.
- Page 3 PART LIST AND HARDWARE Seat Frame Left Frame Right Frame Back Frame Bench Seat Frame Bench Back Frame Table Leg Frame Table Side Frame Seat Cushion Bench Cushion Table Glass Nx42 Ox42 Washer 16x8x1 Bolt M6x30 Allen Key...
- Page 4 STEP 1 STEP 2 Connect the part from step 1 and right Connect left frame B & seat frame A with bolt N with allen key frame C with bolt N with allen key STEP 3 STEP 4 Connect the part from step 2 and back Put on the seat cushion J to finish frame D with bolt N with allen key single chair...
- Page 5 STEP 6 STEP 5 Connect left frame B & bench seat Connect the part from step 5 and right frame C with bolt N with allen key frame E with bolt N with allen key STEP 7 STEP 8 Connect the part from step 6 and bench Put on the bench cushion K to back frame F with bolt N with allen key finish Bench...
- Page 6 STEP 9 STEP 10 Connect Table leg frame G & table side Connect the part from step 9 and table frame H with bolt N with allen key side frame H with bolt N with allen key STEP 11 STEP 8 Connect the part from step 10 and Table Put on Table Glass L to finish Table leg frame G with bolt N with allen key...
Need help?
Do you have a question about the PV-461 and is the answer not in the manual?
Questions and answers