
Related Manuals for DrBrowns AC177-INTL


Summary of Contents for DrBrowns AC177-INTL
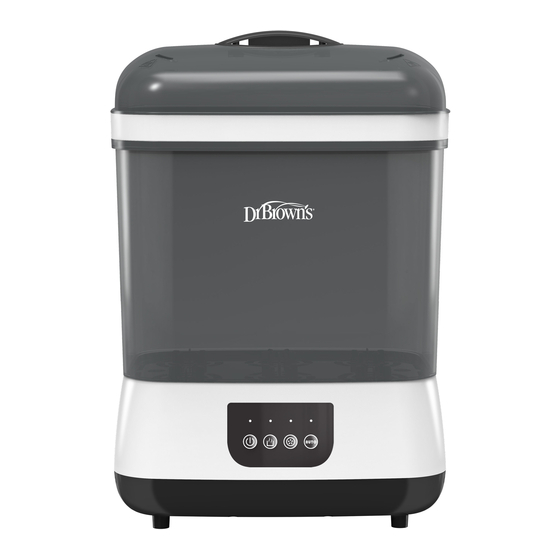
- Page 1 ™ INSTRUCTIONS FOR USE | INSTRUCCIONES DE USO Bottle Sterilizer and Dryer Esterilizador y secador de biberones Model Number AC177-INTL | Número de Modelo AC177-INTL...
-
Page 2: Important Safeguards
A copy of these instructions is also available online at drbrowns.co/intl IMPORTANT SAFEGUARDS WHEN USING ELECTRICAL APPLIANCES, PRECAUTIONS SHOULD ALWAYS BE... -
Page 3: Preparing For Use
• Unplug from outlet and allow to cool for 60 minutes before cleaning and descaling the unit or replacing the lter. • Be careful to avoid spilling or splashing water on yourself when removing contents. • The heating element surface is subject to residual heat after use. •... - Page 4 Position the appliance on a level, heat-resistant surface and out of reach of children. Remove the lower rack, tray and lid from the base. For Automatic Sterilize/Dry or Sterilize Only functions, ll the measuring cup to the solid FILL LINE (110 mL) with NON-MINERAL BOTTLED WATER and pour the water ONTO THE HEATING PLATE.
-
Page 5: Using The Appliance
USING THE APPLIANCE Power Sterilize Automatic Only Only Sterilize/Dry Press the Power Button. Note: When the sterilizer is turned on, the appliance will beep and the indicator above the power button will light up. Choose the desired function: Automatic Sterilize/Dry Press the Automatic Sterilize/Dry Button. -
Page 6: Cleaning The Appliance
steam will cause burns and serious injuries. DO NOT touch hot surfaces, including lid, tray and lower rack, during or immediately after use. When the sterilization cycle is complete, the appliance will beep 5 times and switch o automatically. Note: This cycle lasts approximately 9 minutes but may vary by the amount of water you add, the number of items to be sterilized and other environmental factors. - Page 7 Remove the lower rack, tray and lid from the base. Descale utilizing a mixture of vinegar/water: Fill measuring cup to the dashed line (80 mL) with white vinegar. Add an additional 30 mL of non-mineral bottled water to reach the solid FILL LINE of the measuring cup (110 mL total).
-
Page 8: Replacing The Filter
REPLACING THE FILTER CAUTION: Unplug from outlet and allow to cool for 60 minutes before replacing lter. Replace the lter every six months of regular use for optimal performance. Follow the steps below: The lter is located at the bottom of the base. Gently squeeze the latches on the lter cover to remove it. -
Page 9: Precauciones Importantes
No utilizar el producto de una manera segura y responsable puede causar daño al producto o a la propiedad personal, así como lesiones serias. Puede obtener una copia de estas instrucciones en Internet en drbrowns.co/intl PRECAUCIONES IMPORTANTES CUANDO USE APARATOS ELÉCTRICOS, SIEMPRE DEBE SEGUIR LAS... - Page 10 la unidad o de reemplazar el ltro. • Tenga cuidado y evite derrames o salpicaduras de agua sobre usted al retirar el contenido del esterilizador. • La superficie de la placa calentadora puede guardar calor residual después de su uso. •...
- Page 11 Retire la rejilla inferior, la bandeja y la tapa de la base. Para las funciones de Esterilizar/secar automático o Esterilizar solamente llene la taza para medir hasta la LÍNEA DE LLENADO sólida (110 mL) con AGUA EMBOTELLADA SIN MINERALES y vierta el agua EN LA PLACA DE CALENTAMIENTO. Para la función de Secar solamente, no añada agua.
-
Page 12: Uso Del Aparato
USO DEL APARATO Encendido Esterilizar Secar Esterilizar/secar solamente solamente automático resione el botón de Encendido (“Power”). Nota: Cuando el esterilizador se enciende, el aparato sonará una vez y el indicador encima del botón de encendido (“Power”) se ilumina. Escoja la función deseada: Esterilizar/secar automático Presione el botón de Esterilizar/secar automático (“Automatic Sterilize/Dry”). -
Page 13: Limpieza Del Aparato
LÍNEA DE LLENADO sólida de la taza para medir (110 mL), vierta el agua en la placa de calentamiento y reinicie el ciclo de esterilizar. ADVERTENCIA: NO abra la tapa ni intente alcanzar algo por encima del aparato mientras esté en uso, ya que el vapor puede causar quemaduras y lesiones graves. - Page 14 DESINCRUSTAR PRECAUCIÓN: Desenchufe y deje enfriar durante 60 minutos antes de desincrustar. Pueden formarse depósitos minerales, tales como la cal, en la placa calentadora de metal en la base. Al acumularse los depósitos minerales, el ciclo de esterilización puede ser más lento o interrumpirse.
-
Page 15: Reemplazo Del Filtro
REEMPLAZO DEL FILTRO PRECAUCIÓN: Desenchufe y deje enfriar durante 60 minutos antes de reemplazar el ltro. Reemplazar el ltro cada 6 meses de uso regular para un funcionamiento óptimo. Siga estos pasos: El ltro está ubicado en la parte inferior de la base. Apriete suavemente los pasadores en la tapa del ltro para retirarlo. - Page 16 FCC Compliance Statement This device complies with Part 15 of the FCC Rules. Operation is subject to the following two conditions: (1) this device may not cause harmful interference, and (2) this device must accept any interference received, including interference that may cause undesired operation. Importer: Handi-Craft Company Address: 4433 Fyler Ave., St.
Need help?
Do you have a question about the AC177-INTL and is the answer not in the manual?
Questions and answers