
Summary of Contents for Sila EVI Series
- Page 1 Split EVI DC Inverter Series Installation Manual AS 16,8 I-EVI, AS 18,8 I-EVI AS 9,6 I-EVI Air to Water Heat Pump Heating+Cooling+DHW Refrigerant: R410A PC board code: LCD code:...
-
Page 2: Safety Precaution
Safety precaution Toavoid electrical shock, make sure to disconnect power supply 1minute or more before operating the electrical part. Even after 1minute, always measure the voltage at the terminals of main circuit capacitors or electrical parts and, before touching, make sure that those voltages are lower than the safety voltage. - Page 3 Important parts in heat pump Component DC motor Reservoir Inverter compressor Pressure gauge Filter Small shut-off valve Large shut-off valve Four-way valve Main electronic expansion valve Auxiliary electronic expansion valve Plate heat exchanger economizer Back repair board...
- Page 4 Important parts in heat pump Component DC motor Plate heat exchanger economizer Auxiliary electronic expansion valve Main electronic expansion valve Large shut-off valve Small shut-off valve Four-way valve Pressure gauge Filter Reservoir Gas-liquid separator Inverter compressor...
- Page 5 Important parts in heat pump Component Controller Inverter pump Expension tank Plate heat exchanger Electric heater...
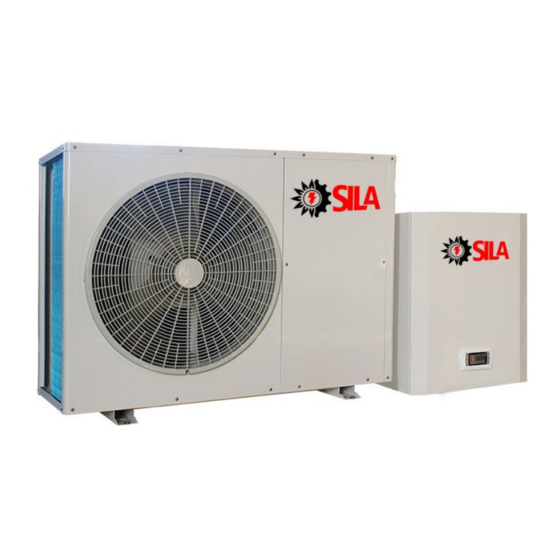
- Page 6 Heat pump size AS 9,6 I-EVI...
- Page 7 Heat pump size AS 16,8 I-EVI, AS 18,8 I-EVI...
- Page 8 Heat pump size Indoor unit...
-
Page 9: Installation Diagram
Installation diagram Primary circulation system... - Page 10 Installation diagram Secondary circulation system...
- Page 11 Distances to barrier and ground Basic of installation The heat pump must be installed in open space. Normally is installedon the roof of house. The unit should be placed in dry and well-ventilated environment. If the environment is humid, electronic components may get corroded orshort circuit.
-
Page 12: Installation Details
Installation details 1. Installation site 1.1 The outdoor unit should be installed in a sunny and ventilated place to prevent the formation of a cold field due to poor ventilation or in a dark place, which affects the use of the unit; 1.2 The outdoor unit should not be installed in a place with too much dust to prevent the dust from adhering to the fin heat exchanger and affecting the heat exchange effect;... - Page 13 Installation details 3. Outdoor unit installation 3.1 Outdoor unit installation distance requirements...
-
Page 14: Indoor Unit Installation
Installation details 3.2 The outdoor unit installation needs to be fixed on the bottom frame with expansion screws, and the bottom corner of the main unit needs to be installed with a cushion Anti-shock pad Concrete basic Expansion bolt 4. Indoor unit installation: 4.1 Indoor unit installation requires three expansion screws to fix the internal unit to the wall. - Page 15 Pipes connection 5. Fix the connecting pipe 5.1 After the outdoor door unit and indoor unit are fixed, look for the nearest connection route, punch a hole of 50-100mm at the location of the wall, pay attention to waterproof when drilling 5.2 Pass the two connecting pipes through the wall, and place the two ends at the connection between the indoor and outdoor units 6.
- Page 16 Pipes connection Indoor unit gas connector 6.2 Fluorine connection pipe specification: CGK030V2LS connection pipe specification φ15.88 / φ12.7 CGK050V2LS connecting pipe specification φ19 / φ12.7 CGK060V2LS connecting pipe specification φ19 / φ12.7 7. Fluorine system pipeline connection steps 7.1 Remove the plastic cover of the globe valve, directly align the bell mouth of the connecting pipe with the connection port on the heat pump, and then tighten the nut, paying attention to alignment, otherwise it will cause air leakage Remove cover...
- Page 17 Pipes connection 7.2 After connecting the connecting pipes of the indoor and outdoor units, use a vacuum pump to evacuate the air in the pipeline and the indoor unit to ensure the evacuation time and ensure that the air in the pipeline is cleaned. 7.3 After evacuation, close the refrigerant meter valve, use a φ5 hex nut to open the shut- off valve switch, close the shut-off valve switch after a little refrigerant enters the connection pipe, then unscrew the connection pipe for evacuation, and then reopen all the...
- Page 18 Wire line 10. Line connection 10.1 When connecting the main power supply, please note that the wire diameter of the power cord must be greater than or equal to the recommended wire diameter, and must be reliably grounded. 10.2 The connection terminal of the water pump can be used as the power supply of the water pump.
- Page 19 Terminal 12. Wiring terminal diagram with self water pump and electric heater AS 9.6 I-EVI AS 16.8 I-EVI AS 18.8 I-EVI Line(mm) Max. Current(A)
- Page 20 Terminal 13.Wiring terminal diagram of externally electric heater and water pump...
-
Page 21: Wiring Diagram
Wiring diagram Wiring diagram 14.Wiring diagram of self water pump and electric heater... - Page 22 Wiring diagram 15.Wiring diagram of externally electric heater and water pump...
- Page 23 Commissioning Commissioning 16. Commissioning 16.1 The water system is filled with water, and the air in the pipes and water tanks is discharged; 16.2 Check whether the water system pipeline is leaking 16.3 Check whether the power cord and other connecting wires are tight 16.4 Adjust the mode of the host to the required mode, set the required temperature, and start the operation 16.5 After the host is turned on, the set temperature is reached and there is no fault.
Need help?
Do you have a question about the EVI Series and is the answer not in the manual?
Questions and answers