Table of Contents
Advertisement
Available languages
Available languages
Advertisement
Table of Contents

Summary of Contents for Premium levella PPC10580D
- Page 1 ESPRESSO MAKER MÁQUINA PARA ESPRESSO...
-
Page 2: Important Safeguards
IMPORTANT SAFEGUARDS When using electric appliances, basic safety precautions should always be followed including the following: 1. Read all instructions. 2. Do not touch hot surfaces. Use handles or knobs. 3. To protect against electrical shock do not immerse cord, plug or appliance in water or any other liquid. - Page 3 Instructions.” 19.Do not fill the unit over the MAX LINE marked in the inner pot. When cooking foods that expand during cooking such as rice, beans, or dried vegetables, do not fill the unit over 1/2 (half) full. See “General Operating Instructions”. Overfilling the pressure cooker may cause clogging, which builds up excess pressure inside and may be dangerous.
- Page 4 mental capabilities, or lack of experience and knowledge, unless they are under the supervision of a responsible person or have been given proper instruction in using the appliance. This appliance is not intended for use by children. Any person who has not fully read and understood all operating and safety instructions contained in this instruction manual is not qualified to operate or clean this electric pressure cooker.
-
Page 5: Special Cord Set Instructions
Special Cord Set Instructions a) A short detachable power-supply cord is provided to reduce the risk resulting from becoming entangled in or tripping over a longer cord. b) Longer detachable power-supply cords are available and may be used if care is exercised in their use. -
Page 6: Product Specifications
Volume Size of Working Limit Warm Supply inner pot pressure pressure temperature PPC10580D (10) 120v~60Hz 1000W 22cm 0-50kPa 90kPa 140-176 Before First Use Before the first use, please take out all accessories from the package and read this Manual carefully. Pay particular attention to operational instructions and cautions to avoid any injury or property damage. - Page 7 • Do not open the lid until pressure inside the pot is completely released. • Never pull out the Pressure Release Valve when it is releasing pressure. • For fluid foods (thin, thick, and sticky liquids), do not slide the Pressure Release Valve for releasing pressure when cooking isjust finished.
- Page 8 3. Select a cooking method by pressing the corresponding button. Once the button is pressed, the display will show the default pressure cooking time. Cooking times may vary depending on the different cooking program selections. Cooking time may vary slightly depending on the quantity of food and liquid and textures of food.
-
Page 9: Opening The Lid
CAUTION! NEVER ATTEMPT TO OPEN THE LID WHILE PRESSURE COOKING! Note: The Pressure Active indicator will light up and indicate that the unit is under high pressure. After cooking time has ended, the pressure cooker will automatically go into Keep Warm mode. - Page 10 followed. Use potholders, tongs, or other tools to adjust the valve. 2. Natural pressure release is recommended when cooking foods that will not have the tendency to overcook, such as potatoes, beans, soups, and stews. When in Keep Warm mode, the pressure will begin to drop. This will take from 12 to 30 minutes. During this time cooking continues slightly.
-
Page 11: Product Features
Product Features PARTS OF THE PRESSURE COOKER... - Page 12 ACCESSORIES ACCESSORIES 1.Rice Spoon 2. Measuring Cup CONTROL AND FEATURES...
-
Page 13: Product Functions
Product functions The pressure cooker includes the following functions: Rice Multigrain Porridge Meat/stew Poultry Seafood Veggies Bean/chili Soup Yogurt Egg Maker Steam Slow cook Sauté Manual Display status 1. - Page 14 4. Preset Time: Press the Preset Time button to set the preset timer for up to 24 hours. Adjust the time in 30- minute increments using the “ + ” and “ - ” buttons, or by continuing to press the Delay Time button until your preferred delay time is selected.
- Page 15 at least 1/5 full of water or cooking liquid to the cooking pot. Add the appropriate amount of grain to the liquid, following the grain to liquid ratio indicated by the recipe. Do not fill the pot more than half-full. Place the lid on the cooker;...
- Page 16 silicone steamer) with your food into the pot, add water to 1/5 mark on the cooking pot. Follow the steps listed in this manual under the heading “General Operation Instructions.” Press the Steam button. If your food needs a longer or shorter cooking time, the default time can be changed during the first 5-second interval by pressing the plus (+) or minus (-) button.
-
Page 17: Time Delay Function
Time Delay Function This Pressure Cooker has a delay time function of up to 24 hours. 1. Follow the steps listed in this manual under the heading “General Operation Instructions”. 2. Press the button of the specific menu that you want to have delayed. 3. -
Page 18: Cooking Programs
Cooking Programs (Table 1) Function Default time Taste selection Adjustable Preset Keep Warm pressure time (Quick) Quick Medium Strong 8min 25min 24hr 24hr 8-25 ( 1 ) Rice 8min 18min Multigrain 30min 45min 60min 24hr 24hr 30-60 ( 1 ) 30min 15min 25min... - Page 19 General Operating Instructions 1. Open the lid by turning the lid handle clockwise to the OPEN position, and then carefully lift the lid. (See picture 1 ). 2. Take out the removable cooking pot, put food and water in it. NEVER fill the cooking pot more than 3/5 or less than 1/5 full.
- Page 20 4. Close the lid: Make sure the silicone gasket is seated properly inside the lid. Hold the lid handle and put the lid on the cooker; rotate the lid counterclockwise approximately 30 degrees until the lid is aligned with the “CLOSE mark on the cooker. (See picture 6) 5.
- Page 21 8. Choose the corresponding function according to your food recipe, and the related indicator will be on. SAFETY AND COOKING TIPS • EXTREME CAUTION should be taken when sliding the pressure release switch to the Venting position. Keep hands and face away from the pressure valve openings.
-
Page 22: Cleaning And Maintenance
Cleaning and Maintenance After use, unplug unit and allow the unit to cool completely before cleaning. This Electric Pressure Cooker must be cleaned thoroughly after each use in order to avoid staining caused by a build-up of food or cooking residue. DO NOT POUR COLD WATER INTO A HOT PRESSURE COOKER. - Page 23 Sealing Ring may also need replacing if this Electric Pressure Cooker is not used for a long period of time, as it can harden from disuse, making it unable to form an airtight seal. The Sealing Ring must be replaced only with another one of the correct type and size for this Pressure Cooker.
-
Page 24: Troubleshooting
Troubleshooting Indicator code Reasons Sensor disconnected Short circuit of sensor Overheating, Sauté function is not tested Pressure switch malfunction... - Page 25 Symptom Possible Reasons Solutions Lid does not The sealing ring is not Reinstall the sealing ring lock properly installed The float is seized by the Push the rod with your hands push rod Cannot open The float is still up Press the float down the lid after air exhaust...
- Page 26 When the following circumstances take Solutions place • Power cord and plug suffer from expansion, •Stop using the product deformation, discoloration, damages, etc. immediately; send it to your • A portion of the power cord or the plug gets nearest customer service hotter than usual.
-
Page 27: Medidas Importantes De Seguridad
MEDIDAS IMPORTANTES DE SEGURIDAD Al usar aparatos eléctricos, siempre se deben seguir las precauciones básicas de seguridad, incluidas las siguientes: 1. Lea todas las instrucciones. 2. No toque las superficies calientes. Utilice asas o perillas. 3. Para protegerse contra descargas eléctricas, no sumerja el cable, el enchufe ni el aparato en agua ni en ningún otro líquido. - Page 28 enchufe del tomacorriente de la pared. 16. No utilice el aparato para otro uso que no sea el previsto. 17. Riesgo de descarga eléctrica. Cocine solo en el recipiente extraíble. 18.Este aparato cocina a presión. El uso inadecuado puede resultar en lesiones por escaldaduras.
- Page 29 tapa con cuidado para evitar el contacto de la piel con el calor o el vapor restante. 24. Esta olla a presión eléctrica genera calor y vapor que se escapa durante el uso. PRECAUCIÓN SUPERFICIES CALIENTES. Se deben seguir todas las precauciones necesarias para evitar incendios, quemaduras u otras lesiones personales durante su funcionamiento.
- Page 30 Instrucciones especiales para los cables a) Se proporciona un cable de alimentación desmontable corto para reducir el riesgo de enredarse o tropezarse con un cable más largo. b) Hay disponibles cables de suministro de energía desmontables más largos y se pueden usar si se tiene cuidado al usarlos.
-
Page 31: Especificaciones Del Producto
Capacidad Tamaño del Presión Presión Temperatura alimentación recipiente interno de trabajo Limite cálida PPC10580D (10) 120v~60Hz 1000W 22cm 0-50kPa 90kPa 140-176 Antes del primer uso Antes del primer uso, saque todos los accesorios del paquete y lea atentamente este Manual. Preste especial atención a las instrucciones y precauciones operativas para evitar lesiones o daños a la propiedad. -
Page 32: Modo De Uso
la posición de desbloqueo y levante con cuidado la tapa para abrirla. • No abra la tapa hasta que la presión dentro de la olla se haya liberado por completo. • Nunca saque la válvula de liberación de presión cuando esté liberando presió •... - Page 33 Para garantizar la seguridad, se recomienda conectar primero el cable de alimentación a la olla y luego conectar el enchufe a la toma de corriente. 3. Seleccione un método de cocción presionando el botón correspondiente. Una vez que se presiona el botón, la pantalla mostrará el tiempo de cocción a presión predeterminado.
- Page 34 En cualquier momento durante el proceso, el programa se puede cancelar presionando el botón Cancelar/Mantener caliente. La olla a presión entrará en modo de espera. 5. A medida que aumente la presión dentro de la olla, la válvula flotante subirá. En este punto comienza la olla a presión.
- Page 35 TENGA EXTREMA PRECAUCIÓN AL ABRIR LA TAPA. EL VAPOR DENTRO DE LA UNIDAD PUEDE OCASIONAR QUEMADURAS SERIAS. PRECAUCIÓN: MANTENGA LAS MANOS Y LA CARA LEJOS DE LA VÁLVULA MIENTRAS VENTILA El vapor caliente que sale de la válvula puede causar lesiones graves si no se siguen las precauciones.
-
Page 36: Características Del Producto
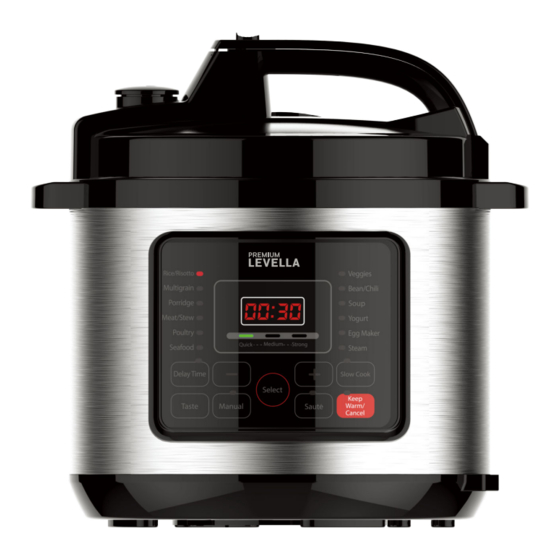
Características del Producto PARTES DE LA OLLA A PRESION Tapa de la Olla Válvula de presión Válvula de flotación Interruptor de liberación de Presión Asa de la tapa Anillo de sellado de silicón Tapa interna Recipiente interior Asa para transporte 10. - Page 37 ACCESSORIOS ACCESSORIES 1.Paleta para Arroz 2. Taza para medir CONTROL Y CARACTERÍSTICAS...
-
Page 38: Funciones Del Producto
Funciones del Producto La olla a presión incluye las siguientes funciones: • Rice - Arroz • Multigrain - Multigrano • Porridge - Papilla • Meat/Stew - Guiso de carne • Poultry - Aves de corral • Seafood - Mariscos • Veggies - Verduras •... - Page 39 hasta por 24 horas. Ajuste el tiempo en incrementos de 30 minutos con los botones "+" y "-", o continúe presionando el botón Delay Time hasta que se seleccione su tiempo de retraso preferido. 5. Keep Warm/Cancel (Mantener caliente/Cancelar): para la mayoría de los ajustes preestablecidos, después de completar el ciclo de cocción, la olla cambiará...
- Page 40 menos 1/5 de agua o líquido de cocción a la olla. Agregue la cantidad adecuada de grano al líquido, siguiendo la proporción de grano a líquido indicada en su receta. No llene la olla más de la mitad. Coloque la tapa en la olla; alinee el mango con el colector de condensación y gírelo en sentido contrario a las agujas del reloj hasta que encaje en su lugar.
- Page 41 6, Steam - Vapor Este es un programa de 8 minutos (00:08) para cocinar al vapor. Inserte una canasta de vapor (NO INCLUIDA, preferiblemente use una vaporera de silicona) con su comida en la olla, agregue agua hasta la marca de 1/5 en la olla de cocción.
- Page 42 ADVERTENCIA: No sostenga la válvula de liberación de presión. Es posible que salga vapor/líquido caliente. Mantenga las manos y la cara alejadas de las salidas de vapor, use agarraderas cuando retire la olla interior o toque cualquier artículo caliente, y nunca fuerce la tapa para abrirla.
-
Page 43: Programas De Cocción
• Dejar alimentos crudos dentro de la olla a presión durante largos períodos de tiempo antes de cocinarlos puede provocar que los alimentos se echen a perder. • Cocine alimentos que se puedan dejar fuera un rato, como frijoles, granos u otros alimentos que no se echen a perder. -
Page 44: Instrucciones Generales De Operación
Instrucciones Generales de Operación 1. Abra la tapa girando la manija de la tapa en el sentido de las agujas del reloj hasta la posición ABIERTA y luego levante la tapa con cuidado. (Ver figura 1). 2. Saque la olla extraíble, ponga comida y agua en ella. NUNCA llene la olla de cocción más de 3/5 o menos de 1/5 de su capacidad. - Page 45 4. Cierre la tapa: asegúrese de que la junta de silicona esté bien asentada dentro de la tapa. Sujete el asa de la tapa y coloque la tapa sobre la olla; gire la tapa en sentido contrario a las agujas del reloj aproximadamente 30 grados hasta que la tapa esté...
- Page 46 presión, volverá a aflojarse. 7 Conecte a la corriente. La pantalla LED muestra "00:00" y entra en estado de espera. 8 Seleccione la función correspondiente de acuerdo con su receta de alimentos y el indicador correspondiente se encenderá. CONSEJOS DE SEGURIDAD Y COCINA •...
-
Page 47: Limpieza Y Mantenimiento
Limpieza y mantenimiento Después del uso, desenchufe la unidad y deje que se enfríe por completo antes de limpiarla. Esta Olla a Presión Eléctrica debe limpiarse a fondo después de cada uso para evitar manchas causadas por la acumulación de alimentos o residuos de cocción. NO VIERTA AGUA FRÍA EN UNA OLLA A PRESIÓN CALIENTE. - Page 48 la tapa. Revíselo periódicamente para asegurarse de que esté limpio, flexible y sin roturas. Si está dañado, no use esta unidad. Nota: El anillo de sellado debe reemplazarse cada año o antes si es necesario. Es posible que también sea necesario reemplazar el anillo de sellado si esta olla a presión eléctrica no se usa durante un largo período de tiempo, ya que puede endurecerse por falta de uso, lo que hace que no pueda formar un sello hermético.
-
Page 49: Resolución De Problemas
Resolución de Problemas Código indicador Razón Sensor desconectado Cortocircuito del sensor Sobrecalentamiento, no se ha probado la función de salteado Mal funcionamiento del interruptor de presión... - Page 50 Síntoma Razón Posible Solución La tapa no se El anillo de sellado no está Vuelva a instalar el anillo de bloquea instalado correctamente. sellado El flotador es agarrado por Empuje la varilla con las manos la varilla de empuje No se puede El flotador sigue arriba Presione el flotador hacia abajo abrir la tapa...
- Page 51 Cuando concurran las siguientes Solución circunstancias • El cable de alimentación y el enchufe sufren • Deje de usar el producto expansión, deformación, decoloración, daños, inmediatamente; envíalo a etc. tu centro de atención al • Una parte del cable de alimentación o del cliente más cercano.
Need help?
Do you have a question about the PPC10580D and is the answer not in the manual?
Questions and answers
Yo elijo el botón de frijoles y pone la pantalla 30 minutos, enseguida me pone rallitas en la pantalla y no cocina,debo apretar otro botón para que empiece la cocción??
The Premium Levella PPC10580D may show lines on the screen and not cook after selecting the bean button and setting it for 30 minutes if the Delay Time function was accidentally activated. If the Delay Time button is pressed within 5 seconds of selecting a cooking function, the cooker will wait before starting. During this time, the display may show lines or countdown the delay time instead of beginning to cook. To fix this, press the Keep Warm/Cancel button to cancel the delay, then reselect the cooking function.
This answer is automatically generated
Como debe estar el cierre de la tapa para q coja presion
The lid of the Premium Levella PPC10580D must be properly sealed to maintain pressure. Ensure that the seal and anti-block shield are correctly mounted in the lid. The seal should not be deformed or damaged, as this can affect the sealing and pressure retention. Never pull the seal by force. If the seal is damaged, it should be replaced through a service center.
This answer is automatically generated
Cuales son los pasos para encender la olla premioum levelle y q tiempo demora en calentar
To turn on the Premium Levella PPC10580D:
1. Insert the plug firmly into the power outlet.
2. Open the lid by turning the handle clockwise to the OPEN position and lifting it.
3. Add food and liquid as needed.
4. Close the lid securely.
5. Select the desired cooking program using the menu button.
6. The menu indicator light will blink for 5 seconds before starting. During this time, you can adjust the cooking time using the plus (+) or minus (-) buttons.
7. After 5 seconds, the light will stop blinking, and the cooking process will begin.
The heating time varies but generally takes more than 10 minutes, depending on the amount of food inside.
This answer is automatically generated
En el panel no salen los. Minutos cuando se pone a cosinar
The minutes will not display on the Premium Levella PPC10580D cooking panel until the food or liquid has heated up and the pressure cooker has started cooking under pressure. The heating process can take more than 10 minutes, depending on the amount of food. Once the pressure is reached, the countdown timer will begin.
This answer is automatically generated
Que me quiere decir cuando la olla me pone E4
Cual es el botón de menu
The Premium Levella PPC10580D does not have a specific button labeled "Menu." Cooking functions are selected directly by pressing the corresponding function buttons such as Soup, Steam, Manual, Rice, etc., on the control panel.
This answer is automatically generated