Advertisement
Available languages
Available languages
RMW1220_AMZ
RMW1220
This product has been manufactured and sold under the responsibility of Curtis International Ltd.
RCA, the RCA logo, the two dogs (Nipper and Chipper) logo, are registered trademarks or
trademarks of Technicolor (S.A.) or its affiliates and are used under license by Curtis International
Ltd. Any other product, service, company, trade or product name and logo referenced herein are
neither endorsed nor sponsored by Technicolor (S.A.) or its Affiliates.
Advertisement
Chapters

Related Manuals for RCA RMW1220-AMZ

Summary of Contents for RCA RMW1220-AMZ
- Page 1 This product has been manufactured and sold under the responsibility of Curtis International Ltd. RCA, the RCA logo, the two dogs (Nipper and Chipper) logo, are registered trademarks or trademarks of Technicolor (S.A.) or its affiliates and are used under license by Curtis International Ltd.
-
Page 2: Table Of Contents
CONTENT CONTENT ........................PRECAUTIONS TO AVOID POSSIBLE EXPOSURE TO EXCESSIVE MICROWAVE ENERGY ..................... 2 IMPORTANT SAFETY INSTRUCTIONS ..............2 GROUNDING INSTRUCTIONS ................. 5 SPECIFICATIONS ....................... 5 INSTALLATION GUIDE ..................... 6 COOKING UTENSILS GUIDE ................... 6 PART NAMES ......................7 CONTROL PANEL ....................8 OPERATION INSTRUCTIONS ................... -
Page 3: Precautions To Avoid Possible Exposure To Excessive Microwave Energy
PRECAUTIONS TO AVOID POSSIBLE EXPOSURE TO EXCESSIVE MICROWAVE ENERGY 1. Do not attempt to operate this oven with the door open since open-door operation can result in harmful exposure to microwave energy. It is important not to defeat or tamper with the safety interlocks. 2. - Page 4 a) Do not overcook food. Carefully attend appliance when paper, plastic, or other combustible materials are placed inside the oven to facilitate cooking. b) Remove wire twist-ties from paper or plastic bags before placing bag in oven. c) If materials inside the oven should ignite, keep oven door closed, turn oven off, and disconnect the power cord or shut off power at the fuse or circuit breaker panel.
- Page 5 accessories, in this oven when not in use. 22. Do not cover racks or any other part of the oven with metal foil. This will cause overheating of the oven. 23. This equipment has been tested and found to comply with Part 18 of the FCC Rules.
-
Page 6: Grounding Instructions
GROUNDING INSTRUCTIONS This appliance must be grounded. In the event of an electrical short circuit, grounding reduces risk of electric shock by providing an escape wire for the electric current. This appliance is equipped with a cord having a grounding wire with a grounding plug. -
Page 7: Installation Guide
INSTALLATION GUIDE 1. Make sure that all the packing materials are removed from the inside of the door. 2. This microwave oven must be placed on a flat. 3. For correct operation, the oven must have sufficient airflow. Allow minimum 20cm of free space necessary above the top surface of the oven and 5cm at both sides. -
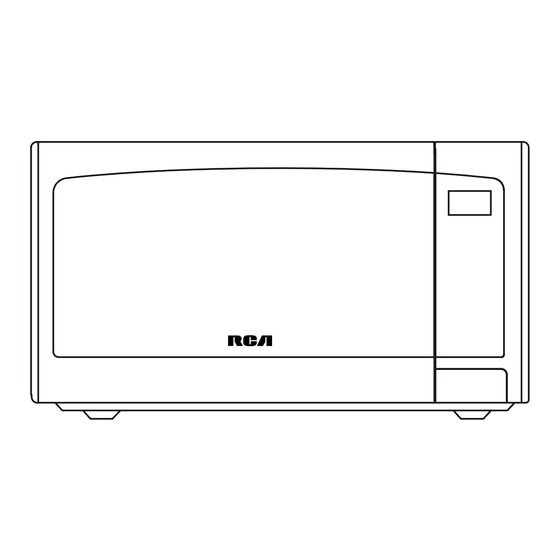
Page 8: Part Names
LIMITED USE Aluminum foil — Use narrow strips of foil to prevent overcooking of exposed areas. Using too much foil can damage your oven, so be careful. You should keep distance of 1 inch (2.54cm) between aluminum foil and cavity. Ceramic, porcelain, and stoneware—... -
Page 9: Control Panel
CONTROL PANEL MENU ACTION SCREEN ● Cooking time, power, indicators and clock time are displayed. MICRO. ● Press to set microwave cooking program. CONV. ● Press to set convection cooking program. ● COMBI. MICRO+CONV. Press to set microwave and convection combination cooking program. -
Page 10: Operation Instructions
OPERATION INSTRUCTIONS ● When the oven plugged in, a beep will sound and the display will show "CLOCK" and "1:00". ● In the process of setting, broke about 20 seconds, the oven will return to standby mode. ● During cooking, if press STOP/CANCEL button once, the program will be paused, then press START button to resume, but if press STOP/CANCEL button once at pausing state, the program will be cancelled. -
Page 11: Microwave Cooking
STOP/CANCEL button can cancel the program when the display shows the time. ICROWAVE COOKING Accessory Guide: Glass Turntable In standb y mode, press MICRO. button once. Use number buttons to set the cooking time. The longest time is 99 minutes and 99 seconds. -
Page 12: Microwave + Convection
minutes. If do not open the oven door in the 30 minutes, the oven will automatically end. During cooking, you can check the current convection temperature by pressing CONV. button. To cook with convection: In standby mode, press CONV. button once. Use number buttons to indicate convection temperature. -
Page 13: Air Fry
In standby mode, press TIME/WEIGHT DEFROST button twice. Use number buttons to set food weight. Press START button to confirm. NOTE: During defrosting, the oven will pause and sound to remind user to turn food over, after that, press START button to resume. IR FRY Accessory Guide: Glass Turntable Air Fry Kit... -
Page 14: Child Lock
HILD LOCK The safety lock prevents unsupervised operation by children. To set: In standby mode, press and hold STOP/CANCEL for 3 seconds, then a beep will sound, the oven will auto enter child lock mode and the lock indicator light will turn on. -
Page 15: Cleaning And Care
CLEANING AND CARE 1. Turn off the oven and unplug the power cord from the wall when cleaning. 2. Keep the inside of the oven clean. When food splatters or spilled liquids adhere to oven walls, wipe with a damp cloth. Mild detergents may be used if the oven gets very dirty. -
Page 16: Warranty
For faster service, locate the model, type, and serial numbers on your appliance. This product has been manufactured and sold under the responsibility of CURTIS INTERNATIONAL LTD. RCA, the RCA logo and the two dogs (Nipper and Chipper) logo are trademarks used under license by CURTIS INTERNATIONAL LTD. – further information at www.rca-brand.com. - Page 17 Ce produit a été fabriqué et vendu sous la responsabilité de Curtis International Ltd. RCA, le logo RCA, le logo des deux chiens (Nippe et Chipper) sont des marques déposées ou des marques de Technicolor (S.A.) ou de ses affiliés et sont utilisés sous licence par Curtis International Ltd.
- Page 18 PARAMÉTRAGE DE L’HORLOGE ............. CUISSON EXPRESS .................. RÉGLAGE DE LA MINUTERIE ..............CUISSON AU MICRO-ONDE ..............CONVECTION ................... MICRO-ONDES + CONVECTION ............. TIME DEFROST..................WEIGHT DEFROST .................. FRITURE À L'AIR ..................CUISSON EN PLUSIEURS ÉTAPES ............VERROUILLAGE ENFANTS ..............PROTECTION ................... CUISSON AUTO ..................
- Page 19 PRÉCAUTIONS À PRENDRE POUR ÉVITER L'EXPOSITION POSSIBLE À L'ÉNERGIE EXCESSIVE DES MICRO- ONDES 1. N’essayez pas de faire fonctionner ce four avec la porte ouverte puisqu’il exposera l’utilisateur à de la énergie à micro-ondes qui est d’ailleurs dangereux pour la santé. Il est important de ne pas détruire ou altérer les dispositifs de verrouillage de sécurité.
- Page 20 a) Ne pas trop cuire les aliments. Surveillez attentivement l'appareil lorsque du papier, du plastique ou d'autres matières combustibles sont placés à l'intérieur du four pour faciliter la cuisson. b) Retirez les attaches de fils métalliques des sacs en papier ou en plastique avant de les placer dans le four.
- Page 21 22. Ne couvrez pas les grilles ou toute autre partie du four avec une feuille de métal. Cela causerait une surchauffe du four. 23. Cet équipement a été testé et jugé conforme à la Partie 18 des règlements de la FCC.
- Page 22 INSTRUCTIONS DE MISE À LA TERRE Cet appareil doit être mis à la terre. En cas de court-circuit électrique, la mise à la terre réduit le risque de choc électrique en fournissant un fil d'échappement pour le courant électrique. Cet appareil est équipé d'un cordon comportant un fil de mise à la terre avec une fiche de mise à...
- Page 23 GUIDE D'INSTALLATION 1. Rassurez-vous que tous les matériaux d'emballage sont retirés de l'intérieur de la porte. 2. Ce four à micro-ondes doit être placé sur une surface lisse. 3. Pour un fonctionnement correct, le four doit avoir une circulation d'air suffisante. Laissez un espacement d'au moins 20 cm au-dessus de la surface supérieure du four et 5 cm des deux côtés.
- Page 24 UTILISATION LIMITÉE Papier d'aluminium — Utilisez des bandes étroites de papier d'aluminium pour éviter la sur-cuisson des zones exposées. L'utilisation d'une quantité considérable de papier d'aluminium peut endommager votre four, alors soyez prudent. Vous devriez garder une distance de 1 pouce (2,54 cm) entre le papier d'aluminium et la cavité. Céramique, porcelaine et grès —...
- Page 25 PANNEAU DE COMMANDE MENU ACTION SCREEN ● Le temps de cuisson, la puissance, les indicateurs et l'heure de l'horloge sont affichés. MICRO. ● Appuyez sur cette touche pour régler le programme de cuisson au micro-ondes. CONV. ● Appuyez sur cette touche pour régler le programme de cuisson par convection.
-
Page 26: Paramétrage De L'horloge
Lorsque le four est branché, un bip retentit et l'écran affiche “CLOCK” et ”1:00”. Dans le processus de réglage, après environ 20 secondes, le four reviendra en mode veille. Pendant la cuisson, si vous appuyez une fois sur le bouton STOP/CANCEL, le ... -
Page 27: Cuisson Au Micro-Onde
En mode veille, appuyer une fois sur le bouton MICRO. Utiliser les touches numériques pour régler la durée de cuisson. La durée maximale est de 99 minutes et 99 secondes. Appuyer plusieurs fois sur le bouton POWER LEVEL pour sélectionner une niveau de puissance. -
Page 28: Convection
Pour la cuisson par convection: En mode veille, appuyer une fois sur le bouton CONV. Utiliser les touches numériques pour indiquer la température de convection. Utiliser les touches numériques pour régler la durée de cuisson. La durée maximale est de 99 minutes et 99 secondes. Appuyez sur le bouton START pour démarrer. -
Page 29: Friture À L'air
NOTE: redémarrer. FRITURE À L'AIR Pour le poulet: CHICKEN WINGS/NUGGETS CHICKEN WINGS/NUGGETS 1 fois AF 8 NOTE: Pour les frites (8 oz): Pour les autres aliments: En mode veille, appuyer plusieurs fois sur le bouton AIR FRY pour sélectionner la température (400°F→375°F→350°F), ou appuyer une fois sur le bouton AIF FRY, puis appuyer sur le bouton «... -
Page 30: Verrouillage Enfants
VERROUILLAGE ENFANTS Le verrouillage de sécurité empêche tout fonctionnement non surveillé par les enfants. Pour le régler: En mode veille, appuyez sur STOP/CANCEL pendant 3 secondes, puis un bip sera émis, le four passera automatiquement en mode de verrouillage enfants et le voyant de verrouillage s'allumera. - Page 31 NETTOYAGE ET ENTRETIEN 1. Éteignez le four et débranchez le cordon d'alimentation du mur lors du nettoyage. 2. Gardez l'intérieur du four propre. Lorsque des éclaboussures d'aliments ou des liquides renversés adhèrent aux parois du four, essuyez-les avec un chiffon humide.
- Page 32 Ce produit a été fabriqué et vendu sous la responsabilité de CURTIS INTERNATIONAL LTD. RCA, le logo RCA et le logo des deux chiens (Nipper and Chipper) sont des marques utilisées sous licence par CURTIS INTERNATIONAL LTD. – pour plus d’informations www.rca-brand.com.
Need help?
Do you have a question about the RMW1220-AMZ and is the answer not in the manual?
Questions and answers