Table of Contents
Advertisement
Available languages
Available languages
Quick Links
Advertisement
Table of Contents

Summary of Contents for GOAL ZERO BOULDER
- Page 1 INSTALLATION GUIDE...
-
Page 2: Important Safety Instructions
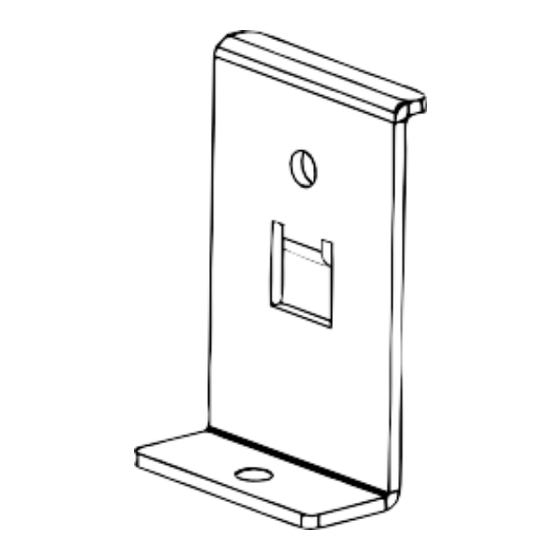
Please read all instructions before beginning installation. This guide is intended to help you with the initial installation step, attaching the mounting brackets to the Boulder Solar Panels. Do not substitute parts from other manufacturers; doing so may void the warranty. - Page 3 Remove the kickstand from the Boulder Solar Panel before 2. Drill hole for Bracket installation with a Philips screwdriver. We also recommend bolt using placing cardboard or a blanket between the Boulder and the Mounting ground to protect the tempered glass. Bracket as guide...
-
Page 4: Step 2: Attaching The Brackets
STEP 2: ATTACHING THE STEP 2: ATTACHING THE BRACKETS BRACKETS 2. Secure Mounting Bracket to solar panel using included nut. 1. Insert screw through the 3. Secure Mounting Bracket by washers, finger tightening the nut and Mounting using the 10mm wrench on bolt. Bracket drilled hole. - Page 5 SPECFICATION STEP 2: ATTACHING THE BRACKETS 4. Repeat 1 through 3 for each Mounting Boulder Mounting Brackets Bracket. General Weight 2.2 oz (62 g) per bracket Dimensions 3.5 x 2.25 x 1.5 in (8.9 x 5.7 x 3.81 cm) Warranty 12 months Be sure to activate your warranty at goalzero.com/warranty...
-
Page 6: Consignes De Sécurité Importantes
Veuillez bien lire toutes les instructions avant de commencer l'installation. Ce guide est destiné à vous aider avec l'étape d'installation initiale, attacher les supports de montage aux panneaux solaires Boulder. Ne remplacez aucune pièce avec celles d'autres fabricants; Cela pourrait annuler la garantie. - Page 7 2. Percez le trou pour cruciforme avant de continuer l'installation. Nous recommandons support de le boulon en également de placer du carton ou une couverture entre votre Boulder montage utilisant le support et le sol pour protéger le verre trempé.
- Page 8 ÉTAPE 2 : ATTACHER LES ÉTAPE 2 : ATTACHER LES SUPPORTS SUPPORTS 2. Fixez le support de montage au panneau solaire à l'aide de l'écrou 1. Insérez le inclus. boulon dans les 3. Fixez le support de montage en rondelles, le serrant l'écrou avec vos doigts et en support de...
-
Page 9: Spécification
SPÉCIFICATION ÉTAPE 2 : ATTACHER LES SUPPORTS 4. Répétez de 1 à 3 pour chaque support de Supports de montage Boulder montage. Informations générales Poids 2.2 onces (62 g) par support Dimensions 3.5 x 2.25 x 1.5 pouces (8.9 x 5.7 x 3.81 cm) -
Page 10: Důležitá Bezpečnostní Upozornění
Před zahájením instalace si prosím pečlivě přečtěte veškeré informace. Tento návod slouží k tomu, aby vám usnadnil první kroky při instalaci – montáži instalačních úhelníků na solární panel Boulder. Nepoužívejte díly od jiných výrobců, jelikož by jinak mohlo dojít k zániku platnosti vaší záruky. -
Page 11: Obsah Balení
• šroubovák pro odstranění boční podpěry ochrany hrany Před zahájením instalace pomocí šroubováku Philips prosím odstraňte až po hranu ze solárního panelu Boulder boční podpěru. Kromě toho doporučujeme montážního úhelníku. položit panel na karton nebo přikrývku, aby nedošlo k poškození tvrzeného skla. - Page 12 2. KROK: MONTÁŽ ÚHELNÍKŮ 2. KROK: MONTÁŽ ÚHELNÍKŮ 2. Upevněte montážní úhelník pomocí přiložené matice na solární panel. 1. Prostrčte šroub podložkou, montáž-ním 3. Úhelník upevněte tak, že úhelníkem a vyvr-taným utáhnete nejprve matici, a poté otvorem. šroub pomocí 10mm klíče na šrouby.
- Page 13 SPECIFIKACE 2. KROK: MONTÁŽ ÚHELNÍKŮ 4. Zopakujte kroky 1 – 3 pro každý montážní Montážní úhelník Boulder úhelník. Obecné údaje Hmotnost 62 g (2,2 oz) na úhelník Rozměry 8,9 x 5,7 x 3,81 cm (3,5 x 2,25 x 1,5 palce) Záruka...
- Page 14 Lea todas las instrucciones antes de comenzar con la instalación. Esta guía tiene por finalidad ayudarle con la instalación inicial, uniendo las abrazaderas de montaje a los paneles solares Boulder. No sustituya las piezas por las de otros fabricantes, ya que podría invalidar la garantía. RESPONSABILIDAD DEL INSTALADOR Compruebe la aplicabilidad de cualquier normativa vigente en el emplazamiento antes de comenzar con la instalación.
- Page 15 Retire el soporte del panel solar Boulder antes de proceder con la extremo 2. Realice el taladro instalación, usando un destornillador Philips. También recomendamos de la para el tornillo colocar un cartón o manta entre el Boulder y el suelo para proteger el abrazadera usando como guía de montaje cristal templado.
- Page 16 PASO 2: INSTALACIÓN DE LAS PASO 2: INSTALACIÓN DE LAS ABRAZADERAS ABRAZADERAS 2. Fije la abrazadera de montaje al panel solar usando la tuerca 1. Inserte el suministrada. tornillo a través 3. Fije la abrazadera de montaje de las arandelas, el dedo apretando la tuerca abrazadera de y usando...
- Page 17 ESPECIFICACIONE PASO 2: INSTALACIÓN DE LAS ABRAZADERAS 4. Repita los pasos 1 a 3 para cada abrazadera de Abrazaderas Boulder montaje. General Peso 62 g por abrazadera Dimensiones 3.5 x 2.25 x 1.5 in (8.9 x 5.7 x 3.81 cm) Garantía...
- Page 18 GOAL ZERO HEADQUARTERS 675 West 14600 South Bluffdale, UT 84065 1-888-794-6250 Designed in the U.S.A. Made in China Goal Zero Boulder is a trademark of Goal Zero. SM030119...


Need help?
Do you have a question about the BOULDER and is the answer not in the manual?
Questions and answers