Advertisement
Quick Links
Advertisement

Summary of Contents for Slider Metro E3
- Page 1 User Manual Metro E3...
- Page 2 If you have questions after reading this manual and watching the assembly video, please consult the SLIDER Help Centre, contact us by email, and/or give us a call on the phone. Thanks for riding SLIDER! SLIDER Help Centre : www.slider.eu E-mail : contact@slider.eu...
- Page 3 SLIDER METRO E3 Folding Electric Bike User Manual Table of content 1.Precautions................03 2. Assembly Instructions.............04 3. Assembly Step Instructions and Precautions.......05-17 4. Battery Precautions..............18-27 5. function test................28-30 5. Precautions for use..............31-38 6. maintainance................39 7. safety checklists..............40-62 8. warranty...................63-65...
- Page 4 This manual makes no representations about the safe use of bikes under all conditions. If you have any questions you should contact SLIDER immediately. Assembly and first adjustment of your bike from SLIDER requires special tools and skills.
- Page 5 Assembly instructions for the SLIDER The following steps provide an overview of how to assemble your METRO E3 from SLIDER. They are not a complete or comprehensive manual of all aspects of assembly, maintenance, and repair, which involve specialized tools and skills. We recommend you consult a certified, reputable bike mechanic to assist in the assembly, repair,...
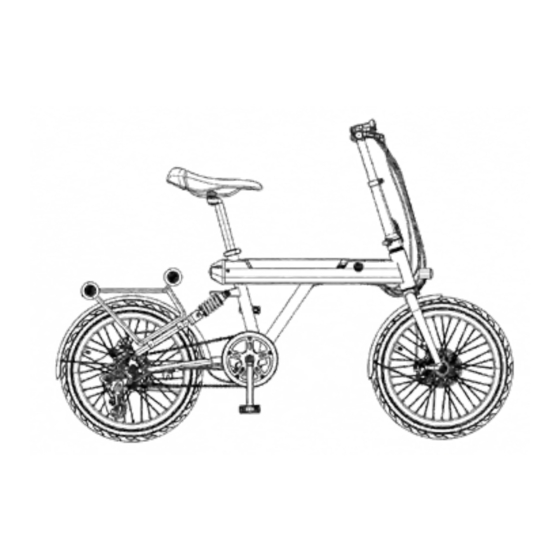
- Page 6 Please note that your SLIDER may include components that look different from those in the illustrations above and elsewhere in this manual. Such changes help ensure uninterrupted shipping. Our engineers rigorously test each component to guar- antee quality and compatibility.
- Page 7 Ensure all of the following pieces are included with the ebike like picture. If anything is missing, please contact SLIDER. We also recommend the following (not included) for assembly and main- tenance:...
- Page 8 2. After taking out the bicycle and checking that there is no problem, first rotate and fix the handlebar of the bike as shown in the picture. Please be sure to lock the handlebar tightly. If you find that it cannot be fixed or the tenon is damaged, please contact us and we will serve you.
- Page 9 3. Work with your strong friend to unfold the folded bicycle to the riding state, and follow the above steps to lock it.
- Page 10 (a) After unfolding, align the shock absorber tenon on the rear fork with the frame buckle and insert it, (b) and turn the screw on the quick release kit to lock it to tightly be like (c). Caution: Must be lock tide before riding !
- Page 11 Step 4 Install Front Wheel 4. Hold the quick-release lever in line with the axle and tighten the thumbnut until the lever can stay parallel to the floor without being held. Use the palm of your hand to close the lever fully, without touching the brake rotor.
- Page 12 After confirming that the direction is consistent, first loosen the quick release screw (but do not disassemble it), align the hole on the front fork and install the wheel, and then tighten the quick release screw after confirming that the direction of the wheel and the front fork is not offset, and Tighten the quick release kit.
- Page 13 Check the security of the front wheel and quick-release lever. If it’s too easy or too difficult to close, adjust the lever tension by turning the thumbnut one turn, then close the lever. Check the front wheel security on a regular basis: the front wheel should always be fully seated in the dropouts of the front fork, and the quick-release lever should always be properly secured.
- Page 14 Step 5 Rotate Padel (a)Press down on the pedals in the folded state to align the inner rotat -ing structure (b)Rotate the pedals to position as in the above picture (c)After rotating to the position, the pedal will automatically rebound and fix...
- Page 15 Step 6 Install Seat 1.Open the seatpost quick-release lever. 2.Slide the seatpost in or out of the seat tube to a height appropriate for your leg length and preference. Do not extend the seatpost beyond the minimum insertion marking etched onto the seatpost (see the “Seat post out TOO FAR”...
- Page 16 Adjusting for comfort and safety The following steps are critical for your comfort and safety, and must be performed before your first bike ride. We recommend that you consult a bike fitting professional such as a certified, reputable bike mechanic who specializes in bike fit.
- Page 17 Adjusting the seat height An ideal seat height for most riders allows them to be comfort- able and get the best pedalling efficiency. When the rider is seated, they should be able to place the ball of their foot on the pedal at its lowest position while their leg is almost fully extended, with the knee slightly bent.
- Page 18 Tool Rec. torque Handlebar area Stem clamp bolts 5 mm Allen 10 Nm Stem faceplate bolts 5 mm Allen 6 Nm Stem angle adjustment bolt (side) 5 mm Allen 12 Nm Stem angle adjustment bolt (bottom) 5 mm Allen 15 Nm Rad UI Display clamp bolts 3 mm Allen 3 Nm...
- Page 19 Step 7 Battery Charging Insert the key to unlock the battery It is possible to remove the battery for storage, transportation, security, or as an option for charging. To remove the battery, follow these steps. 1.Place the key into the keyport and turn it to the unlocked position. 2.The battery lock will release the battery from the frame and lift it out of the mount slightly.
- Page 20 CHECK CHARGE LEVEL Please check the color of the indicator light on the charger. If it is red, it means it is not fully charged. If the indicator light on the charger turns green or turns off, it means the battery is fully charged. Critical battery safety overview ・Protect the battery from impact damage.
- Page 21 TEMPERATURE RANGE SUMMARY These are the maximum safe and recommended temperature ranges for your SLIDER battery. Please see the preceding section for more informa- tion. Maximum use range: -20°C to 49°C (-4°F to 120°F) Maximum charging range: 0°C to 45°C (32°F to 113°F) Recommended charging range: 10°C to 25°C (50°F to 77°F)
- Page 22 ・Check that the battery and charger are undamaged before charging. If the battery or charger look damaged or were involved in a fall or crash (even without outward or obvious signs of damage) contact SLIDER Bikes Product Support for more information.
- Page 23 fine, proceed with the rest of the steps. If you find any damage, don’t charge your bike. Instead, take photos and seek more information from our Help Centre at www.slider.eu or by contacting SLIDER Product Support. 3.Plug the charger into the battery’s charging port. Place the charger on a flat, secure surface with the charging status light facing up, open the...
- Page 24 SLIDER Product Support. Long-term battery storage If storing your SLIDER for longer than two weeks at a time, follow the recommendations below to maximize the performance and longevity of your battery.
- Page 25 Store any damaged battery or charger in a safe location and, as soon as possible, recycle or otherwise dispose of it according to local rules. Contact SLIDER Product Support if you have any questions or to purchase a compatible replacement battery or charger.
- Page 26 WARNING: Using aftermarket battery accessories or products that have not been tested by SLIDER for safety and compatibility may void your warranty, create an unsafe riding condition, result in bike/property damage, or cause serious injury or death. If you use products not tested and recommended by SLIDER, you do so at your own risk.
- Page 27 NOTICE: Always follow any safety information attached to the battery or charger. A sample label for the battery that shipped with your bike is shown at right, some details and manufacturing loca- tion may differ. If you read all done,you can start to charge your SLIDER battery...
- Page 28 Step 7 Fully Charged INSTALLING THE BATTERY To install the battery, you do not need the key. Check to ensure the bat- tery mount is clean and dry, and then follow these steps. 1.Gently insert the battery into the frame. 2.Align the battery with the terminal contacts.
- Page 29 Step 8 Test Function 1.Push Mode (6km/h) 2.Speed Mode 3.Warning 4.Brake 5.Speed 6.Speed Unit 7.Mileage 8.Mileage Unit 9.Battery 10.Total Mileage 11.Subtotal Mileage 12.Gear Pas 13.Light Power Button Change Mode Button Adjustment Button Adjustment Button Open light (hold press) Push Mode (hold press) Data clear (hold press 3 sec to enter data interface, and short press M to clear)
- Page 30 List of fault codes Fault code (decimal) Fault state Remark Normal status Reserve Brake Power assist sensor failure (riding mark) Not shown here 6 km/h cruise Not shown here Implement cruise Not shown here Battery undervoltage Motor failure Accelerator failure Controller failure Communication receiver failure Communication transceiver failure...
- Page 31 Electric assist ON Electric assist OFF How the electrical system works Your SLIDER is equipped with a pedal assist system (PAS) that provides power assistance from the motor to help propel the bike forwards. HOW PEDAL ASSIST WORKS The rider can engage the pedal assist system (PAS) while pedalling, and it will call up assistance from the motor to help propel the bike forwards.
- Page 32 Adjusting handle stem height First unlock the quick release structure of the handle stem, and adjust the height according the height scale above.There are 12 stages of height adjustment, please do not too low or too high. Too low will cause riding discomfort, too high may cause the quick release structure to fail to lock tight the handle stem.
- Page 33 Adjustment of brake system Test the brakes for proper operation If the brake becomes loose, firstly position the screw on the brake caliper that matches the position shown in the picture. After loosening the screw, the rotating rod on the caliper will automatically rebound. After tighten- ing the rotating rod upward or forward, then Tighten the screw, try to press the brake lever to confirm whether the braking effect is improved, and confirm that there is no friction between the rotor and the caliper...
- Page 34 Adjustment of Derailleur system Fully details please check www.shimano.com...
- Page 35 20kg <100kg Bike Weight : 20kg Maximum payload of the Metro E3 (Safety Suggestion) : 100kg <25kg Rear rack maximum payload: 25 kg The maximum payload capacity and other important safety information for specific SLIDER accessories will come with those products and/or be available online at www.slider.eu.
- Page 36 The rear rack width of SLIDER Metro E3 is 120mm. If you want to install a child seat, you must purchase a child seat that meets the installation width of 120mm.
- Page 37 Carrying loads (cargo or passengers) safely Follow these recommendations to maximize safety when using your SLIDER to carry cargo or passengers. ・Carrying extra weight significantly affects braking, acceleration, turning, balancing, etc. These effects can be increased by challenging riding conditions, such as when roads are wet or slick. Hills that are normally easy to climb or descend without cargo can become challenging or even dangerous once extra weight is loaded onto the bike.
- Page 38 WARNING: Loading cargo or passengers without holding onto the SLIDER can cause the bike to tip, leading to damage or serious injury. The kickstand is designed to hold up an unoccupied, unload- ed bike on a hard, flat, stable surface, not to support the weight of the rider, passengers, or cargo.
- Page 39 Carrying passengers Your SLIDER is designed to carry one small child in a child seat. The seat must be attached to the built in rear rack. DANGER: Using your SLIDER to transport a passenger who is not the appropriate size or age for your child seat, or who does not have the health, motor control, or impulse control to ride safely as a passen- ger, can lead to serious injury or death of the rider or passenger.
- Page 40 Typical components affected are the tyres, brake pads and rotors, suspension forks, spokes, wheels, and the battery. If you need to replace a part on your bike, visit www.slider.eu. If you want something that isn’t listed there, contact SLIDER Product Support. Be extremely careful about using parts or accessories that SLIDER has not tested for safety and compatibility with your specific bike model.
- Page 41 If you find anything amiss with your bike, don’t ride it until you’re sure it’s fixed. Consult a local, certified, and reputable bike mechanic or explore our Help Centre at www.slider.eu if you have any questions.
- Page 42 Make sure you are wearing a HELMET and other safety gear (e.g. knee pads, elbow pads) WARNING : SLIDER Metro E3 belongs to urban bicycles. The frame design is specially developed for urban riding, which can ride for a long time and face daily bumpy terrain. However, please do not ride SLIDER in places with severe terrain, such as mountainous terrain and ladder.
- Page 43 Brake system: -Check brake pads and ensure the brake pad material isn’t thinner than the backing plate it attaches to. Ensure brake pads are correctly posi- tioned in relation to the brake rotors. -Ensure brake housing shows no obvious wear. -Ensure brake levers are properly positioned and tightly secured to the handlebar.
- Page 44 Steering: -Ensure the handlebar and stem are correctly aligned, adjusted, and tightened for proper steering. -Perform a handlebar twist test to ensure the stem clamp bolts are secure. -Ensure the handlebar is set correctly in relation to the fork and the direction of travel.
- Page 45 -Ensure there is no damage to the battery. -Ensure the battery is locked to the frame and is secured. Remove the key before riding. -Ensure the battery gauge on the SLIDER UI Display and the charge status indicator on the battery read similarly.
- Page 46 Cables: Look over electrical cable connectors to make sure they are fully seated and free from debris or moisture. Check cables and cable housing for obvious signs of damage. Ensure cables are secured away from moving parts. Ensure headlight, taillight, and brake light are functioning, adjusted properly, and unobstructed.
- Page 47 AFTER EVERY RIDE Store your bike and battery in a dry location and take other sensible precautions as described in “Parking, storage, and transport” Guard against damage from the elements by following the recommenda- tions in “Guard against rust, corrosion, and water damage” Charge your battery in a temperature-controlled location and follow the recommendations in “Battery information”...
- Page 48 AFTER BREAK-IN PERIOD OF 80–160 KM (50–100 MILES) Inspect: -Check all cables and the chain for stretch. -Check spoke tension and the trueness of the wheels. -Check all bolted connections for loosening and ensure they are tight- ened to recommended torque values. Service: -Have a certified, reputable bike mechanic perform a thorough tune-up.
- Page 49 -Clean and grease the chain. Replace: -Replace any components confirmed to be broken or damaged beyond repair by SLIDER Product Support or a certified, reputable bike mechanic. MONTHLY, 400–1200 KM (250–750 MILES) Inspect: -Check brake pad wear, alignment, and the brake lever tension.
- Page 50 -Replace cables and housings if necessary. Checking brakes & motor cutoff switches All vehicles, including your SLIDER, need reliable brakes. Test your brake levers, brakes, and motor cutoff switches for proper functioning before every ride. If anything seems wrong, take your bike to a local, certified, and reputable bike mechanic, refer to our Help Centre (www.slider.eu), or...
- Page 51 WARNING: Touching the brake rotor, which has sharp edges and can get very hot while you're riding, can cause serious injury, slicing damage, or burns. The brake rotor heats up from normal friction when the brake pads press against the brake rotor to slow or stop the bike.
- Page 52 TYRE REPLACEMENT Even tyres equipped with built-in flat-preventative tyre liners, like those that come with your SLIDER, can and do get flats from punctures, pinch- es, impacts, and other causes. If you get a flat tyre or see evidence of tyre wear, you must replace your tyre and/or tubes before operating the bike again.
- Page 53 5.If needed, align the handlebar and stem and torque the stem clamp bolts evenly. Be sure to torque the stem clamp bolts evenly to the specifi- cation. After torqueing the stem clamp bolts to the proper specification, perform the twist test again. If the handlebar still moves, contact SLIDER Product Support.
- Page 54 If you have any questions, contact SLIDER Product Support. Like any vehicle used outdoors, your SLIDER needs care to ensure it isn’t damaged by the elements. Follow these steps for a long, healthy life for your ebike: 1.
- Page 55 Bike cleaning Maintenance Before cleaning the car, please make sure to remove the battery first, so as not to lose the function of the parts printed on the battery when it comes into contact with water. Cleaning precautions High-pressure water gun only for cleaning wheels High-pressure water guns can be used for cleaning, but only for the front and rear wheels.
- Page 56 Chain Cleaning Maintenance When cleaning the chain, use a brush to clean the dust and silt on the chain, prolong the service life of the chain and keep the freewheel clean, so as to prevent the freewheel from accumulating too much dirt and affecting the use of the transmission.
- Page 57 Troubleshooting Problems Solution A. You turn the power on, the 1. Your controller needs to be replaced, or indicator lights 2. Your motor needs to be replaced. are all on, but with throttle or 1. Your controller needs to be replaced, or B.
- Page 58 SLIDER products of the A-weighted emission sound pressure level at the driver ears is less than 70 dB(A) Ride SLIDER by taking the sensible measures outlined in this section to maximize your safety. Bicycling is an exciting, delightful, and practical way to get around, but like any sport, it involves risk of injury and death.
- Page 59 Age and ability requirements The SLIDER is designed for persons at least 16 years of age, and a parent or legal guardian should always decide whether a child should operate or ride on the SLIDER or any other vehicle. NOTICE: Some localities may require ebike riders to be older than 16.
- Page 60 Always use a low pedal assist level until you are comfortable with your SLIDER and confident about controlling its power, weight, and respon- siveness (e.g., during start-up, turns, and braking) at different speeds, in different conditions, and with whatever payloads you might carry.
- Page 61 ROAD RIDING When riding on streets, obey the same road laws as all other road vehicles as well as local rules governing bike or ebike usage. Sharing the road with other vehicles presents many hazards. Always take these precautions: -Expect the unexpected such as opening car doors or cars backing out of driveways.
- Page 62 EXTREME RIDING There are no appropriate conditions for extreme riding. Although many articles, advertisements, and catalogues depict extreme riding, SLIDER strongly recommends against such inappropriate and dangerous use of its products. DANGER: Extreme riding puts you at VERY HIGH RISK of serious injury or death.
- Page 63 All tampering consuming parts should be well installed and in same specs and quality, otherwise, SLIDER won’t be responsible on the products that been tampered.
- Page 64 SLIDER LIMITED WARRANTY TERMS This Limited Warranty is in addition to your statutory rights. All SLIDER (“RPB”) E-Bikes (the “E-Bike”) purchased in Europe, and their individual Covered Components (as defined herein), are protected against all manufacturing defects in material or workmanship with regard to the Covered Components for two years after the date of receipt of this ebike by the customer (the “Warranty Period”).
- Page 65 RPB WILL NOT REPLACE ANY COVERED COMPONENT UNDER THIS LIMITED WARRANTY WITHOUT FIRST SEEING PHOTOS OR VIDEO OF THE DAMAGED COVERED COMPONENT. Before making a warranty claim, we suggest that you contact our Product Support team at www.slider.eu as there may be a simple fix for your problem.
- Page 66 Replacement Covered Components under this Limited War- ranty shall only be shipped to the address of the original purchaser. All claims to this warranty must be made through SLIDER within 1 years of initial purchase. Warranty claims may be submitted to www.slider.eu.
- Page 67 Start Your New Journey with Metro E3...
- Page 68 All purpose arrives.
Need help?
Do you have a question about the Metro E3 and is the answer not in the manual?
Questions and answers