
Related Manuals for JUPITERBIKE DEFIANT


Summary of Contents for JUPITERBIKE DEFIANT
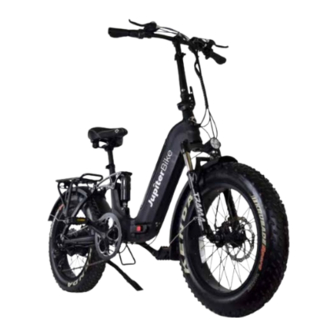
- Page 1 Folding Electric Bike | Vélo Pliant Electric | Bici Eléctrica Plegable USER MANUAL...
-
Page 2: Table Of Contents
TABLE OF CONTENTS Structural Diagram ............2 Specifications ..............3 Installing the Front Wheel ........4 Installing the Kickstand ........... 5 Installing the Handlebars ........5 Seat Post Installation ..........6 Pedals Installation ............6 Charging the Battery ..........7 Fender Mudguard Installation ...... -
Page 3: Structural Diagram
DEFIANT / DEFIANT PRO STRUCTURAL DIAGRAM Brake Handle Stem Saddle Latch Lock Seat Post Bike Frame Latch Stem Latch Seat Post Clamp Bike Frame Headlight Bike Rack (Pro Only) Front Fork Chainwheel Motor Brake Rotor Pedal Fender Derailleur and Caliper... -
Page 4: Specifications
Saddle & Seat Tube Waterproof Rating: IP54 User Manual Battery Capacity: 48V / 10.4Ah Charger Capacity for Defiant ST: 48V / 13.2Ah In Frame Battery Battery Type: Lithium Ion 2 Keys for Battery Lock Charging Current 2A max Front & Rear Mudguard... -
Page 5: Installing The Front Wheel
FENDER & HEADLIGHT 1. For Defiant ST and PRO, 1b. For Defiant, attach the headlight attach the front fender and and front fender bracket, then retighten the wingnut screw. Make sure no wires headlight to the crown of the front fork using the bolt and are between the fork legs. -
Page 6: Installing The Handlebars
Axle Latch open. make sure the wheel does not wobble. FRONT WHEEL INSTALL (DEFIANT ST & PRO) 1. Arrange the Front Axle with the 2. Place the axle in the groves on nut, washer, and 1 shorter spacer... -
Page 7: Seat Post Installation
R engraved on the threaded end. It should hand twist easily on the pedal arm. If it doesn’t, unscrew and try again. Use a 15mm wrench for the last 1 or 2 turns. Repeat with the left pedal on the other side. support.jupiterbike.com... -
Page 8: Charging The Battery
CHARGING THE BATTERY The Defiant battery can be charged inside or outside the bike frame. The red led light on the charger will turn green when fully charged. -
Page 9: Removing The Battery
REMOVING THE BATTERY For Defiant and Defiant Pro, unlatch the Bike Frame Latch and fold the bike in half. Insert the key into the hole on the bottom of the battery terminal or on the side of the bike frame and turn it to unlock and remove the battery. -
Page 10: Turning On Your Bike
2 seconds your first ride! riding your bike. to power up your new bike! THE LCD DISPLAY Power / Headlight Speed Power Current Pedal Assist Battery Odo / Trip Go to support.jupiterbike.com for complete LCD Display instructions... -
Page 11: Precautions When Riding
• Accelerate slowly when riding. Sudden acceleration may throw you out-of-balance and could cause falls or injury. Do not ride in snowy Always ride with Never ride down stairs, or slippery road both hands on the escalators or elevators. conditions. handlebar. support.jupiterbike.com... -
Page 12: Care And Maintenance
CARE & MAINTENANCE CLEANING YOUR BIKE To clean the Defiant carefully wipe with a damp cloth, then dry with a dry cloth. Do not use water to clean the Defiant, as the electrical and electronic systems may get wet, resulting in personal injury or malfunction of the bicycle. You should clean your bike after each ride. -
Page 13: Safety Warnings
TROUBLESHOOTING • When riding with others, always maintain For troubleshooting or operational issues, a safe distance to avoid the possibility of please contact Jupiter Tech at 813-609-BIKE a collision. (2456) or e-mail support@jupiterbike.com support.jupiterbike.com... -
Page 14: Warranty
PRODUCT REGISTRATION Please register you product within 10 days of purchase at https://www.jupiterbike.com/product-registration RETURNS & EXCHANGES Please refer to our website JupiterBike.com for all product exchange information. Please keep the original packaging. 813-609-BIKE (2453) sales@jupiterbike.com www.Jupiterbike.com... - Page 16 TABLE DES MATIÈRES Schéma de la structure ........16 Caractéristiques techniques ....... 17 Installation de la roue avant ......18 Installation de la béquille ........19 Installation des guidons ........19 Installation de la tige de selle ......20 Installation des pédales ........20 Chareger la batterie ..........
- Page 17 SCHÉMA STRUCTUREL DEFIANT / DEFIANT PRO Frein Guidon Tige Selle Verrouillage du loquet Tige de Loquet de cadre de vélo Pince de Tige Loquet de tige de Selle Cadre de Vélo Phare Vélo Fourche Étagère Avant Roue à Chaîne Moteur Frein à...
- Page 18 Étanchéité à l’eau : IP54 Selle et tube de selle Capacité de la batterie: 48V / 10.4Ah Manuel de l’utilisateur Capacité pour Defiant ST: 48V / 13.2Ah Chargeur Type de batterie : Lithium Ion Dans le cadre de la batterie Courant de charge 2A maxi 2 Clés de verrouillage de la batterie...
-
Page 19: Installation De La Béquille
GARDE-BOUE ET PHARE 1. Pour Defiant ST et PRO, fixez 1b. Pour Defiant, fixez le phare et le le garde-boue avant et le phare support de garde-boue avant, puis au sommet de la fourche avant resserrez la vis de l’écrou à oreilles. - Page 20 MONTAGE DE LA ROUE AVANT (DEFIANT & PRO) Dévissez la vis à oreilles sur l’axe, Placez la fourche avant sur l’essieu. placez l’axe dans la roue avant, Serrez à la main la vis à oreilles, puis revissez-le sans serrer avec le puis fermez le loquet de l’essieu.
-
Page 21: Installation De La Tige De Selle
à la main sur le bras de la pédale. Si ce n’est pas le cas, dévissez et réessayez. Utilisez une clé de 15 mm pour les 1 ou 2 derniers tours. Répétez avec la pédale gauche de l’autre côté. support.jupiterbike.com... - Page 22 Centrez le guidon dans le loquet ouvert puis appuyez sur la pince pour la CHARGER LA BATTERIE La batterie Defiant peut être chargée à l’intérieur ou à l’extérieur du cadre du vélo. Le voyant rouge du chargeur devient vert lorsqu’il est complètement chargé.
-
Page 23: Retrait De La Batterie
RETRAIT DE LA BATTERIE Pour Defiant et Defiant Pro, déverrouillez le loquet du cadre de vélo et pliez le vélo en deux. Insérez la clé dans le trou au bas de la borne de la batterie ou sur le côté du cadre du vélo et tournez-la pour déverrouiller... -
Page 24: Allumer Votre Vélo
2 secondes pour votre premier trajet ! lorsque allumer votre nouveau vélo ! L’ÉCRAN LCD AFFICHER Power / Headlight Speed Power Current Pedal Assist Battery Odo / Trip Rendez-vous sur support.jupiterbike.com pour obtenir des instructions complètes sur l’écran LCD... -
Page 25: Précautions À Prendre Lors De La Conduite
Ne roulez pas sur des routes Roulez toujours avec les deux Ne descendez jamais un or slippery road both hands on the escalators or elevators. enneigées ou glissantes. mains sur le guidon. escalier, un escalier mécanique conditions. handlebar. ou un ascenseur. support.jupiterbike.com... -
Page 26: Entretien Et Maintenance
• Vérifiez régulièrement les freins. Recherchez les problèmes avant chaque trajet. • Nettoyez, lubrifiez et inspectez régulièrement votre chaîne. • Vérifiez et fixez tous les boulons ou pièces desserrés sur le Defiant. Serrez à la main si nécessaire. SOINS DE BATTERIE •... -
Page 27: Avertissements
12 devant vous et au loin. Jupiter Tech au 813-609-BIKE (2456) ou par • Lorsque vous roulez avec d’autres personnes, courriel sales@jupiterbike.com gardez toujours une distance de sécurité afin d’éviter tout risque de collision. support.jupiterbike.com... -
Page 28: Garantie
ENREGISTREMENT DU PRODUIT Veuillez enregistrer votre produit dans les 10 jours suivant l’achat sur https://www.jupiterbike.com/product-registration RETOURS & ÉCHANGES Veuillez consulter notre site Web JupiterBike.com pour tous les échanges de produits, formation et procédures de fonctionnement. Veuillez conserver l’emballage d’origine. 813-609-BIKE (2453) sales@jupiterbike.com www.Jupiterbike.com... - Page 29 ÍNDICE Diagrama Estructural ..........30 Especificaciones ............31 Instalación de la rueda delantera ....32 Instalación del soporte .......... 33 Instalación de los manillares ......33 Instalación de la tija del sillín ......34 Instalación de pedales .......... 34 Cargando la batería ..........35 Instalación de guardabarros Fender ....
-
Page 30: Diagrama Estructural
DIAGRAMA ESTRUCTURAL DEFIANT / DEFIANT PRO Freno Manillar Vástago Sillín Pestillo de bloqueo Poste Del Asiento Pestillo de cuadro de bicicleta Abrazadera de Pestillo del vástago poste de sillín El marco de la Faro bicicleta Tenedor frontal Rueda Bicicleta de cadena... - Page 31 Impermeabilidad: IP54 Sillín y asiento Capacidad de Batería: 48V / 10.4Ah Manual de usuario del tubo Capacidad para Defiant ST: 48V / 13.2Ah Cargador Tipo de Batería: Ion Litio En el marco de la batería Corriente de Carga 2A máximo 2 llaves para batería...
- Page 32 GUARDABARROS Y FARO 1. Para Defiant ST y PRO, fije 1b. Para Defiant, fije el faro y el soporte el guardabarros delantero y el del guardabarros delantero, luego vuelva faro a la corona de la horquilla a apretar el tornillo de la tuerca de delantera usando el perno y la mariposa.
-
Page 33: Instalación De La Rueda Delantera
INSTALACIÓN DE LA RUEDA DELANTERA (DEFIANT & PRO) Desenrosque el tornillo de mari- Coloque la horquilla delantera en posa del eje, coloque el eje en la el eje. Apriete a mano el tornillo de rueda delantera y luego vuelva mariposa, luego cierre el pestillo a atornillarlo sin apretar con el del eje. -
Page 34: Instalación De Pedales
Si no es así, desatornille y vuelva a intentarlo. Utilice una llave de 15 mm durante las últimas 1 o 2 vueltas. Repita con el pedal izquierdo del otro lado. support.jupiterbike.com... -
Page 35: Cargando La Batería
CARGANDO LA BATERÍA La batería Defiant se puede cargar dentro o fuera del cuadro de la bicicleta. La luz LED roja del cargador se volverá verde cuando esté completamente cargada. -
Page 36: Extracción De La Batería
EXTRACCIÓN DE LA BATERÍA Para Defiant y Defiant Pro, abre el pestillo del marco de la bicicleta y dobla la bicicleta por la mitad. Inserte la llave en el orificio en la parte inferior de la terminal de la batería o en el lateral del cuadro de la bicicleta y gírela para desblo-... -
Page 37: La Pantalla Lcd
2 segundos para encender su para tu primer viaje! cuando nueva bicicleta. andar en bicicleta LA LCD MOSTRAR Power / Headlight Speed Power Current Pedal Assist Battery Odo / Trip Vaya a support.jupiterbike.com para obtener instrucciones completas sobre la pantalla LCD... -
Page 38: Precauciones Al Manejar
Always ride with Never ride down stairs, No conduzca en carreteras Conduzca siempre con ambas Nunca baje escaleras, or slippery road both hands on the escalators or elevators. nevadas o resbaladizas. manos en el manubrio. escaleras mecánicas o conditions. handlebar. ascensores. support.jupiterbike.com... -
Page 39: Cuidado Y Mantenimiento
• Revise los frenos con regularidad. Busque problemas antes de cada viaje. • Limpia, lubrica e inspecciona tu cadena con regularidad. • Revise y asegure cualquier perno o pieza suelta en el Defiant. Apriete a mano si es necesario. BATERÍA •... -
Page 40: Precauciones De Seguridad
• Siempre dé paso a los peatones y esté alerta a Para solucionar problemas o problemas su entorno, tanto directamente frente a usted operativos, comuníquese con Jupiter Tech como a distancia. al 813-609-BIKE (2456) o envíe un correo • Cuando maneje con otras personas, mantenga electrónico a ventas sales@jupiterbike.com support.jupiterbike.com... -
Page 41: Garantía
Veuillez enregistrer votre produit dans les 10 jours suivant l’achat sur https://www.jupiterbike.com/product-registration DEVOLUCIONES Y CAMBIOS Consulte nuestro sitio web JupiterBike.com para conocer todos los procedimientos y procedimientos de intercambio de productos. Por favor, mantenga el embalaje original. 813-609-BIKE (2453) sales@jupiterbike.com www.Jupiterbike.com... - Page 42 X ES...
Need help?
Do you have a question about the DEFIANT and is the answer not in the manual?
Questions and answers