Table of Contents
Advertisement
Quick Links
Advertisement
Table of Contents

Related Manuals for DITEC ENTREMATIC QIK80EH

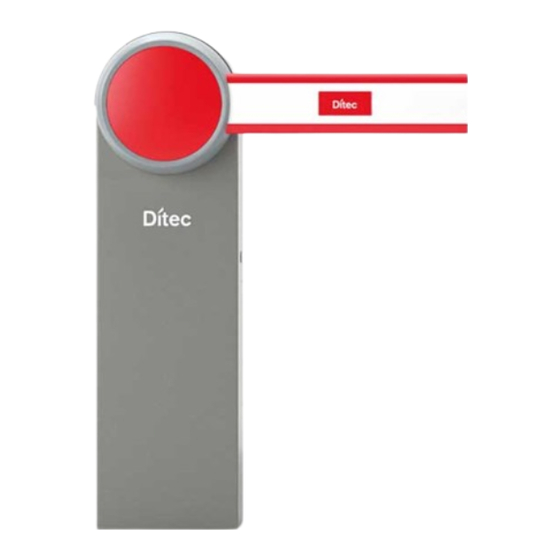
Summary of Contents for DITEC ENTREMATIC QIK80EH
- Page 1 IP2085EN- rev. 2011-01-19 Installation and maintenance manual for electromechanical barrier. (Translation of the original instructions) DITEC S.p.A. Via Mons. Banfi, 3 - 21042 Caronno Pertusella (VA) - ITALY Tel. +39 02 963911 - Fax +39 02 9650314 www.ditec.it - ditec@ditecva.com...
-
Page 2: Table Of Contents
INDEX Subject Page 1. General safety precautions 2. EC declaration of conformity 3. Technical data 3.1 Operating instructions 3.2 Dimensions Standard installation Main components Mechanical installation Rod installation Rod balancing Choice of opening direction 10. Adjustment of limit switches 11. Access to control panel 12. -
Page 3: General Safety Precautions
GENERAL SAFETY PRECAUTIONS This installation manual is intended for professionally competent personnel only. Methods and in compliance with applicable regulations. materials (plastic, polystyrene, etc.) should not be discarded in the environment or left within reach of children, as these are a potential source of hazard. deformation occurring during use. -
Page 4: Ec Declaration Of Conformity
EC DECLARATION OF CONFORMITY Manufacturer: DITEC S.p.A. Declares that the motorised barrier product, such as QIK80EH conforms to the essential requisites of the fol- lowing EC directives: - Electromagnetic Compatibility Directive 2004/108/EC - Machine Directive 2006/42/EC - Building Products Directive 89/106/EC... -
Page 5: Technical Data
TECHNICAL DATA QIK80EH Power supply 230 V~ / 50-60 Hz Absorption 1.2 A Torque 200 Nm Opening time 6÷12 s/90° Closing time 6÷12 s/90° Rod length (max) 7950 mm Service class 4 - INTENSE S2 = 50 min Intermittence S3 = 50% Temperature -20°... -
Page 6: Dimensions
3.2 Dimensions PL = min 4500 - max 7600 80 80... -
Page 7: Standard Installation
STANDARD INSTALLATION 4x0.5 mm² 4x0.5 mm² Ref. Code Description QIK80EH Barrier enclosure QIK80Z Enclosure fastening base QIKC40 Rod 3975 mm QIKC55 Rod 5550 mm QIKCG Joint for rod QIKLUX QIKC QIKAM Mobile support QIKGR Aluminium barrier 2000 mm QIKAF Fixed support QIKAFE QIKAFZ Fixed support fastening base... -
Page 8: Main Components
MAIN COMPONENTS Ref. Code Description 24 V= motor with encoder Opening/closing limit switches Limit switch adjusting Mechanical stop adjusting Key release Blue spring Ø63 mm Control panel BATKH Display module for diagnostics and advanced controls... -
Page 9: Mechanical Installation
MECHANICAL INSTALLATION Ø12,5 anchor ties and base plate QIK80Z embedded which must be level and clean. Insert elements made of iron or other material through the anchor ties so that the ties are attached to the concrete reinforcement. Pass the cable ducts through the central hole of the plate. Secure the enclosure. -
Page 10: Rod Installation
ROD INSTALLATION Ø3 Ø3 Cut the length of the rod to L=PL+350 mm. -
Page 11: Rod Balancing
ROD BALANCING Release the automation as described on page 23 and place the bar in the vertical opening position. Place the spring in the correct position depending on the choice of opening direction as described on page 12. Using the nuts placed above the spring (see ref. [B] on page 12), compress the spring until the rod is upwards). -
Page 12: Choice Of Opening Direction
CHOICE OF OPENING DIRECTION Right opening Left opening DIP2=OFF DIP2=ON 85 Nm... -
Page 13: Adjustment Of Limit Switches
10. LIMIT SWITCH ADJUSTMENT Adjust the opening and closing position of the bar using the special screws [A]. Adjust the opening and closing limit switches using the cams [C] so that the switches are activated approx. 3 mm before the mechanical stop [B]. 11. -
Page 14: Electrical Connections
12. ELECTRICAL CONNECTIONS Transformer Motor 24V= 24 V~ 12 11 0 BIXMR2 1 2 3 4 5 VC TC R1 POWER GOLR ALARM C NO 14 0 +G2- 0 1 2 3 0 1 G1G3 0 1 8 0 1 21 22 Power supply GOL4... -
Page 15: Commands
13. COMMANDS Command Function Description N.O. AUTOMATIC The permanent closing of the contact enables automatic clo- CLOSING sing. N.O. OPENING With DIP1=ON, the closing of the contact activates the ope- ning operation. STEP-BY-STEP With DIP1=OFF, the closing of the contact activates opening or closing operations in the following sequence: open-stop- close-open. -
Page 16: Outputs And Accessories
14. OUTPUTS AND ACCESSORIES Output Value - Accessories Description Accessories power supply. Power supply output for external accessories, including automation status lamp. 24 V= / 0.5 A Flashing light. Activated during opening and closing operations. C NO 14 0 LAMPH QIKAFE Electric lock. -
Page 17: Settings
15. ADJUSTMENTS Description DIP1 Command 1-3 operation. Step-by-step Opening. DIP2 Opening direction selection. Opens towards right. Opens towards left. The opening direction is intended by viewing the automation from the side being exami- ned. DIP3 Opening with safety devices open. Enabled. -
Page 18: Radio Receiver Operation
16. RADIO RECEIVER OPERATION The control panel has a housing for a plug-in card such as a GOLR radio receiver type with a frequency of 433.92 MHz. The antenna consists of a 173 mm long rigid wire. installing the tuned antenna (BIXAL). Up to 200 remote controls can be stored in the storage module. -
Page 19: Start Up
17. START-UP Manually place the rod in the open and closed position. Adjust the mechanical stops and limit switches as indicated on page 13. Use DIP2 to set the required direction as indicated on page 12. Connect the power supply cable to the terminals L-N- as indicated on pages 7-14. -
Page 20: Troubleshooting
18. TROUBLESHOOTING Problem Possible causes Remedy The automation does not No power. open or close. (POWER ALARM led off). correctly. Short circuited accessories. Disconnect all accessories from termi- (POWER ALARM led off). nals 0-1 (voltage must be 24 V=) and reconnect one at a time. -
Page 21: Routine Maintenance Plan
19. ROUTINE MAINTENANCE PLAN Disconnect the 230 V~ power supply and batteries (if present): Reconnect the 230 V~ power supply and batteries (if present): NOTE NOTE... -
Page 22: Operating Instructions
20. OPERATING INSTRUCTIONS 20.1 General safety precautions The following precautions are an integral and essential part of the product and must be supplied to the user. Read them carefully since they contain important information on safe installation, use and maintenance. Any other use is to be considered improper and therefore dangerous. -
Page 23: Manual Release Instructions
20.2 Manual release instructions Manually open the barrier. Installer: DITEC S.p.A. Via Mons. Banfi, 3 21042 Caronno Pertusella (VA) - ITALY Tel. +39 02 963911 - Fax +39 02 9650314 www.ditec.it - ditec@ditecva.com... - Page 24 DITEC ESPAÑA ARENYS DE MAR Tel. +34 937958399 Fax +34 937959026 www.ditecespana.com DITEC FRANCE MASSY Tel. +33 1 64532860 Fax +33 1 64532861 www.ditecfrance.com DITEC GOLD PORTA ERMESINDE-PORTUGAL Tel. +351 22 9773520 Fax +351 22 9773528/38 www.goldporta.com DITEC SVIZZERA BALERNA Tel. +41 848 558855 Fax +41 91 6466127 www.ditecswiss.ch...
Need help?
Do you have a question about the ENTREMATIC QIK80EH and is the answer not in the manual?
Questions and answers