Table of Contents
Advertisement
Quick Links
Advertisement
Table of Contents

Summary of Contents for Impulse ECOMIZER-PRO
- Page 2 Adjusting the revolution cycles depends directly on the amount of supplied medium that needs to be pumped. Pump units equipped with the ECOMIZER-PRO offer the best of both worlds - the mobility of a self-operating diesel pump set with the full flexibility of a frequency- controlled electric fixed installation.
-
Page 3: Table Of Contents
INDEX ECOMIZER-PRO p. 1 1. Screen Activation 2. Starting Screen p. 2 3. Ecomizer-Pro Explanation p. 3 4. Manual Control p. 4 5. Level Control p. 7 p. 19 6. Battery Recharge p. 20 7. Fault Codes p. 22 8. Info Screens 9. -
Page 4: Screen Activation
Maintenance, repair, and/or transportation should never be done with the switch in “On” position. 1. To start the ECOMIZER-PRO: Hold the “Off-On-Start” switch on the control box in the “Start” position, and wait until the Touch Screen display appears. -
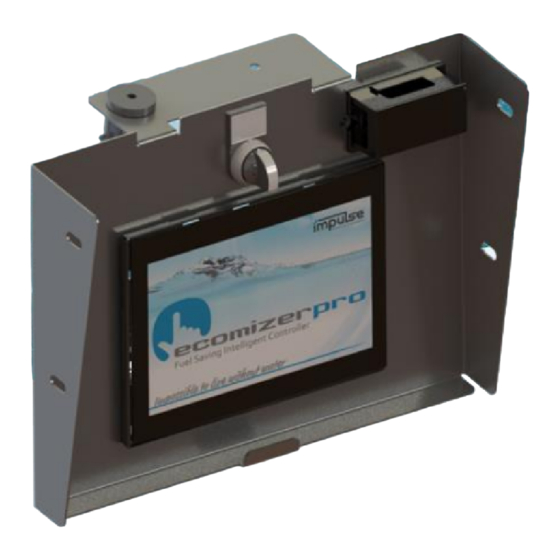
Page 5: Starting Screen
The Level Control (Only) software option is mostly used for larger pump sets for which Ecomizer-Pro can help reduce mistakes caused by human error. Ecomizer-Pro The Ecomizer-Pro software option gives the user the choice of using either manual control or level control. -
Page 6: Ecomizer-Pro Explanation
Starting Screen 3. Ecomizer-Pro Explanation From this point on the manual is based on the Ecomizer-Pro software version. The Manual Control Only and Level Control Only are both explained separately. To change the Touch Screen language, press the [Language] button. -
Page 7: Manual Control
Manual Control 4. Manual Control In manual control you can activate the pump unit and set the RPM value according to your preferences. Activate Manual Control by pressing START MANUAL CONTROL Be aware that RPM adjustment is only possible as soon as the system has been primed (full of water). - Page 8 Manual Control As soon as the pump has started the following screen appears: General Data Air in system Vacuum pump is active. Air in suction hose is displayed by “AIR DETECTED” and a blue dot. As soon as the pump has been primed “REV UP” and “REV DOWN” buttons appear. System Slide show: primed...
- Page 9 As air is detected the unit will rev down to 1000 RPM, vacuum pump will be activated, and the pump will keep on priming/snoring. 4.3 Intelligent Manual Control by ECOMIZER-PRO If air is detected and the pump starts snoring/slobbering the RPM will automatically fall down to idle RPM (in this case 1000 RPM).
-
Page 10: Level Control
Level Control 5. Level Control Level Control provides the advantage that the pump performance is automatically adjusted to the available amount of medium (flow). The units come equipped with a hydrostatic pressure sensor and/or a ball float switch. The two connectors for the sensors have different connection points (4 pins or 5 pins), eliminating the possibility of connection mistakes. - Page 11 Level Control 5.1 Installing/positioning of the Ball Float Switch 1. Put a tube (longer than total pit depth) inside the well. Now mark the level at which the pump needs to start pumping. This is the position at which the ball float should be mounted. The ball float switch will float (up) as soon as the water level rises above this point.
- Page 12 Level Control 5.2 Connecting Ball Float Switch Only The following screen appears: Ball Float Switch Connected (Down) In this mode ensure that the ball float is positioned (floating) at the desired level at which you want the pump to start. After installing the ball float, activate the pump by pressing the START button.
- Page 13 Level Control As soon as the water level will activate the pump by lifting the float switch up, the following screen appears: Ball Float Switch Connected (Up) The vacuum pump is active and will prime the system. After full activation the following screen appears: As long as the float switch is up the engine will slowly rev up to maximum RPM.
- Page 14 Level Control If the water level comes down and the float switch will be down the unit will slowly rev down to a minimum of 1400 RPM. As soon as the water level comes up to a level that the float switch will come up again the pump will rev up again.
- Page 15 Level Control 5.3 Installing/positioning of the Hydrostatic Pressure Sensor (HPS) 1. Put a filter/well point tube with end cap (longer than total pit depth) inside the well. 2. Place the HPS inside the filter well point tube and sink it completely to the bottom. Hydrostatic Pressure Sensor (HPS)
- Page 16 Level Control 5.4 Connecting Hydrostatic Pressure Sensor Only The following screen appears: Hydrostatic Pressure Sensor Connected The HPS sensor should be positioned at the bottom or just above the bottom (to avoid sludge) of the pump pit. Make sure that the sensor is always leveled below the suction hose/strainer of the pump.
- Page 17 Level Control 5.5 Level Control Settings (HPS Connected): Pit depth: The pit depth value is only needed to obtain a properly scaled view of the pit on the right side of the screen. You need to measure the distance from the fluid level in the pit to the upper surface of the pit (ground level) or estimate it.
- Page 18 Level Control The parameters for level control can be set by pressing the blue activation box for the level that needs to be changed/adjusted. After the activation box for a required level has been selected the screen below appears. The required level can be set in the range as given. Every time the level is adjusted, activate this new level by pressing the enter button.
- Page 19 Level Control 5.6 Screen of fully activated Level Control (waiting mode) After pressing the START button the STOP button appears, indicating that the pump is active. Depending on the Desired Level Above Sensor in combination with the actual level the pump may not start directly. The Desired Level above Sensor is above the actual level. 5.7 Screen of fully activated Level Control (start mode) After pressing the START button the pump will start directly if the actual level is above the desired level.
- Page 20 Level Control 5.8 Main screen of Level Control (pumping mode)
- Page 21 The HPS needs to be inspected periodically to ensure reliable functioning. If the maintenance of the HPS cannot be assured, the ECOMIZER-PRO controller can be executed by using two sensors at the same time. If the ball float switch will finally go “up”, and pump unit is NOT running, the pump will start and go directly to Full Power...
-
Page 22: Battery Recharge
Battery Recharge 6. Battery Recharge An activated Ecomizer-Pro pump controller will always consume some power. To avoid empty batteries and failure of the system an automatic battery recharge procedure is built in. As soon as the battery voltage drops down below the set value (settings button after login) the unit will start recharging the battery. -
Page 23: Fault Codes
Fault Codes 7. Fault Code List Ecomizer-Pro pump controllers are unique in the way the fault codes are being displayed directly on the screen. The user of the pump can see the fault codes (mostly generated by the ECU of the engine) and in the same platform the fault codes of the pump, like fuel level low, alarm level reached or maximum time of priming reached. - Page 24 For example, in the fault code SPN 3226 FMI 13, the SPN number 3226 tells you the problem is with the SCR outlet NOx sensor and FMI 13 tells you that the signal from the part is unavailable. All SPN codes used in ECOMIZER-PRO Pump controllers are registered in the ECOMIZER-PRO Fault Code list.
-
Page 25: Info Screens
Info Screens 8. Info Screens There are two info screens available in ECOMIZER-PRO which can always be opened on all screens. The INFO button gives general data of the unit software version, etc. The engine button gives real-time data of the unit. In this manual we show the info screens of a running unit. - Page 26 Info Screens By clicking on engine button the following screen with information appears: Not always given By clicking on PAGE 2, the next screen with engine information appears. Depending on the engine, there might also be a third page (PAGE 3) with emission and regeneration data (FASE V Engines with AdBlue).
- Page 27 Info Screens By pressing on the REGEN INFORMATION button the following screen can appear depending if manual regeneration is allowed by the engine manufacturer: Select “Regen Inhibit” to start the manual regeneration procedure. Confirm that suction hose is disconnected to run without load. After both selections have been made the engine will start manual regeneration and the following screen appears:...
-
Page 28: Login Screen
Login Screen 9. Login Screen The login option in ECOMIZER-PRO enables different users to have various access levels. Only User and Owner logins are explained. Click on the LOGIN button in order to log-in. The following screen will pop-up: To login as User press 1234 and then LOGIN. - Page 29 Login Screen After logging in, a new settings button (gear wheel) appears on the home screen: Click on the settings button (gear wheel) to open the login settings page.
- Page 30 Login Screen When logged in as User the following screen appears: Login Level (User) As User possibilities are given to shut down fuel tank levels (by running on an external fuel tank) and start on Ball Float Alarm Level (both sensors connected at the same time). The User can also finetune the data on the right side of the screen (4 settings).
- Page 31 Login Screen When logged in as Owner the following screen appears: Login Level (Owner) As Owner there are a couple of extra settings visible to be adjusted. By pressing on RESET TRIP HOURS the hour counter can be adjusted to 000. For Owner of the pump unit, the total running hours on a project can be logged.
-
Page 32: Time Settings
The following screen will pop-up to adjust the time (login not needed): By pressing on – and + the correct date and time can be set. Ecomizer-Pro does not account for summer and winter timings. This needs to be set manually. - Page 33 Notes Notes...
- Page 34 ECOMIZER-PRO pump technologies are designed for a better and greener planet All rights strictly reserved. Reproduction or issue to third parties in any form whatsoever is not permitted without written authority from the proprietor. Property of Impulse Holding B.V. Copyright Impulse Pumps B.V.
Need help?
Do you have a question about the ECOMIZER-PRO and is the answer not in the manual?
Questions and answers