Table of Contents
Advertisement
Quick Links
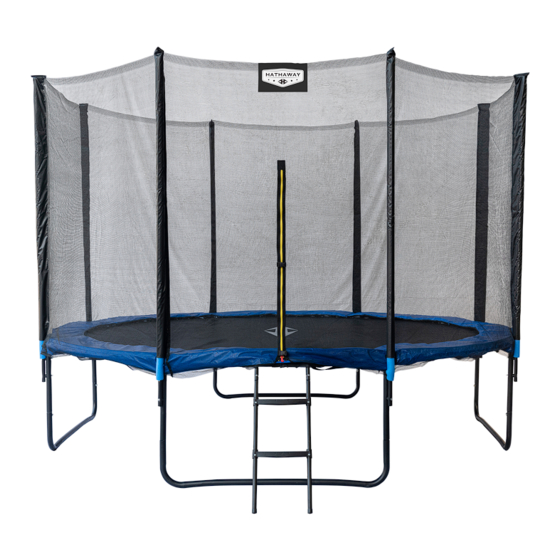
TR1005 / TR1010
HATHAWAY XT
12-FT AND 14-FT ROUND TRAMPOLINE - BLUE
Assembly, Installation, Care, Maintenance, and Use Instructions
WARNING
DO NOT attempt or allow somersaults. Landing on the head
or neck can cause serious injury, paralysis, or death, even
when landing in the middle of the bed (jumping mat).
DO NOT allow more than one person on the
trampoline. Use by more than one person at the
same time increases the chance of injury.
Use trampoline only with mature, knowledgeable supervision. Enforce all safety
rules. All trampoline users require supervision regardless of their age and experience.
Maximum user weight for the trampoline should not exceed 330-lbs (150-kg).
Overloading trampoline above recommended user weight limit may cause damage
to jumping mat or springs that is not covered by trampoline warranty.
Trampolines not for children under 6 years.
Questions, problems, missing parts?
Before returning to your retailer, call our Consumer Hotline at 1-800-759-0977,
Monday – Friday, 8 a.m. – 5 p.m. (CST).
WARNING
Read these materials prior to assembling and using
this trampoline. Save this manual for future reference.
CAUTION
Trampolines and safety enclosures are
susceptible to winds. Be sure to secure
trampoline and enclosure. Wind damage is
not covered by trampoline warranty.
V2: 020823
Advertisement
Table of Contents

Related Manuals for Hathaway XT TR1005


Summary of Contents for Hathaway XT TR1005
- Page 1 TR1005 / TR1010 HATHAWAY XT 12-FT AND 14-FT ROUND TRAMPOLINE - BLUE Assembly, Installation, Care, Maintenance, and Use Instructions CAUTION WARNING WARNING Read these materials prior to assembling and using Trampolines and safety enclosures are this trampoline. Save this manual for future reference.
-
Page 2: Table Of Contents
TABLE OF CONTENTS THANK YOU! ..............SAFETY INFORMATION SIGNAL WORDS . -
Page 3: Thank You
THANK YOU! Thank you for purchasing this product! We work around the clock and around the globe to ensure that our products maintain the highest possible quality. However, in the rare case of issues during assembly or use of this product, please contact our Consumer Hotline at 1-800-759-0977 for immediate assistance before contacting your retailer. -
Page 4: Installation And Assembly
INSTALLATION AND ASSEMBLY TRAMPOLINE PLACEMENT LOCATION • Adequate overhead clearance is essential. A minimum of 24 feet from ground level is recommended. Provide clearance for wires, tree limbs, and other possible hazards. • Lateral clearance is essential. Place the trampoline and trampoline enclosure away from walls, structures, fences, and other play areas. -
Page 5: Trampoline Parts List
INSTALLATION AND ASSEMBLY TRAMPOLINE PARTS LIST TR1005 TR1010 TR1005 TR1010 PART ITEM IMAGE PART PART 12-FT 4 LEGS 14-FT 6 LEGS DESCRIPTION NUMBER NUMBER PART QTY PART QTY Top Rail TRP1100 TRP1108 Safety Pad TRP1101 TRP1109 Jumping Mat TRP1102 TRP1110 Spring TRP1103 TRP1103... -
Page 6: Trampoline Assembly
INSTALLATION AND ASSEMBLY TRAMPOLINE ASSEMBLY STEP 1: FRAME LAYOUT Lay out the trampoline parts on the ground so that the top rail sections start to form a circle. When laying out the top rail sections, make sure that each section is arranged so that it will properly connect with adjacent sections. - Page 7 INSTALLATION AND ASSEMBLY TRAMPOLINE ASSEMBLY (continued) STEP 4: CONNECTION OF LEG BASES TO TOP RAIL CIRCLE Attach the leg supports assembled in Step 2 to the top rails, ensuring that the screw holes align, as shown on the right. Repeat this step until the full frame is standing.
- Page 8 INSTALLATION AND ASSEMBLY TRAMPOLINE ASSEMBLY (continued) STEP 6: SAFETY PAD ASSEMBLY A) Lay the safety pad over the outer edge of the circular frame. Be sure to cover all the springs, as shown on the right. B) Several sets of straps are attached to the underside of the safety pad.
-
Page 9: Safety Enclosure Parts List
INSTALLATION AND ASSEMBLY SAFETY ENCLOSURE PARTS LIST TR1005 TR1010 TR1005 TR1010 PART ITEM IMAGE PART PART 12-FT 4 LEGS 14-FT 6 LEGS DESCRIPTION NUMBER NUMBER PART QTY PART QTY Quick Clamp TRP1112 TRP1112 Pole Cap TRP1113 TRP1113 Pole Bottom Plug TRP1114 TRP1114 Upper Pole Tube... -
Page 10: Safety Enclosure Assembly
INSTALLATION AND ASSEMBLY SAFETY ENCLOSURE ASSEMBLY WARNING • The trampoline enclosure is only to be used as an enclosure for a trampoline of a size for which the enclosure is designed. • Failure to exactly follow all instructions for assembling the safety enclosure properly could result in the enclosure not functioning, as intended, to keep the trampoline user from falling off the edge of the trampoline, which may result in serious injury. - Page 11 INSTALLATION AND ASSEMBLY SAFETY ENCLOSURE ASSEMBLY (continued) STEP 2: SAFETY NET ASSEMBLY A) Ensure that the zippered entrance to the safety net is located between two trampoline support legs, and then place the safety net pole covers entirely over the installed enclosure pole tubes. Starting from the entrance, go left in a clockwise direction from one tube to the next.
-
Page 12: Trampoline Ladder Placement
INSTALLATION AND ASSEMBLY TRAMPOLINE LADDER PLACEMENT Hook the pre-assembled access ladder onto the frame of the trampoline at the entrance to the safety enclosure net. No additional hardware is required. When the trampoline is not in use, always store the access ladder in a secure place so that unsupervised children cannot play on the trampoline. -
Page 13: Warning Label Placement
INSTALLATION AND ASSEMBLY WARNING LABEL PLACEMENT With the exception of the Safety Instructions placard, the remaining warning labels on this page have already been attached to the trampoline in the places indicated. The owner will need to place the Safety Instructions placard on the trampoline enclosure net to the right of the entrance zipper. -
Page 14: Trampoline And Safety Enclosure Disassembly
TRAMPOLINE AND SAFETY ENCLOSURE DISASSEMBLY If you need to disassemble the trampoline, follow Safety Enclosure Assembly instructions (Steps 1–2) in reverse order and Trampoline Assembly instructions (Steps 1–6) in reverse order. DO NOT attempt to disassemble any frame components before the springs and the jumping mat have been removed. -
Page 15: Product Use
PRODUCT USE WARNING • DO NOT attempt or allow somersaults. Landing on the head or neck can cause serious injury, paralysis, or death, even when landing in the middle of the bed (jumping mat). • DO NOT allow more than one person on the trampoline. Use by more than one person at the same time increases the chance of serious injuries. - Page 16 PRODUCT USE SAFE USE INSTRUCTIONS (continued) SUPERVISION • Allow use of trampoline only with mature, knowledgeable supervision. Enforce all safety rules. • Supervise all trampoline users regardless of their age and experience. • Keep spectators at a safe distance of at least 10 feet from the trampoline while it is in use. •...
- Page 17 PRODUCT USE SAFE USE INSTRUCTIONS (continued) SAFE USE PRACTICES FOR JUMPERS (continued) • DO NOT jump into the trampoline from an outside source. Hitting the frame or safety pad, or incorrectly landing on the trampoline can lead to injury. • DO NOT hang from, kick, cut, or climb on the safety net enclosure. •...
-
Page 18: Fundamental Bounce Techniques
PRODUCT USE FUNDAMENTAL BOUNCE TECHNIQUES Initially, get accustomed to the feel and bounce of the trampoline. The focus must be on body position. Each fundamental bounce should be practiced until it can be executed with skill before moving on to more difficult and advanced bounces. DO NOT bounce recklessly on the trampoline; focus on good control and mastering various bounce techniques. -
Page 19: Care And Maintenance
CARE AND MAINTENANCE GENERAL CARE • Inspect the trampoline before each use and replace any worn, defective, or missing parts to avoid potential hazards, such as: - Missing, improperly positioned, or insecurely attached safety pad - Punctures, frays, tears, or holes worn in the jumping mat or safety pad - Deterioration in the stitching or fabric of the jumping mat or safety pad - Ruptured springs - A bent or broken frame... -
Page 20: Product Warranty
PRODUCT WARRANTY 1-YEAR LIMITED WARRANTY These products (models TR1005 and TR1010) are warranted to the original purchaser to be free from defects in material or workmanship for a period of one (1) year from the date of the original retail purchase. This warranty does not cover defects or damage due to improper installation, alteration, accident, or any other event beyond the control of the manufacturer.
Need help?
Do you have a question about the XT TR1005 and is the answer not in the manual?
Questions and answers