Table of Contents
Advertisement
Available languages
Available languages
Quick Links
EN OPERATING MANUAL
NL BEDIENINGSHANDLEIDING
FR MANUEL D'UTILISATION
DE BENUTZERHANDBUCH
PL PODRĘCZNIK UŻYTKOWNIKA
CZ UŽIVATELSKÁ PŘÍRUČKA
IT GUIDA UTENTE
SK UŽÍVATEĽSKÁ PRÍRUČKA
ES GUÍA DEL USUARIO
PT GUIA DE USUARIO
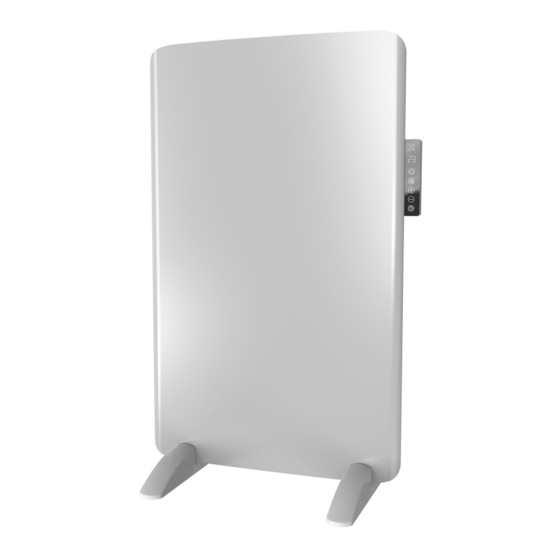
This product is only suitable
for well insulated spaces or
occasional use
TECHNICAL SPECIFICATIONS
Type of heater
Infrared heater
Wattage
500W
Heat settings (W)
1
Adjustable thermostat
yes. digital 5-35°
Timer (H)
9 hour timer off
Temperature settings (°C)
5-35
Heating element
heating film
App controllable
yes
Wifi
yes
Control buttons
yes, touchable
Display
yes. LED display
Integrated handle
No
Tip-over switch protection
No
Overheat safety protection
Yes
Anti frost mode
Yes
Standing feet
Yes
Child lock
No
3
5
7
9
11
13
15
17
19
21
Advertisement
Table of Contents

Summary of Contents for LSC 5725000200
- Page 1 EN OPERATING MANUAL NL BEDIENINGSHANDLEIDING FR MANUEL D'UTILISATION DE BENUTZERHANDBUCH PL PODRĘCZNIK UŻYTKOWNIKA CZ UŽIVATELSKÁ PŘÍRUČKA IT GUIDA UTENTE SK UŽÍVATEĽSKÁ PRÍRUČKA ES GUÍA DEL USUARIO PT GUIA DE USUARIO This product is only suitable for well insulated spaces or occasional use TECHNICAL SPECIFICATIONS Type of heater...
- Page 2 The found at: https://eur-lex.europa.eu The full declaration of conformity can be found at http://www.lsc-light.com . For other adapter (if applicable) must be installed near the device, not connected to any other adapter, and easily accessible.
-
Page 3: Safety Instructions
SAFETY INSTRUCTIONS CLEANING & MAINTENANCE Always read this instruction manual before installing or using your appliance and • Disconnect from mains when not in use or cleaning. always keep for future reference. • Do not misuse the cord or pull the cable to disconnect it from the outlet. Instead, grasp the plug and pull it to disconnect. - Page 4 The screen displays ’ d 1 ’ , press ’+’ and ’-’ to set from ’ d 1 – d 7’ (Monday-Sun- Before you start adding this LSC Smart Connect product, write down the name and day). Press ’$’ to confirm and enter hour setting password, including spaces and capital letters, of your WiFi network.
- Page 5 Model identifier(s): Article Code : 5725000200 Item Symbol Value Unit Item Unit Heat output Type of heat input, for electric storage local space heaters only (select one) Nominal heat output manual heat charge control, with integrated [no] thermostat Minimum heat output...
- Page 6 de natte kleding niet boven de kachel. Er kan brand ontstaan als de kachel is bedekt met of in aanraking komt met ontvlambaar materiaal, inclusief gordijnen, VEILIGHEIDSINSTRUCTIES gordijnen, beddengoed enz. of enig ander ontvlambaar materiaal tijdens het Lees deze handleiding altijd voordat u uw apparaat installeert of gebruikt en gebruik.
- Page 7 Het scherm toont ’ d 1 ’ , druk op ’+’ en ’-’ om in te stellen van ’ d 1 –d 7’ (maandag-zondag). Druk op ’$’ om te bevestigen en de uurinstelling in te voeren Download de LSC Smart Connect app van de Google Play Store, de Apple Store of scan de QR-code.
-
Page 8: Consignes De Sécurité
CONSIGNES DE SÉCURITÉ • Attention : afin d'éviter une surchauffe, ne couvrez pas le radiateur. Ne suspendez pas les vêtements mouillés au-dessus du radiateur. Un incendie peut se produire si le radiateur est recouvert ou touche des matériaux inflammables, y Lisez toujours ce mode d'emploi avant d'installer ou d'utiliser votre appareil et conservez-le toujours pour référence future. - Page 9 P3 : (samedi-dimanche) Programme ajustable '*' 00:00 – 01:00, Avant de commencer à ajouter ce produit LSC Smart Connect, écrivez le nom et le ' ' 01:00 – 05:00 mot de passe, y compris les espaces et les majuscules, de votre réseau WiFi.
-
Page 10: Reinigung & Pflege
SICHERHEITSHINWEISE berührt, einschließlich Gardinen, Vorhängen, Bettzeug usw. oder anderen brennbaren Materialien. HALTEN SIE DAS HEIZGERÄT FERN VON SOLCHEN MATERIALIEN. • Bitte stellen Sie kein Gerät auf das Produkt. Lesen Sie diese Bedienungsanleitung immer, bevor Sie Ihr Gerät installieren oder verwenden, und bewahren Sie sie immer zum späteren Nachschlagen auf. REINIGUNG &... - Page 11 (Montag bis Sonntag) einzustellen. Drücken Sie ’$’, um zu bestätigen und die Stundeneinstellung einzugeben Laden Sie die LSC Smart Connect App aus dem Google Play Store, dem Apple Store herunter oder scannen Sie den QR-Code. Der Bildschirm zeigt „00“ an, drücken Sie „+“ und „-“, um zwischen 00 und 23 Öffnen Sie die App.
- Page 12 INSTRUKCJE BEZPIECZEŃSTWA CZYSZCZENIE I KONSERWACJA • Odłącz od zasilania, gdy nie jest używany lub czyszczony. • Nie używaj kabla w niewłaściwy sposób ani nie ciągnij za kabel, aby odłączyć go od Zawsze przeczytaj niniejszą instrukcję obsługi przed instalacją lub użyciem urządzenia i zachowaj ją...
- Page 13 Na ekranie pojawi się „d1 ”, naciśnij „+” i „-”, aby ustawić od „d1 – d 7” (poniedziałek-niedziela). Naciśnij „$”, aby potwierdzić i wprowadzić ustawienie Pobierz LSC Smart Connect App z sklepu Google Play, sklep Apple lub zeskanuj godziny kod QR.
- Page 14 BEZPEČNOSTNÍ POKYNY ČIŠTĚNÍ A ÚDRŽBA • Pokud přístroj nepoužíváte nebo nečistíte, odpojte jej od sítě. • Nepoužívejte kabel nesprávně ani jej netahejte za kabel, abyste jej odpojili ze Před instalací nebo použitím vašeho spotřebiče si vždy přečtěte tento návod k použití...
- Page 15 V režimu P3 stiskněte '$' po dobu 3 sekund pro vstup do nastavení dne. Než začnete přidat tento LSC Smart Connect produkt, proveďte si poznámku jména Na obrazovce se zobrazí „d1 “, stiskněte „+“ a „-“ pro nastavení od „d1 –...
- Page 16 ISTRUZIONI DI SICUREZZA PULIZIA E MANUTENZIONE • Scollegare dalla rete quando non è in uso o durante la pulizia. Leggere sempre questo manuale di istruzioni prima di installare o utilizzare l'apparecchio e conservarlo sempre per riferimenti futuri. • Non abusare del cavo né tirare il cavo per scollegarlo dalla presa. Invece, afferra la spina e tirala per scollegarla.
- Page 17 Lo schermo visualizza ' d 1 ', premere '+' e '-' per impostare da ' d 1 – d 7' Scarica l'app LSC Smart Connect da Google Play Store, Apple Store o scansiona il (lunedì-domenica). Premere '$' per confermare e inserire l'impostazione dell'ora codice QR.
- Page 18 BEZPEČNOSTNÉ POKYNY ČISTENIE A ÚDRŽBA • Ak zariadenie nepoužívate alebo nečistíte, odpojte ho od siete. • Kábel nepoužívajte nesprávne a neťahajte za kábel, aby ste ho odpojili zo zásuvky. Pred inštaláciou alebo používaním spotrebiča si vždy prečítajte tento návod na obsluhu a vždy si ho uschovajte pre budúce použitie.
- Page 19 Opakujte operáciu, kým nedokončíte plán na každú hodinu a každý deň. Poznámka: Po nastavení režimu vykurovania na 23. hodinu stlačte „+“ pre návrat Stiahnite si aplikáciu LSC Smart Connect z obchodu Google Play, Apple Store alebo do denného nastavenia. Skenovať QR kód.
-
Page 20: Instrucciones De Seguridad
INSTRUCCIONES DE SEGURIDAD LIMPIEZA Y MANTENIMIENTO • Desconecte de la red eléctrica cuando no esté en uso o limpieza. Siempre lea este manual de instrucciones antes de instalar o usar su electrodomés- • No haga mal uso del cable ni tire del cable para desconectarlo del tomacorriente. tico y guárdelo siempre para referencia futura. - Page 21 ' ' 16:00 – 18:00 '*' 18:00 – 00:00 P3: (Sábado-Domingo) Programa ajustable "Antes de comenzar a agregar este producto LSC Smart Connect, anote el nombre y '*' 00:00 – 01:00, la contraseña, incluidos los espacios y las letras mayúsculas, de su red WiFi.
- Page 22 INSTRUÇÕES DE SEGURANÇA LIMPEZA E MANUTENÇÃO • Desconecte da rede elétrica quando não estiver em uso ou limpeza. Leia sempre este manual de instruções antes de instalar ou utilizar o seu aparelho e • Não use mal o cabo nem puxe o cabo para desconectá-lo da tomada. Em vez disso, guarde-o sempre para referência futura.
- Page 23 Introdução ao aplicativo LSC Smart Connect P3: (sábado a domingo) Programa ajustável "Antes de começar a adicionar este produto LSC Smart Connect, anote o nome e a '*' 00:00 – 01:00, senha, incluindo espaços e letras maiúsculas, da sua rede Wi-Fi. Certifique-se de ' ' 01:00 –...
- Page 24 Disposal, warranty, disclaimer and intended use Smaltimento, garanzia, esclusione di responsabilità e destinazione d'uso Removal of your product. This product is made of high quality materials and parts that can be recycled. If you see this Rimozione del tuo prodotto. Questo prodotto è realizzato con materiali e parti di alta qualità che possono essere riciclati. symbol on your product, it means that the product is covered by EU Directive 2002/96 / EC.
- Page 25 STANDING FEET / BRACE INSTALLATION INSTALLATION INSTALACE • Gently upside down the heater body, and put it on a flat soft surface, refer to below Pics: • Opatrně otočte tělo ohřívače dnem vzhůru a položte jej na rovný měkký povrch, viz níže obrázky: •...
-
Page 26: Wall Mounted Installation
WALL MOUNTED INSTALLATION ∅ 8mm >300MM >300MM >300MM >200MM 326mm ∅ 8mm 130mm 650mm ≥200mm... - Page 27 EN - INSTALLATION de suspension. Il est recommandé d'essayer de fixer le support de suspension au If you want to install the appliance in a bathroom (or similar wet environment), radiateur et de le retirer, afin que vous sachiez comment il se fixe et se détache. safety is of utmost concern.
- Page 28 • Při montáži na stěnu opatrně sejměte již zkonstruovaný závěsný držák ze zadní části Upozornenie: Pred zapojením jednotky sa uistite, že je radiátor správne pripevnený ohřívače otočením dvou plastových zajišťovacích úchytů umístěných v horní části k stene. V opačnom prípade môžu nastať problémy. držáku.
- Page 30 EN - BATHROOM ZONES verwendet wird, muss für Niederspannung und absolut tauchfest sein, mindestens IPX7. If you want to install the appliance in a bathroom (or similar wet environment), safety is of utmost concern. For protection against electric shock, only products with suitable IP Zone 1: Alle Stromkreise in dieser Zone müssen mit einem 30-mA-Fehlerstromschut- rating can be used.
- Page 31 Il nostro prodotto raggiunge IPX4, quindi può essere installato in Zona 2 o Zona 3. Assicurarsi che la distanza da muri e oggetti sia rispettata. SK - KÚPEĽŇOVÉ ZÓNY Ak chcete spotrebič nainštalovať v kúpeľni (alebo podobnom vlhkom prostredí), bezpečnosť je nanajvýš dôležitá. Na ochranu pred úrazom elektrickým prúdom je možné používať...
- Page 32 PARTS & SYMBOLS EN PARTS FIGURE DE TEILFIGUR FIGURA DI PARTE Front cover Vordere Abdeckung Copertina anteriore PT FIGURA DA PEÇA Pannello di controllo Control panel Bedienfeld Capa frontal On/off switch Ein-/Ausschalter Interruttore di accensione/spegnimento Painel de controle Interruptor liga/desliga CONTROL PANEL SCHALTTAFEL PANNELLO DI CONTROLLO...
Need help?
Do you have a question about the 5725000200 and is the answer not in the manual?
Questions and answers