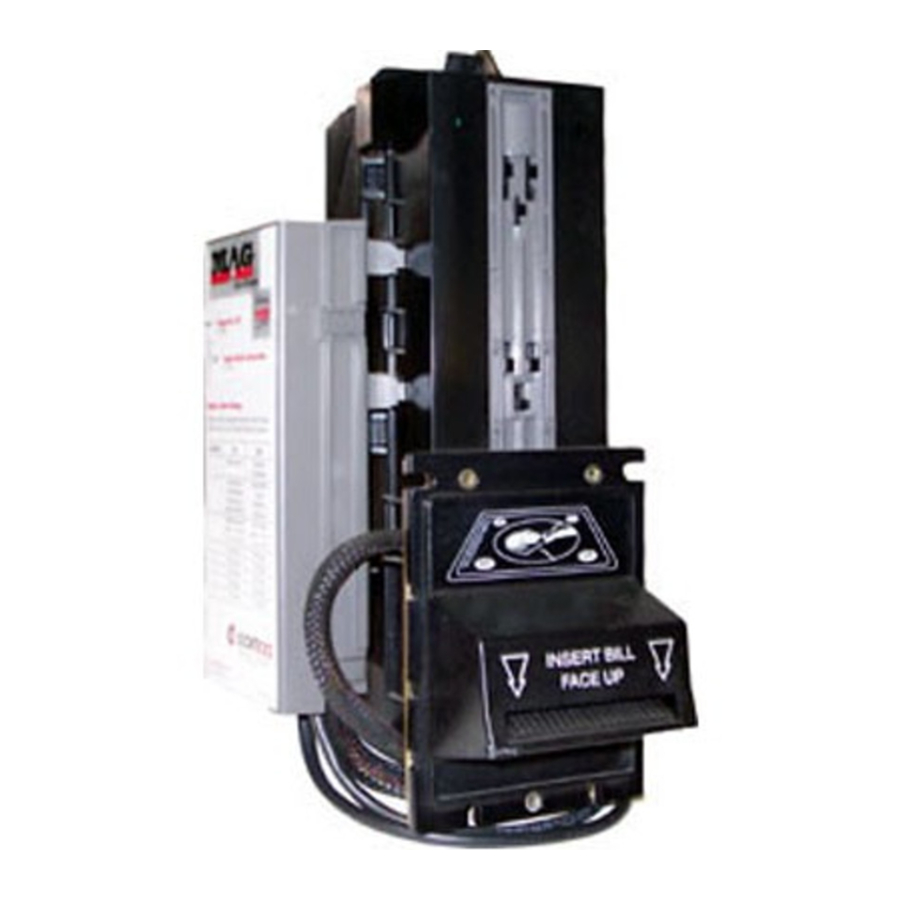
Coinco MAG50B - Bill Acceptor Installation & Operation Guide
- Installation & operation manual (2 pages) ,
- Operation and service manual (36 pages)
Advertisement
INTRODUCTION
This page contains general information on installing, operating and maintaining the MAG50B Bill Acceptor. Taking time to read this information will help you obtain the best performance from your MAG50B.
The MAG50B is the result of extensive research and development in computerized crediting systems. This greatly simplified unit provides many important features never before available in any bill acceptor. The MAG50B extends the capability of the vending machine. Some of the unit's many outstanding features include:
- High acceptance rate — even on worn out or wet bills.
- Accepts all or any combination of the following bills: $1, $2, $5, $10 and $20.
- Option switches allow the unit to be customized to fit the specific needs of the location.
- Dollar bill escrow feature.
- Standard and Multi-Drop Bus (MDB) interface.
- Snap-in modules for easy cleaning and on-the-spot service.
- Compact design for easy mounting.
- Most components are made of General Electric's Noryl resins making it resistant to salting, corrosion and rust.

INSTALLATION AND OPERATION
Before installing the MAG50B into the vendor, set the option switches as desired (see "Setting Option Switches" section for detailed information).
- Turn OFF vending machine power.
- Install the MAG50B into the mounting hole of vending machine using the appropriate hardware (not included).
- Connect the MAG50B interface harness (not included) between the MAG50B and the vending machine.
NOTE: Should additional mounting hardware or harnessing be required, please contact your local Coinco office.
- Install a Coinco coin changer or the equivalent into the vending machine according to the coin changer instructions.
- Load the changer coin tubes with a minimum of ten coins in each tube making sure all coins lie flat.
- Restore power to the vending machine. The MAG50B stacker will cycle upon power-up.
- Observe that the power indicator light on back of MAG50B control box is ON continuously. If the light is OFF or blinking, check the following:
- Power to vendor.
- Coin changer tube levels.
- Bill acceptor interface harness.
- Vendor does not have credit already established.
- With the vend price set below one dollar, insert a one dollar bill as shown on the front of the unit.
- The bill will be accepted and stacked in the bill box.
- Verify one dollar credit has been established by making a vend and verifying that the proper amount of change is returned.
- Check the bill box to see that the one dollar bill is properly stored.
ABOUT THE OPTION SWITCHES
On the MAG50B control board, there is an option switch module containing eight switches. These switches allow the unit to be customized. These option switches are factory set and shipped with switch 3 set to the ON position. This setting allows the highest acceptance of one dollar bills only, face up in both directions. If you wish to change these settings, please refer to "Setting The Option Switches" section for detailed information.
SETTING THE OPTION SWITCHES
Remove power to the unit. To access option switches, remove the bill box to access the option switch access hole on inner side panel of logic board case. Using a small screwdriver, set option switches through access hole.
To obtain the highest possible acceptance rate of one dollar bills only, switches 4, 5, 6, 7 and 8 should be set to the OFF position.

REMOVING ACCEPTED BILLS
See Figure 2. Accepted bills may be removed by releasing the bill box lid exposing the bills for collection or by removing the bill box from the bill acceptor unit.

Figure 2
Flash Codes
A steady light indicates normal operation.
1=Bill Box Full
2=Not Used
3=Check Bill Path
4=N/A
5=Check Optical Sensors
6-14, 17 & 18=Reset or Service Required
15 & 16=Check Skew Sensors
CLEARING JAMS AND CLEANING
See Figure 2. Trapped bills/debris or dirt can result in poor bill acceptance or bill rejection. Remove bill box and lower housing to access bill path for clearing trapped bills or debris. Clean bill path plastic parts with a cloth moistened with a mild soap and water solution. Clean the magnetic head and optic sensors using a swab and isopropyl alcohol.
Do not use any petroleum based cleaning solvents, scouring pads or stiff brushes for cleaning. The MAG50B requires no lubrication at any time.

Documents / ResourcesDownload manual
Here you can download full pdf version of manual, it may contain additional safety instructions, warranty information, FCC rules, etc.
Download Coinco MAG50B - Bill Acceptor Installation & Operation Guide
Advertisement


Need help?
Do you have a question about the MAG50B and is the answer not in the manual?
Questions and answers