
Related Manuals for MICHELANGELO CMAF-525T

Summary of Contents for MICHELANGELO CMAF-525T
- Page 1 MICHELANGELO AIR FRYER OVEN CMAF-525T INSTRUCTION MANUAL Please Read Carefully and Save This Instruction...
-
Page 2: Table Of Contents
TABLE OF CONTENT IMPORTANT SAFEGUARDS FEATURES AND BENEFITS CONTROL PANEL OPERATING INSTRUCTIONS PRESET MENUS CLEANING AND MAINTENANCE TROUBLESHOOTING LIMITED WARRANTY... -
Page 3: Important Safeguards
Return the Air Fryer Toaster Oven to the store or retailer where purchased for examination or repair or adjustment. 8. The use of accessory attachments not recommended by Michelangelo may cause injury. 9. Do not use outdoors. - Page 4 20. Do not store any items on top of the appliance when in operation. Do not operate under wall cabinets. 21. Do not clean with metal scouring pads. Pieces can break off the pad and touch electrical parts, involving a risk of electric shock. 22.
-
Page 5: Features And Benefits
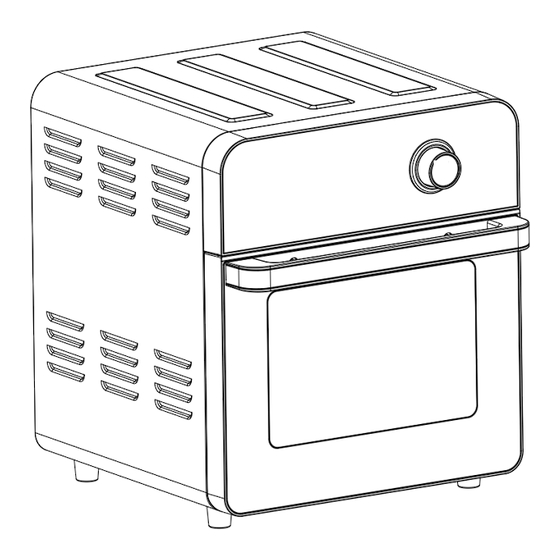
FEATURES AND BENEFITS Product components: 1.Housing 8.Rotisserie fork 2.Button 9.Wire rack 3.Control panel 10.Mesh basket 4.Inner case 11.Drip tray 5.Door 12.Glove 6.Door handle 13.Rolling cage 7.Cage tong 14.Mesh tray... - Page 6 Use of Accessories: Choose proper accessories for different cooking purposes. 1. Cage Tong: use the cage tong to hold and remove rotisserie fork or rolling cage as shown below. 2. Rotisserie Fork: Specially designed for rotisserie. Use cage tong to hold or remove.
- Page 7 Wire Rack & Mesh Tray: Insert the Steam Rack into the unit as shown below 4. Mesh Basket: Use the basket when using the Air Fry, Broil or Dehydrate functions to optimize your cooking results. We recommend using the mesh basket together with the drip tray.
- Page 8 7. Rolling Cage: Insert mesh basket as shown below. (1)-(5): Note: * Make sure you leave enough space for food to grow with heat. * There is a safety switch shows in Pic as below. Only when the door is closed, the machine can work properly.
- Page 9 INTELLIGENT CONTROL PANEL 1. ON/OFF Press the "ON/OFF" key, indicator light and digital screen light up, unit into standby mode. 2. TEMP & TIME After selecting the menu function, if you need to adjust cooking temperature and/or time, press "TIME” or “TEMP" to change cooking time and cooking temperature by turning knob.
-
Page 10: Operating Instructions
**WARNING**: Objects should not be stored on the top of the oven. If they are, remove all objects before you turn on your oven. The exterior walls get very hot when in use. Keep out of reach of children. OPERATING INSTRUCTIONS 1. - Page 11 7. Pause function: If the door is open during cooking cycle, the unit will stop working automatically. In this case, only "ON/OFF" “LIGHT” and "Rotisserie" buttons are in working mode. Other buttons will be locked. When the door is closed, the unit will resume previous cooking. If the door is not closed within 10 minutes, the unit will shut down automatically.
-
Page 12: Preset Menus
PRESET MENUS Michelangelo’s Air Fryer Oven has convenient, easy-to-use presets with default combination of cooking time and cooking temperature to meet your different cooking needs. 1. Turn the knob to select the desired preset menu. 2. To adjust cooking temperature, after selecting preset menu, press temp and turn knob to increase or decrease the temperature. -
Page 13: Cleaning And Maintenance
can be adjusted from 50 ℃-220 ℃. You can also set the light, top heating element, bottom heating element, rotisserie by pressing the corresponding keys according to your actual requirements. Press "ON/OFF" again to start working after finished setting. Preset function Press “ON/OFF”, the digital screen shows "0000", select the function and then press "PRESET ", the digital screen shows the preset time and it will flash,... -
Page 14: Troubleshooting
Might loose connected, please contact circuit Michelangelo customer service for repairing or replacing E2 - Sensor short circuit Might be sensor damage, please contact Michelangelo customer service for repairing or replacing E3 - Circuit board Might be wrong wire installation or even broken wires, please... -
Page 15: Limited Warranty
Michelangelo warrants this product against defects in materials and workmanship for a period of one year from the date of purchase. During this period, Michelangelo will either repair or replace, at its discretion, any defective products at no charge to the owner. Replacement products or repaired parts will be guaranteed for only the unexpired portion of the original warranty or six months, whichever is greater.
Need help?
Do you have a question about the CMAF-525T and is the answer not in the manual?
Questions and answers