
Related Manuals for THOMSON X-link 4.0


Summary of Contents for THOMSON X-link 4.0
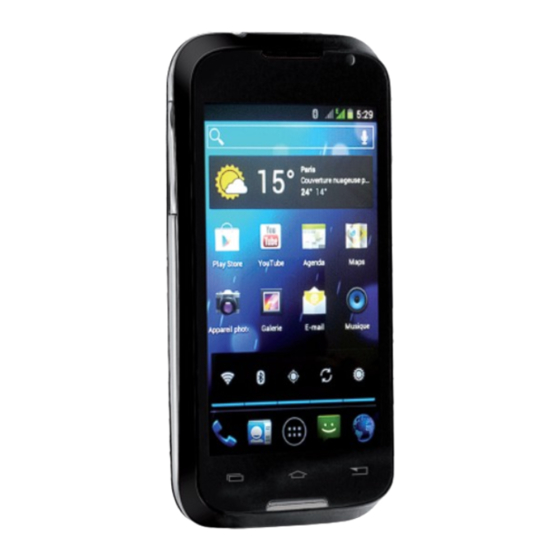
- Page 1 X-link 4.0 User Manual TH-1127MB TH-1127MW Please read and retain these instructions.
-
Page 2: Table Of Contents
Contents Important Safety Information..........1. Getting Started.............. 1.1. Selecting the Operator for First Use......1.2. Turning Off Your Phone, Activating Flight Mode, Silent Mode and Vibrate Mode........1.3. Activating Mobile Data..........1.4. Activating Wi-Fi............2. Main Functions.............. 2.1. Downloading Applications from Play Store....2.2. - Page 3 3.8. Locking the Screen............ 3.9. Notifications............. 4. Other Settings............... 4.1. Enabling the French Word Prediction for Keyboard..4.2. Changing the Phone Language........4.3. Changing the Ringer Volume or Ringtone..... 4.4. Setting the Brightness, Wallpaper, Screen Timeout Period and Font Size..........4.5.
-
Page 4: Important Safety Information
Important Safety Information General Guidelines Do not become distracted by the device while driving, and always be fully aware of all driving conditions. Always operate the vehicle in a safe manner. Minimize the amount of time spent viewing the device's screen while driving and use voice prompts when possible. - Page 5 Battery Warning Do not expose the device to heat or leave it in a vehicle in the sun. Use of the Supplied Li-Ion Battery This product uses a Li-Ion battery. Caution: Risk of fire and burns if the battery pack is handled improperly. Warning: Danger of explosion if battery is incorrectly replaced.
- Page 6 Always maintain a distance of 15 cm (6 inches) between the pacemaker and any mobile phone that is turned on. Store the phone on the opposite side of the pacemaker. Do not carry the phone in a breast pocket. Use the ear furthest from the pacemaker in order to minimize any potential for interference.
- Page 7 Avoid Repetitive Motion You may experience occasional discomfort in your hands, arms, shoulders, neck, or other parts of your body if you perform repetitive activities, such as typing or playing games, on the device. Take frequent breaks. If you have discomfort while or after using the device, stop using and see a physician.
- Page 8 When using the earphone, reduce the volume to protect your ears. Declaration of Conformity Hereby, Admea declare that this GSM Phone is in compliance with the essential requirements and other relevant provisions of Directive 1999/5/EC. The declaration of conformity is available on web site: www.logisav.fr 0700 The European directive 2002/96/EC on Waste Electrical...
- Page 9 Welcome Thank you for purchasing this Thomson mobile phone. Its main features are as follows: Large 4.0-inch display with WVGA 800x480 pixels and 16.7 million colors Quad band for use in all countries Operating System: Android 4.0 Ice Cream Sandwich...
-
Page 10: Getting Started
1. Getting Started 1.1. Selecting the Operator for First Use Before you use the phone for the first time, please charge the battery for eight hours in order to optimize its performance (see also the Quick Start Guide). Press and hold the power button located on the top of the phone to boot it. - Page 11 The below screen appears. You can now choose which operator to use (in case you insert two SIM cards) for Voice Calls and Messaging.
- Page 12 Opt for one of the two SIMs or choose “Always ask”. If you choose the first option by setting the default SIM, when you dial a call, the name of the operator appears on the notifications bar at the upper left of the screen. Simply drag down the notification bar to select the other operator if necessary.
- Page 13 Then, select “Mobile networks”. After that, select “Network operators”. After a few minutes, you can choose one of the available operators. -10-...
-
Page 14: Turning Off Your Phone, Activating Flight Mode, Silent Mode And Vibrate Mode
1.2. Turning Off Your Phone, Activating Flight Mode, Silent Mode and Vibrate Mode When your phone is switched on, long press the button on the left side of the device. After one second, the following message appears on the screen. You can choose to turn off or restart the phone, switch t o s i l e n t m o d e , v i b r a t e... -
Page 15: Activating Mobile Data
1.3. Activating Mobile Data To activate mobile data in order to browse the Internet or send emails through your operator's network, tap “Data connection” and select the network operator of the corresponding SIM card. If the above screen does not appear: from the Home screen, tap and select “System settings”... - Page 16 Note: Before activating mobile data, make sure that you have a data plan since data usage out of bundle data plan can incur important charges from your operator. When traveling abroad, be sure to disable mobile data connection if you do not have international roaming data plan.
- Page 17 1.3.1. Important Information for Subscribers to Free, Bouygues Telecom and Virtual Mobile Phone Service Providers 1.3.1.1.French Subscribers to Free and Virtual Mobile Phone Service Providers Virtual mobile phone service provider refers to service p r o v i d e r s w h o d o n o t h a v e a n y G S M n e t w o r k infrastructures of its own and must rely on the network infrastructure of an existing network operator (for France: Orange, SFR and Bouygues Telecom).
- Page 18 You may encounter this alert message if you subscribe to Free (as Free uses for the time being part of the Orange's network infrastructure) as well as any virtual mobile phone service provider (non-exhaustive list: Afone Mobile, Budget Mobile, BuzzMobile, Bazile Telecom, Carrefour Mobile, Casino Mobile, La Poste Mobile, Lycamobile, M6 Mobile, NRJ Mobile, Symacom Mobile, Transatel mobile, U Mobile, Virgin Mobile).
- Page 19 If you do not want the phone to display the roaming alert message in data mode (when you connect to the Internet, for example), select the option “Data roaming” in the below screen. Then tap OK to validate the warning message and select your network operator.
- Page 20 After that, select the second option “Always”. By default, you are always notified whenever additional cost is generated during roaming. To stop displaying the alert message, select “Never”. Important Note: You will not receive any roaming alert when you are abroad. You should be particularly vigilant and preferably restore the roaming alert to warn you of the risk of being overcharged by your operator.
- Page 21 Important Remark: If the “R” symbol is displayed at the top right corner of the screen, next to the signal strength indicator, that means you are roaming. By consequent, substantial charges may apply for calls and mobile data. 1.3.1.2. Bouygues Telecom Subscribers P e r f o r m t h e f o l l o w i n g steps if you encounter any problem connecting to the...
- Page 22 After that, select “Mobile networks”. Then select “Access point names”. -19-...
-
Page 23: Activating Wi-Fi
Then choose Bouygues. Two access points will then appear on the screen: Bouygues Telecom and Bouygues Telecom Pro. Select the access point that corresponds to your subscription. 1.4. Activating Wi-Fi When you are at home or in a place with a Wi-Fi network, turn on Wi-Fi to reduce mobile data usage and to get a faster connection. - Page 24 Then select the desired Wi-Fi network. -21-...
- Page 25 A f t e r t h a t , e n t e r t h e password of the network. To facilitate entry, press button to remove the on-screen keyboard and Input “ password”. Then, tap the password input field to display the k e y b o a r d a g a i n .
-
Page 26: Main Functions
2. Main Functions 2.1. Downloading Applications from Play Store You can download thousands of applications for your phone from Play Store. From the Home screen, tap the “Play Store” icon. You need to associate your phone with a Google Account at the first use. If y o u a l r e a d y h a v e a Google Gmail account, tap “Existing”;... - Page 27 If you already have a Gmail account: enter your e m a i l a d d r e s s ( e n d i n g p r o b a b l y w i t h “...
- Page 28 Notes: Opt preferably for applications of well-known firms. The company's name appears below the application name. In fact, your phone, like a computer, can be infected by viruses and your sensitive information can be stolen. Download an anti-virus to protect your phone. Do not attempt to install third-party applications which are not coming...
-
Page 29: Sending Emails From Your Phone And Synchronizing Your Contacts And Calendar
2 . 2 . S e n d i n g E m a i l s f r o m Yo u r P h o n e a n d Synchronizing Your Contacts and Calendar On the Home screen, tap the “E-mail” icon. If you have not yet set up an account, the following p a g e a p p e a r s o n t h e... - Page 30 T h i s a p p l i c a t i o n c a n manage multiple email accounts simultaneously. To c r e a t e a s e c o n d account, tap then s e l e c t “...
-
Page 31: Browsing The Internet
Also, choose “Sync Calendar” so that your phone share the same agenda with your computer. “ Choose ringtone”, for example, for deactivating alert tone for new email messages. 2.3. Browsing the Internet From the Home screen, tap the icon. You will first need to active mobile data (see section 1.3) or connect to a Wi- Fi network (see section 1.4.) in order to browse the Internet. - Page 32 to access the options. Then choose “Save to bookmark” to save the address of the current page. To v i e w y o u r f a v o r i t e websites, long press the button, then select the t a b “...
- Page 33 To set the homepage of the browser, tap then scroll down the menu and tap “Settings”. Then tap “General”. -30-...
- Page 34 Select “Set homepage” to s e t t h e c u r r e n t l y displayed page as the browser's homepage. -31-...
-
Page 35: Activating Geolocation And Gps
2.4. Activating Geolocation and GPS The “Maps” application allows you to orientate yourself easily when you are traveling. You do not n e e d p a p e r m a p s anymore! Before using the Maps feature for the first t i m e , y o u m u s t f i r s t activate Geolocation on this phone. - Page 36 Operating Geolocation and loading mapping data from Google Maps require significant data usage. It is necessary to subscribe to a data plan from your service provider. Be vigilant when you are abroad and opt for a data plan or a local SIM card. To activate Geolocation: from the Home screen...
- Page 37 Scroll down the menu and select “Location Services” as shown below. -34-...
- Page 38 Tick the options “Google's location Service”, “GPS Satellites”, “GPS EPO assistance”, “A-GPS” and “Location and Google search”. -35-...
- Page 39 Once you have completed setting up your phone, tap the button below the screen in order to return to the Home screen Then tap the “Maps” icon to launch the mapping application. Notes: Once the map appears on the screen, tap the icon to locate yourself.
-
Page 40: Multimedia Applications
2.5. Multimedia Applications 2.5.1. Camera Tap the “Camera” icon on the Home screen. Then, to view available options. For example, you can enable or disable the flash, change color effects and select scene mode. To use the camera, you must first insert a Micro SD m e m o r y c a r d i n t o t h e phone. - Page 41 The message “USB connected” appears. At this point, the computer still does not recognize the phone. You need to select the option “Turn on USB storage” and then confirm by tapping OK. -38-...
- Page 42 The message “Turn off USB storage” appears on the screen. The files of t h e p h o n e a r e n o w a c c e s s i b l e f r o m y o u r computer.
-
Page 43: Discovering The Interface Of Your Phone
3.Discovering the Interface of Your Phone Once you have completed setting up your phone, tap button below the screen to return to the Home screen shown below -40-... -
Page 44: Navigation Buttons
3.1. Navigation Buttons There are four navigation buttons below the screen. Whatever you do with your phone, you can always return to the Home screen or to the previously opened screens: Icon Name Description 1. Short press: to return to the Home screen at any time. -
Page 45: Favorites Bar
3.2. Favorites Bar The favorites bar is located just above the navigation buttons: The application icons that you keep in this bar remain visible on each Home screen. icon in the center is displayed permanently . Tap it to access all the installed applications on the phone. 3.3. - Page 46 From left to right: 1. To activate Wi-Fi. Tap to connect to the Wi-Fi network previously saved in memory. 2. To enable Bluetooth 3. To turn on the GPS function 4. To enable automatic synchronization (“push mail”) in order to receive new emails as soon as they are received by the server (the E-mail application on the Home screen should also be set accordingly) 5.
-
Page 47: Shortcut Icons
3.4. Shortcut Icons The main interface has several screens, which can display shortcuts to many applications. From the below screen, sweep your finger left or right in order to scroll to a new screen. These screens are currently empty and you can insert your own shortcuts, widgets and folders. - Page 48 To create a new shortcut: Sweep the screen with your finger left or right in order to choose an empty one. A screen similar to the one below should appear. Then tap to display all your applications. To select an application, for example “FM radio”, touch and hold the application's icon.
-
Page 49: Widgets
3.5. Widgets Some applications have “widgets” that can display information on the screen w i t h o u t l a u n c h i n g t h e application. For example, they allow you to check the news and weather i n f o r m a t i o n f r o m t h e Home screen. - Page 50 Select “Settings” then “Weather settings”. Finally, select “Use my location” if you have activated the GPS feature. Otherwise, select “Set a location”. Tap repeatedly to exit the menu and return to the Home screen. The weather bulletin will now be updated automatically.
- Page 51 To insert other widgets: choose a screen with sufficient free space. Tap then select the “Widgets” tab appearing at the top right of the screen. The list of available widgets appears on the screen. Just like inserting a shortcut, touch and hold a widget icon then drag it to the desired location.
-
Page 52: Switching Between Applications
3.6. Switching between Applications When an application is open, long press the button to display all open applications on the screen. Then can quickly select the one you want to use. 3.7. Using the Touch Screen Use your fingers to manipulate icons, buttons, menus, on- screen keyboard and the other elements of the touch screen. - Page 53 Other common manipulations: Long press: Touch and hold an item on the screen then wait for an action to occur before lifting your finger. Dragging: Touch and hold an item then move your finger without leaving the screen to the desired location.
-
Page 54: Locking The Screen
3.8. Locking the Screen To protect your sensitive information, you can change the lock settings of your phone: 1. From the Home screen or on the “Apps” screen, tap the icon. 2. Scroll down and tap “Security”. 3. Tap “Screen lock”. 4. -
Page 55: Notifications
Answer To respond to the caller Redirects the caller to your Forward call to voicemail so that he/she can voicemail leave you a message. Opens a list of default SMS. Send a Select one of them to send the message message immediately to the caller. -
Page 56: Other Settings
Tip: When the notification list is open, you can also access the settings by tapping the Quick Setup icon at the top of the list. It allows you to quickly access the setting options from any screen. To change the notification tones, tap the Settings icon >... - Page 57 To d i s a b l e a u t o m a t i c prediction, from the Home screen of your phone, tap and then select “System settings”. The screen below is displayed. Scroll down and select “Language &...
-
Page 58: Changing The Phone Language
Disable the “A.I. type keyboard”. 4.2. Changing the Phone Language The default language of the phone is that of the S I M c a r d i n s e r t e d . To c h a n g e t h e d e f a u l t language, from the Home screen, tap and then... - Page 59 Scroll down and select “Language and input” as shown below. The first option allows you to change the phone language. -56-...
-
Page 60: Changing The Ringer Volume Or Ringtone
4.3. Changing the Ringer Volume or Ringtone From the Home screen, tap and then select “System settings”. The below screen appears, select “Audio profiles”. -57-... - Page 61 Tap “General” (do not tap the blue button, tap the word “General” directly). From the next screen, you can change the ringtone, ringer volume, vibrate mode, as well as the alert tone for notifications. -58-...
-
Page 62: Setting The Brightness, Wallpaper, Screen Timeout Period And Font Size
4.4. Setting the Brightness, Wallpaper, Screen Timeout Period and Font Size From the Home screen, tap and then select “System settings”. The below screen appears, select “Display”. -59-... -
Page 63: Mobile Usage And Enabling/Disabling Mobile Data
4.5. Data Usage and Enabling/Disabling Mobile Data From the Home screen, tap and then select “System settings”. The below screen appears, select “Data usage”. From this screen, you choose to enable or disable mobile data. If you have a limited data plan, you can also set a mobile data limit. -
Page 64: Activating Hotspot
4.6. Activating Hotspot Mobile Hotspot is an innovative feature which allows your laptop to use the mobile data service of your phone to connect to the Internet. This function is particularly useful in areas where your laptop cannot connect to a Wi-Fi network. - Page 65 From the Home screen, tap and then select “System settings”. The below screen appears, select “More…”. -62-...
- Page 66 A notification appears at the top of the screen. You can now search for the name of the Wi-Fi network “THOMSON TH-1129m” on your laptop computer (or another name if you have changed it). Select the password type “WPA2 PSK” then enter the password you just entered in the previous step.
-
Page 67: Dual Sim Management: Assigning A Telephone Number To Sim Card
Notes: Remember to turn off Hotspot after use. Secure your password. Use of Hotspot causes a significant drain to t h e b a t t e r y a n d r e d u c e s u s e t i m e s . Recharge your phone or disable Hotspot as soon as possible. - Page 68 From the Home screen, and then s e l e c t “ S y s t e m settings”. The below screen appears, select “SIM management”. For “Voice call” and “Messaging” functions, you can define which operator to use. -65-...
- Page 69 Choose one of the two SIM cards or choose “Always ask”. In the first case, when dialing a call, the name of the network operator appears at the top left corner of the screen in the notification bar. Simply sweep down the notification bar to select the other network operator if necessary.
-
Page 70: Troubleshooting Common Problems
5. Troubleshooting Common Problems The network is Make sure you have inserted the not displayed SIM card correctly (see Quick Start and “Emergency Guide). Call” appears on Make sure you are in an area the screen covered by the network. S e l e c t y o u r n e t w o r k o p e r a t o r manually by going to Settings >... - Page 71 In order to store photos, you must insert a Micro SD card in the phone. This device's internal memory is o n l y u s e d f o r a p p l i c a t i o n s management and installation.
- Page 72 D a t a c o n n e c t i o n m o d e i s n o t activated. You have not subscribed to mobile d a t a p l a n f r o m y o u r s e r v i c e provider.
- Page 73 If you use a virtual mobile phone service provider or if you are subscriber to Free in France, you A message must first activate the Roaming warns you of service. Go to Settings > SIM high roaming management > Roaming > Display costs each time roaming alert >...
- Page 74 Imported by ADMEA, 12 Rue Jules Ferry, 93110 Rosny Sous Bois, France. THOMSON is a trademark of TECHNICOLOR SA used under license by ADMEA.
Need help?
Do you have a question about the X-link 4.0 and is the answer not in the manual?
Questions and answers