
Related Manuals for Toro 22283


Summary of Contents for Toro 22283
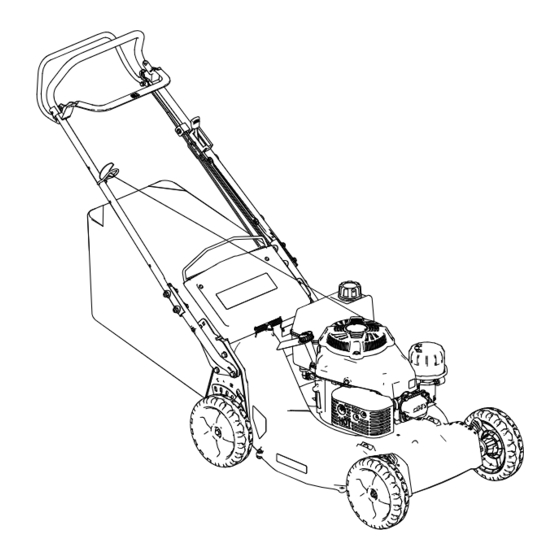
- Page 1 Form No. 3463-576 Rev A 53cm Heavy-Duty Recycler ® /Rear Bagger Lawn Mower Model No. 22283—Serial No. 400000000 and Up *3463-576* Register at www.Toro.com. Original Instructions (EN)
-
Page 2: Safety-Alert Symbol
Authorized Service injury. Dealer or Toro Customer Service and have the model and serial numbers of your product ready. Figure 1 CAUTION indicates a potentially hazardous situation... -
Page 3: Table Of Contents
Contents Safety Safety-Alert Symbol..........2 General Safety Safety ............... 3 General Safety ........... 3 This product is capable of amputating hands and Safety and Instructional Decals ......4 feet and of throwing objects. Always follow all safety Setup ................ 6 instructions to avoid serious personal injury or death. -
Page 4: Safety And Instructional Decals
Safety and Instructional Decals Safety decals and instructions are easily visible to the operator and are located near any area of potential danger. Replace any decal that is damaged or missing. decaloemmarkt Manufacturer's Mark 1. This mark indicates that the blade is identified as a part from the original machine manufacturer. - Page 5 decal116-7583 116-7583 1. Warning—read the Operator’s Manual; do not operate this 4. Cutting/dismemberment hazard of hand or foot, mower machine unless you are trained. blade—stay away from moving parts; keep all guards in place. 2. Thrown object hazard—keep bystanders away. 5.
-
Page 6: Setup
Setup Important: Remove and discard the protective plastic sheet that covers the engine and any other plastic or wrapping on the machine. Removing the Cable Guards No Parts Required Procedure g412382 Figure 3... -
Page 7: Assembling The Lower Handle
Assembling the Lower Handle Parts needed for this procedure: Upper handle assembly Lower handle Bolt (5/16 x 1-3/4 inches) Flange locknut (5/16 inch) Curved washer Procedure Assemble the lower handle as shown in Figure g340673 Figure 4 1. Flange locknut (5/16 inch) 4. -
Page 8: Installing The Handle
Installing the Handle No Parts Required Procedure g412353 Figure 5... -
Page 9: Installing The Cable Guard
Installing the Cable Guard No Parts Required Procedure g412356 Figure 6 Installing the Recoil-Starter Rope in the Rope Guide No Parts Required Procedure g230180 Figure 7... -
Page 10: Adding Oil To The Engine
Adding Oil to the Engine No Parts Required Procedure Important: If the oil level in the engine is too low or too high and you run the engine, you may damage the engine. g235721 Figure 8 Assembling the Grass Bag No Parts Required Procedure g412357... -
Page 11: Adjusting The Self-Propel Drive
Adjusting the Self-Propel Drive No Parts Required Procedure Important: You must adjust the self-propel-drive cable before you operate the machine for the first time. Refer to Adjusting the Self-Propel Drive (page 25). -
Page 12: Product Overview
Contact your Authorized Service Dealer or authorized Toro distributor or go to www.Toro.com for a list of all approved attachments and accessories. To ensure optimum performance and continued safety certification of the machine, use only genuine Toro replacement parts and accessories. -
Page 13: Before Operation
Operation – Avoid prolonged breathing of vapors. – Keep your hands and face away from the nozzle and the fuel-tank opening. Note: Determine the left and right sides of the machine from the normal operating position. – Keep fuel away from your eyes and skin. Before Operation Filling the Fuel Tank Type... -
Page 14: Checking The Engine-Oil Level
Checking the Engine-Oil Level Service Interval: Before each use or daily Important: If the oil level in the crankcase is too low or too high and you run the engine, you may damage the engine. g235721 Figure 13 Adjusting the Handle Height You can raise or lower the handle to 1 of 3 positions that is more comfortable for you (Figure 14). -
Page 15: Adjusting The Cutting Height
Adjusting the Cutting Height DANGER Adjusting the cutting-height levers could bring your hands into contact with a moving blade and result in serious injury. • Shut off the engine and wait for all movement to stop before adjusting the cutting height. •... - Page 16 • Check the grass catcher components and the discharge chute frequently for any wear or deterioration and replace them with genuine Toro parts when necessary. Slope Safety • Mow across the face of slopes; never up and down.
-
Page 17: Starting The Engine
Starting the Engine Connect the spark-plug wire to the spark plug. Open the fuel valve (Figure 16). g024303 Figure 16 1. Fuel valve Move the throttle-control lever to the position (A of Figure 17). CHOKE Note: Do nut use the choke when the engine is warm. Hold the blade-control bar against the handle (B of Figure 17). -
Page 18: Shutting Off The Engine
Shutting Off the Engine Operating the Self-Propel Drive Service Interval: After each use—Ensure that the engine shuts off within 3 seconds To operate the self-propel drive, squeeze the after releasing the blade-control bar. self-propel drive bar toward the handle and hold it in To shut off the engine, release the blade-control bar. -
Page 19: Recycling The Clippings
A worn grass bag could allow small stones and other similar debris to be thrown toward you or bystanders, resulting in serious personal injury or death. Check the grass bag frequently. If it is damaged, install a new Toro replacement bag. WARNING The blades are sharp;... -
Page 20: Operating Tips
Replace the blade when necessary with an original • Clear the area of sticks, stones, wire, branches, Toro replacement blade. and other debris that the blade could hit and throw. • Mow only dry grass or leaves. Wet grass and •... -
Page 21: After Operation
– If you suspect the engine speed is faster • Clean grass and debris from the machine to help than normal, contact an authorized Toro prevent fires. Clean up oil or fuel spills. distributor. •... -
Page 22: Cleaning Under The Machine
Cleaning under the Machine no longer see clippings being washed out from under the machine. To ensure the best performance, keep the underside Shut off the engine and wait for all moving parts of the machine clean. Be especially careful to keep to stop. -
Page 23: Maintenance
• To ensure optimum performance of the machine, adjusting, servicing, cleaning, or storing it. use only genuine Toro replacement parts and • Disconnect the spark-plug wire from the spark plug accessories. Replacement parts and accessories before performing any maintenance procedure. -
Page 24: Servicing The Air Filter
Servicing the Air Filter Changing the Engine Oil Service Interval: After the first 8 hours Service Interval: Every 25 hours—Clean the foam pre-filter (more frequently in dusty Every 50 hours conditions). Run the engine a few minutes before changing the oil Every 300 hours—Replace the paper air filter to warm it. -
Page 25: Adjusting The Self-Propel Drive
because grit entering the cylinder can Shut off the engine. damage the engine. If you must adjust the machine, do the following: Set the gap on the plug to 0.76 mm (0.030 inch); • If the wheels do not spin when you engage refer to Figure the self-propel-drive bar, the traction belt is... - Page 26 DANGER A worn or damaged blade can break, and a piece of the blade could be thrown toward you or bystanders, resulting in serious personal injury or death. • Inspect the blade periodically for wear or damage. • Replace a worn or damaged blade. Inspecting the Accelerator g024253 Service Interval: Before each use or daily—Inspect...
-
Page 27: Cleaning Under The Belt Cover
Installing the Blade Install the belt cover. Install a sharp, balanced Toro blade, the Connect the wire to the spark plug. accelerator, the lock washer, and the blade bolt. The sail of the blade must point toward the top of the mower housing for proper installation. -
Page 28: Cleaning The Wheels
Cleaning the Wheels Storage Service Interval: Every 40 hours To prepare the machine for off-season storage, Remove the rear wheels and clean any debris perform the recommended maintenance procedures; from the wheel-gear area. refer to Maintenance (page 23). Store the machine in a cool, clean, dry place. Cover the machine to keep it clean and protected. -
Page 29: Removing The Machine From Storage
Service the air filter; refer to Servicing the Air Filter (page 24). Tighten all nuts, bolts, and screws. Touch up all rusted or chipped paint surfaces with paint available from an Authorized Service Dealer. Removing the Machine from Storage Check and tighten all fasteners. Remove the spark plug and spin the engine rapidly using the starter to blow out the excess oil from the cylinder. - Page 30 Notes:...
- Page 31 The Toro Company (“Toro”) respects your privacy. When you purchase our products, we may collect certain personal information about you, either directly from you or through your local Toro company or dealer. Toro uses this information to fulfil contractual obligations - such as to register your warranty, process your warranty claim or to contact you in the event of a product recall - and for legitimate business purposes - such as to gauge customer satisfaction, improve our products or provide you with product information which may be of interest.
Need help?
Do you have a question about the 22283 and is the answer not in the manual?
Questions and answers