Table of Contents
Advertisement
Advertisement
Table of Contents

Summary of Contents for Q-SUN Xe-1
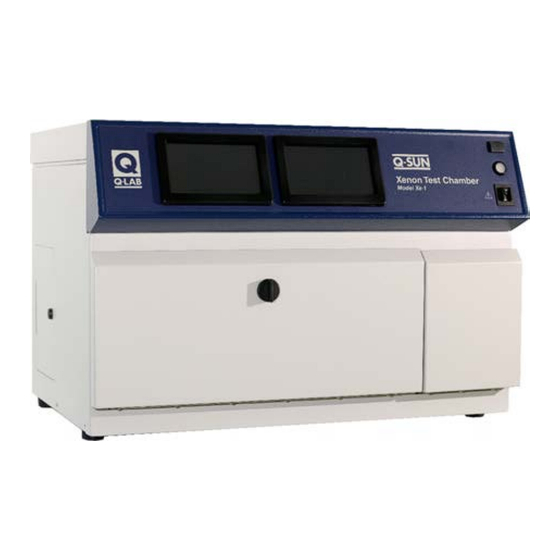
- Page 1 Q-SUN Xe-1 Xenon Test Chamber Revision Date 11 Apr 2022...
-
Page 2: Table Of Contents
6.4 Venting (May 2020) ............. 29 7. Start Up................... 31 7.1. Specimen Mounting (May 2020) ......... 31 7.2. Q-SUN Xe-1 All “E” Models Control Panel (May 2020) ..31 7.3. Q-SUN Xe-1-B Control Panel (May 2020) ......33 8. Warranty (Oct 2020) ............... 34... -
Page 3: Specifications, Classifications, Symbols
1. Specifications, Classifications, Symbols 1.1 Specifications, Classifications (Mar 2019) ● The recommended ambient operating temperature and relative humidity (RH) for the Q-SUN tester is 23 ± 5 °C and 50 ± 25% RH. ● The maximum ambient operating temperature and humidity is 40 °C and 80% relative humidity. -
Page 4: Symbols (Aug 2020)
Section 1. Specifications, Classifications, Symbols Section 1. Specifications, Classes, Symbols 1.2 Symbols (Aug 2020) Electrical Shock Hazard Hot Surfaces Hazard Attention Finger/Hand Crushing Hazard Local waste & recycling regulations per the WEEE Directive 2002/96/EC on Waste Electrical and Electronic Equipment... -
Page 5: Safety Information (Feb 2022)
● If the equipment is used in a manner not specified by the manufacturer, the protection provided by the equipment safety devices may be impaired. ● The Q-SUN meets the European Low Voltage Directive 2014/35/EU and complies with the requirements of EN 61010-1: 2010 (Third Edition), “Safety of Electrical Equipment for Measurement, Control and Laboratory Use” . - Page 6 Section 2. Safety Information Heat and Electrical Shock Hazards Warning Labels ● All Q-SUN Xe-1 models are equipped with a lamp access door interlock switch that turns off the xenon lamps when the lamp access door is opened (Figure 2a Figure 2b).
- Page 7 ● The Q-SUN lamps produce UV light that can cause severe sunburn, eye inflammation, and damage to your vision. ● All Q-SUN Xe-1 models are equipped with a chamber door interlock switch that turns off the xenon lamps when the chamber door is opened...
-
Page 8: General Description (Feb 2022)
3. General Description (Feb 2022) Overview ● This Quick Setup Guide is not a Technical Manual. ● This document is intended to explain only the basics of uncrating and setting up a Q-SUN Xenon Test Chamber. ● See the LX-5090-TM Q-SUN Xe-1 Technical Manual for complete information on the installation, operation, and maintenance of Q-SUN Xe-1-SE, Xe-1-BCE, Xe-1-SCE, and Xe-1-WE testers. -
Page 9: Operating Environment
4.1 Suitable Environments (May 2020) Ambient Laboratory Temperature and Humidity ● The recommended ambient operating temperature and relative humidity (RH) for Q-SUN testers is 23 ± 5 °C and 50 ± 25% RH. ● Operating outside the recommended range (or in rare cases, even within it), certain standards or test cycle conditions may not be achievable. -
Page 10: Unsuitable Environments (May 2020)
● Operating a Q-SUN tester in an unsuitable environment will void the warranty. ● DO NOT install Q-SUN testers in a room with corrosion chambers (Figure 4.2a). ● DO NOT locate a Q-SUN tester in a room with machines or processes that generate dust, particles, vapors, gases, etc (Figure 4.2b). - Page 11 Section 4. Operating Environment HVAC Vent Directly Above Tester Figure 4.2d: Keep tester away from sources of hot or cold air. Other Unsuitable Environments ● Outdoors: Rain and dust will corrode or short out electrical components. ● Metal Dust / Metal Chips: Do not locate the tester near metal cutting machines or metal grinding machines. Conductive metal dust or metal chips in the air will damage electronic components.
-
Page 12: Uncrating
5.2 Models Without Chiller (Feb 2022) Xe-1-B, Xe-1-SE, Xe-1-WE ● Q-SUN Xe-1-B, Xe-1-SE, and Xe-1-WE testers are shipped in one of two types of packaging (Figure 5.2a Figure 5.2b). - Page 13 Section 5. Uncrating Figure 5.2c: Labels on the carton indicate the Figure 5.2d: Open this envelope for important envelope to be opened first. uncrating instructions. Carton and Wooden Go To Step Frame Carton Only Go To Step Uncrating instructions are located in this envelope. Packaged with wooden frame continue with Step Remove and read the instructions.
- Page 14 Section 5. Uncrating Use Fork Lift to Remove Crate in One Piece If a fork lift is not available, use a pry bar to carefully remove the horizontal and vertical wooden pieces If a fork lift is available, use it to carefully lift the off of the tester.
- Page 15 Section 5. Uncrating Q-Lab recommends that at least two people 12. Carefully lift the tester off of the skid remove the Q-SUN from the skid. To complete tester installation see through Section 6.1 Section 6.4. 13. Go to the sections listed above.
-
Page 16: Models With Chiller (Feb 2022)
Section 5. Uncrating 5.3 Models With Chiller (Feb 2022) Xe-1-BCE, Xe-1-SCE ● Q-SUN Xe-1-BCE and Xe-1-SCE testers are shipped in one of two types of packaging (Figure 5.3a Figure 5.3b). ● Labels on the carton indicate the location of the instructions to be opened first (Figure 5.3c). - Page 17 Section 5. Uncrating Carton and Wooden Go To Step Frame Carton Only Go To Step 7 Uncrating instructions are located in this envelope. Packaged with wooden frame continue with Step Remove and read the instructions. Packaged with carton only, go to Step Remove ×3 Screws in...
- Page 18 Section 5. Uncrating Accessory Package If there is an accessory package, cut the band and Cut the bands holding the carton to the skid. remove the plastic wrap. Set the package aside. Remove the bands and boards. Remove Air Filter 10.
- Page 19 16. Screws (2 each side) attach runners to skid. filter frame points up. Close the door. Remove ×4 At least two people are needed to remove the Xe-1 with chiller from the skid. 18. Follow Step 19 through Step 26 to remove the Xe-1 Remove the four (4) screws.
- Page 20 Section 5. Uncrating Slide Forward 100 mm Off Skid 19. Two persons tilt the chiller. Pull the foam pieces out 20. Partially slide the unit off the skid so that the from under the bottom of the unit. Discard foam. runners overhang the skid by about 100 mm (4").
- Page 21 Section 5. Uncrating Runner Runner 25. Tilt up one side of the chiller and remove the 26. Tilt up the other side of the chiller and remove the runner. Discard runner. other runner. Discard runner. To complete tester installation see Leveling Glides Section 6.1...
-
Page 22: Set Up
With Casters No Casters No Casters 30.5" × 56.1" × 31.0" (W × H × D) ● The Q-SUN Xe-1-B and Xe-1-SE are designed for tabletop or benchtop installation. ● Figure 6.1a shows external dimensions and space requirements. 10 cm... - Page 23 Section 6. Set Up ● Q-SUN Xe-1-BCE and Xe-1-SCE models are designed for stand-alone installation. ● Figure 6.1b shows external dimensions and space requirements Rear Clearance Required = 0 cm Vent Vent Rear Exhaust 77 cm Q-SUN Xe-1-BCE, SCE Top View...
-
Page 24: Electrical (Apr 2022)
Xe-1 to the Main Power Supply. ● Q-SUN Xe-1 testers are provided with a 3 conductor, 14 AWG, ≈ 4.9 m (16') long power cord without plug. ● A qualified electrician should make all electrical connections to the tester. -
Page 25: Water (May 2020)
Figure 6.3a produces water pure enough for spray systems. This type of RO/DI system is required for Xe-1-SE, Xe-1-SCE and Xe-1-WE testers. Important: Use Type I, not Type II anion in the mixed bed tanks of the RO/DI system. The Strong Base Type I Anion resin in the mixed bed tanks is the most important part of these systems to prevent water spotting. - Page 26 Water Repurification System ● Q-Lab offers an optional water repurification system for the Q-SUN to conserve purified water. ● The system re-circulates and re-purifies the spray water instead of letting it go down the drain and can save over 50 liters of purified water per day.
- Page 27 Section 6. Set Up Connections ● Water supply and drain connection requirements for Xe-1 models are listed in Figure 6.3b below: Connections Xe-1-B Xe-1-BCE Xe-1-SE Xe-1-SCE Xe-1-WE Water Supply Required Drain Required Figure 6.3b: Xe-1 water connection requirements. For Xe-1 Models Requiring Connections ●...
- Page 28 Note: To disconnect inlet hose barb or elbow, push in on the dark gray gripper ring on the inlet connector. For Xe-1 Chiller Models (Xe-1-BCE, Xe-1-SCE) ● The air chiller condenses water on its evaporator coil. This water must then be drained away.
-
Page 29: Venting (May 2020)
Section 6. Set Up 6.4 Venting (May 2020) ● Xe-1 models are designed to release warm exhaust air directly into the room (See Figure 6.4b,c,d). ● Xe-1 testers do not require a vent hood or ducting. ● Do not attach to a powered vent. - Page 30 Chiller Excess Cool Air Exhaust Chiller Warm Air Rear View Exhaust Figure 6.4d: Q-SUN Xe-1-BCE and Xe-1-SCE lamp / ballast air intake and air exhaust areas. Q-SUN Xe-1-WE Air Exhaust Air Intake Air Exhaust Figure 6.4e: Q-SUN Xe-1-WE air intake and exhaust areas.
-
Page 31: Start Up
LX-5090-TM Q-SUN Xe-1 Technical Manual LX-5090B-TM Q-SUN Xe-1 basic Technical Manual for a complete guide to the programing and operation of the Q-SUN Xe-1 Xenon Test Chamber. 7.1. Specimen Mounting (May 2020) ● Specimens are placed on the tray in the test chamber (Figure 7.1). - Page 32 Section 7. Start Up Menu Screen Status Screen Figure 7.2b: Control interface and test status display. Main Menu Manage Test Timers Settings Manage Cycles Diagnostics Calibrate Contact Q-Lab Figure 7.2c: Menu screen. Black Panel Figure 7.2d: Status screen.
-
Page 33: Q-Sun Xe-1-B Control Panel (May 2020)
● The status and message display shows keypad input as well as diagnostic information and messages. (Figure 7.3c). ● The test monitor display shows test setup parameters and provides real-time data on actual test conditions (Figure 7.3d). Figure 7.3a: Power switch on Xe-1-B control panel. Program Silence Clear Alarm Irradiance... -
Page 34: Warranty (Oct 2020)
Section 8. Warranty 8. Warranty (Oct 2020) ● All Q-SUN Xe-1 Xenon Test Chambers and components are guaranteed against defects in workmanship or materials for one year. ● Liability is limited to replacing or repairing any part or parts that are defective in materials or workmanship. -
Page 35: Repair And Tester Support (Mar 2019)
Westlake, Ohio USA • Homestead, Florida USA • Buckeye, Arizona USA Bolton, England • Saarbrücken, Germany • Shanghai, China Additional Information ● Visit Q-Lab.com for additional information. LX-5090-QS © 2016, 2020, 2022 Q-Lab Corporation. All Rights Reserved. Q-Lab, the Q-Lab logo and Q-SUN are registered trademarks of Q-Lab Corporation.
Need help?
Do you have a question about the Xe-1 and is the answer not in the manual?
Questions and answers