Table of Contents
Advertisement
Available languages
Available languages
Quick Links
LIMITED WARRANTY
The Little Tikes Company makes fun, high quality toys. We warrant to the original purchaser that this
product is free of defects in materials or workmanship for one year * from the date of purchase
(dated sales receipt is required for proof of purchase). At the sole election of The Little Tikes
Company, the only remedies available under this warranty will be the replacement of the defective
part or replacement of the product. This warranty is valid only if the product has been assembled
and maintained per the instructions. This warranty does not cover abuse, accident, cosmetic issues
such as fading or scratches from normal wear, or any other cause not arising from defects in material
and workmanship. *The warranty period is three (3) months for daycare or commercial purchasers.
U.S.A and Canada: For warranty service or replacement part information, please visit our website at
www.littletikes.com, call 1-800-321-0183 or write to: Consumer Service, The Little Tikes Company,
2180 Barlow Road, Hudson OH 44236, U.S.A. Some replacement parts may be available for purchase
after warranty expires—contact us for details.
Outside U.S.A and Canada: Contact place of purchase for warranty service. This warranty gives you
specific legal rights, and you may also have other rights, which vary from country/state to
country/state. Some countries/states do not allow the exclusion or limitation of incidental or
consequential damages, so the above limitation or exclusion may not apply to you.
Please keep this manual as it contains important information.
© The Little Tikes Company,
an MGA Entertainment company.
LITTLE TIKES® and RIDE & RELAX® are
trademarks of Little Tikes in the U.S. and other
countries. All logos, names, characters,
likenesses, images, slogans, and packaging
appearance are the property of Little Tikes.
Little Tikes Consumer Service
2180 Barlow Road Hudson, Ohio 44236 U.S.A.
1015-0-E4
1-800-321-0183
Printed in China
16
MGA Entertainment UK Ltd
50 Presley Way
Crownhill
Milton Keynes
MK8 0ES
Visit our website at
Bucks, UK
www.littletikes.com
0800 521 558
to register your product and
to enter our sweepstakes.
www.littletikes.com
(No purchase necessary)
www.littletikes.co.uk
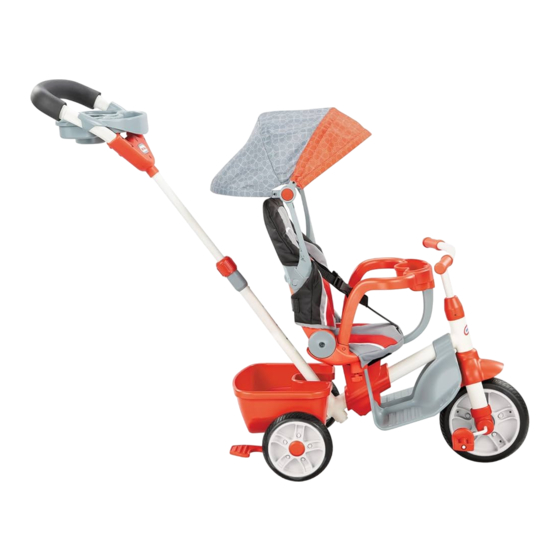
Ride & Relax® 5-in-1 Trike
Ride & Relax® 5-in-1 Trike
639814E4
R
S
D
C
T
E
I
J1
A
F
H
G
AGES: 9 MONTHS - 5 YEARS
ADULT ASSEMBLY AND SUPERVISION REQUIRED
CONTENTS
O
P
Q
N
M1
M2
B
I
J2
ENG
U
K
L x2
1
Advertisement
Table of Contents

Related Manuals for Little Tikes Ride & Relax 5-in-1 Trike


Summary of Contents for Little Tikes Ride & Relax 5-in-1 Trike
- Page 1 Ride & Relax® 5-in-1 Trike The Little Tikes Company makes fun, high quality toys. We warrant to the original purchaser that this product is free of defects in materials or workmanship for one year * from the date of purchase AGES: 9 MONTHS - 5 YEARS (dated sales receipt is required for proof of purchase).
-
Page 2: Included Hardware
POSITION 5 - TRIKE INCLUDED HARDWARE T1 x 8 (for K, M1/M2) Lock both rear brakes when parked. T2 x 1 (for E) T3 x 1 + N2 x 1 + x 1 (for D) T4 x 1 (for S) T5 x 2 (for O) disengage pedals T6 x 2 (for C) - Page 3 If these checks are not carried out, the toy could overturn or otherwise become a hazard. • Do not attempt to modify or repair this product. For help contact Little Tikes Consumer Service. disengage pedals •...
- Page 4 The right wheel and right brake have two lines (=). The left wheel and left brake have one line (-). POSITION 3 - PEDAL Inside the wheels and under the brakes are R and L indicators for right and left. slot Lock both rear brakes when parked.
- Page 5 POSITION 2 - STROLL T7 x 2 N1 x 2 Place washer over DISENGAGE PEDALS FOR POSITION 2 Lock both rear brakes when parked. the frame (A). Then, completely push the handlebars down. disengage pedals Place washer over frame. Then, push the handlebars down completely into the frame.
- Page 6 POSITION 1 - RECLINE T1 x 4 button DISENGAGE PEDALS FOR POSITION 1 Press frame (A) and front wheel (F) together until the button snaps into place. Lift up and pull back handle on seat to recline. T6 x 2 disengage pedals engage pedals Push in button.
- Page 7 T4 x 1 T8 x 2 T8 x 2 Slide seat to back of frame. Then, gently twist Gently twist knobs (T8) until they are securely knobs (T8) until they are securely fastened. fastened. T8 x 2 T5 x 2 T9 x 2 Handle adjusts to three heights.
- Page 8 Attach one side of the tray onto the handle. Then, adjust the other side of the tray and snap on to lock in place. Press in tabs before inserting the canopy into the openings on the seat. TO ADJUST LENGTH: IMPORTANT: Follow path to prevent...
-
Page 9: Garantie Limitée
UN ADULTE DOIT EFFECTUER L’ASSEMBLAGE ET LA SURVEILLANCE de The Little Tikes Company, le seul recours offert en vertu de cette garantie sera le remplacement de la pièce défectueuse du produit ou le remplacement du produit. Cette garantie est valide seulement CONTENU si le produit a été... - Page 10 POSITION 5 - TRICYCLE PIÈCES D’ASSEMBLAGE INCLUSES T1 x 8 (pour K, M1/M2) Verrouillez les deux freins arrière lorsque vous garez le tricycle. T2 x 1 (pour E) T3 x 1 + N2 x 1 + x 1 (pour D) T4 x 1 (pour S) T5 x 2 (pour O) débrayer les pédales...
-
Page 11: Entretien Et Nettoyage
• N’essayez pas de modifier ou de réparer ce produit. Pour obtenir de l’aide, contactez le service à la clientèle de débrayer les pédales Little Tikes. • Nettoyez le tricycle avec un chiffon légèrement humecté d’eau froide et un savon doux. Ne nettoyez pas le tricycle avec un produit corrosif ou abrasif. - Page 12 La roue droite et le frein droit ont deux lignes (=). La roue gauche et le frein gauche ont une ligne (-). POSITION 3 - PÉDALAGE Vous trouverez les indicateurs « R » et « L » pour droite et gauche respectivement à l’intérieur des roues et sous les freins.
- Page 13 POSITION 2 - PROMENADE T7 x 2 N1 x 2 Posez la rondelle sur DÉBRAYEZ LES PÉDALES POUR LA POSITION 2 le cadre (A). Puis baissez entièrement le guidon. débrayer les pédales Place washer over frame. Then, push the handlebars down completely into the frame.
- Page 14 POSITION 1 - INCLINAISON T1 x 4 bouton DÉBRAYEZ LES PÉDALES POUR LA POSITION 1 Reliez le cadre (A) et la roue avant (F) ensemble jusqu’à ce que le bouton s’enclenche. Soulevez et tirez la poignée du siège vers l’arrière pour incliner T6 x 2 le siège.
- Page 15 T4 x 1 T8 x 2 T8 x 2 Glissez le siège vers l’arrière du cadre. Puis, tournez Tournez délicatement les boutons (T8) jusqu’à ce délicatement les boutons (T8) jusqu’à ce qu’ils qu’ils soient fixés solidement. soient fixés solidement. T8 x 2 T5 x 2 T9 x 2 La poignée se règle à...
- Page 16 PATTE Posez une extrémité du plateau sur la poignée. Puis, ajustez l’autre extrémité du plateau et enclenchez-le en place. Enfoncez les pattes avant d’insérer le pare-soleil dans les ouvertures du siège. POUR RÉGLER LA LONGUEUR : IMPORTANT : suivez le trajet pour éviter le desserrage.
-
Page 17: Garantía Limitada
(se requiere un recibo fechado como prueba de compra). Bajo la sola discreción 639814E4 de The Little Tikes Company, los únicos recursos disponibles bajo esta garantía son la sustitución de REQUIERE MONTAJE Y SUPERVISIÓN POR PARTE DE UN ADULTO la pieza defectuosa o el reemplazo del producto. - Page 18 POSICIÓN 5 - TRICICLO ACCESORIOS DE MONTAJE INCLUIDOS T1 x 8 (para K, M1/M2) Accione ambos frenos traseros cuando lo aparque. T2 x 1 (para E) T3 x 1 + N2 x 1 + x 1 (para D) T4 x 1 (para S) T5 x 2 (para O) desengranar pedales T6 x 2 (para C)
- Page 19 POSICIÓN 4 - APRENDIZAJE ¡ATENCIÓN! LEA ESTAS INSTRUCCIONES ANTES DE MONTAR Y UTILIZAR EL PRODUCTO. Por favor, guarde el recibo como prueba de compra. ADVERTENCIA: REQUIERE MONTAJE POR PARTE DE UN ADULTO. • Lea todas las instrucciones detenidamente antes de montar este producto. ADVERTENCIA: MONTAJE •...
- Page 20 La rueda derecha y el freno derecho tienen dos líneas (=). La rueda izquierda y el freno izquierdo POSICIÓN 3 - PEDALEO tienen solo una línea (-). La llanta de las ruedas, y la parte inferior de los frenos, están marcados con «R», para derecha, y «L», para izquierda.
- Page 21 POSICIÓN 2 - PASEO T7 x 2 N1 x 2 Coloque la arandela DESACOPLE LOS PEDALES PARA LA POSICIÓN 2 Accione ambos frenos traseros cuando lo aparque. en el cuadro (A). Luego, presione los manillares completamente hacia abajo. desengranar pedales Place washer over frame.
- Page 22 POSICIÓN 1 - RECLINADO T1 x 4 Botón DESACOPLE LOS PEDALES PARA LA POSICIÓN 1 Presione el cuadro (A) y la rueda delantera (F) juntas hasta que el botón se enganche en su lugar. Tire del asa del asiento hacia arriba y hacia atrás para T6 x 2 reclinarlo.
- Page 23 T4 x 1 T8 x 2 T8 x 2 Deslice el asiento hacia atrás en el cuadro. Luego, Gire con cuidado los tornillos (T8) hasta que gire con cuidado los tornillos (T8) hasta que estén estén bien asegurados. bien asegurados. T8 x 2 T5 x 2 T9 x 2...
- Page 24 LENGÜETA Acople un lado de la bandeja al mango. A continuación, ajuste el otro lado de la bandeja y fíjelo en posición. Presione las lengüetas antes de insertar la capota en los orificios del asiento. PARA AJUSTAR LA LONGITUD: IMPORTANTE: Siga la dirección de las flechas para evitar que...
-
Page 25: Garantie
Diese Anleitung für mögliche Rückfragen bitte aufbewahren. Sie enthält wichtige Informationen. © The Little Tikes Company, eine Firma von MGA Entertainment. LITTLE TIKES® und RIDE & RELAX® sind in den USA und anderen Ländern Warenzeichen von Little Tikes. Alle Logos, Namen, Charaktere, L x2 Ähnlichkeiten, Bilder, Claims und das Erscheinungsbild der Verpackung... -
Page 26: Benötigte Werkzeuge
POSITION 5 - DREIRAD MONTAGEMATERIAL T1 x 8 (für K, M1/M2) Beide Hinterbremsen in geparkter Position feststellen. T2 x 1 (für E) T3 x 1 + N2 x 1 + x 1 (für D) T4 x 1 (für S) T5 x 2 (für O) Pedale lösen T6 x 2 (für C) T7 x 2 +... -
Page 27: Wartung Und Reinigung
• Versuchen Sie nicht, dieses Gerät zu modifizieren oder reparieren. Kontaktieren Sie den Verbraucherservice Pedale lösen von Little Tikes, wenn Sie Hife brauchen. • Reinigen Sie das Dreirad mit einem leicht feuchten Tuch (kaltes Wasser) and mildem Reinigungsmittel. Verwenden Sie keine aggressiven Mittel oder Scheuermittel zur Reinigung. - Page 28 Das rechte Rad und die rechte Bremse sind durch zwei Striche (=) gekennzeichnet; das linke Rad und die linke Bremse durch einen Strich (-). Die Rechts-/Linksmarkierung (R/L) befindet sich an der POSITION 3 - PEDAL Innenseite der Räder und unter den Bremsen. schlitz Beide Hinterbremsen in geparkter Position...
- Page 29 POSITION 2 - SPAZIEREN FAHREN T7 x 2 N1 x 2 Die Unterlegscheibe LÖSEN DER PEDALE FÜR POSITION 2 Beide Hinterbremsen in geparkter Positon feststellen. auf den Rahmen (A) legen und die Lenkstange bis zum Anschlag herunterdrücken. Pedale lösen Place washer over frame. Then, push the handlebars down completely into the frame.
- Page 30 POSITION 1 - SITZNEIGUNG T1 x 4 Knopf LÖSEN DER PEDALE FÜR POSITION 1 Rahmen (A) und Vorderrad (F) ineinander drücken und Knopf einrasten lassen. Um den Sitz zu neigen, den Griff nach oben schieben und zurück T6 x 2 ziehen.
- Page 31 T4 x 1 T8 x 2 T8 x 2 Den Sitz bis ans Ende des Rahmens schieben, dann Drehknöpfe (T8) vorsichtig ein- und dann die Drehknöpfe (T8) vorsichtig ein- und festdrehen. festdrehen. T8 x 2 T5 x 2 T9 x 2 Die Führstange ist 3-fach längenverstellbar: Den Knopf eindrücken und die...
- Page 32 STOPPER Erst eine Seite der Ablage am Griff befestigen, dann die andere Seite positionieren und fest einrasten lassen. Vor dem Einstecken des Dachs in die Öffnungen am Sitz die Stopper eindrücken. LÄNGENEINSTELLUNG: WICHTIG: Gurtführung beachten, damit sich der Gurt nicht lockern kann.
-
Page 33: Beperkte Garantie
Ride & Relax® 5-in-1 Driewieler Ride & Relax® 5-in-1 Driewieler De Little Tikes Company maakt speelgoed van hoge kwaliteit waar kinderen veel plezier aan beleven. Wij garanderen de oorspronkelijke koper voor een periode van één jaar * vanaf de LEEFTIJD: 9 MAANDEN - 5 JAAR oorspronkelijke aankoopdatum dat dit product vrij is van defecten in materiaal of werking. - Page 34 STAND 5 - DRIEWIELER INBEGREPEN HARDWARE T1 x 8 (voor K, M1/M2) Vergrendel beide remmen op de achterwielen als u de driewieler parkeert. T2 x 1 (voor E) T3 x 1 + N2 x 1 + x 1 (voor D) T4 x 1 (voor S) T5 x 2 (voor O) trappers ontkoppelen...
-
Page 35: Onderhoud En Schoonmaken
Als deze controles niet worden uitgevoerd, kan het product omvallen of op een andere manier gevaar opleveren. • Probeer dit product niet te wijzigen of repareren. Neem contact op met de klantenservice van Little Tikes in trappers ontkoppelen geval van vragen. - Page 36 Het rechterwiel en de rechterrem zijn voorzien van twee streepjes (=). Het linkerwiel en de linkerrem zijn voorzien van één streepje (-). Binnen in de wielen en onder de remmen bevinden STAND 3 - TRAPPER zich R- en L-indicatoren voor rechts en links. gleuf Vergrendel beide remmen op de achterwielen als u de...
- Page 37 STAND 2 - WANDELEN T7 x 2 N1 x 2 Plaats de sluitring ONTKOPPEL DE TRAPPERS VOOR STAND 2 Vergrendel beide remmen op de achterwielen als u de driewieler parkeert. over het frame (A). Duw de stang van het stuur vervolgens helemaal omlaag.
- Page 38 STAND 1 - ACHTEROVER T1 x 4 knop ONTKOPPEL DE TRAPPERS VOOR STAND 1 Duw het frame (A) en het voorwiel (F) in elkaar tot de knop op zijn plek klikt. Til de greep op het zitje omhoog en trek naar achteren om het T6 x 2 zitje achterover te laten leunen.
- Page 39 T4 x 1 T8 x 2 T8 x 2 Schuif het zitje naar de achterkant van het frame. Draai voorzichtig aan de knoppen (T8) totdat Draai vervolgens voorzichtig aan de knoppen (T8) deze stevig vastzitten. totdat deze stevig vastzitten. T8 x 2 T5 x 2 T9 x 2 De duwgreep is op drie...
- Page 40 LIPJE Maak een kant van het blad vast aan de duwgreep. Klik vervolgens de andere kant van het blad vast. Druk op de lipjes voordat u het zonnescherm in de openingen van het zitje plaatst. LENGTE AANPASSEN: BELANGRIJK: Volg het pad om losraken te voorkomen.
-
Page 41: Gwarancja Ograniczona
1-800-321-0183, lub pisemnie pod adresem: Consumer Service, The Little Tikes Company, 2180 Barlow Road, Hudson, OH 44236 USA. Po wygaśnięciu okresu gwarancji niektóre części zamienne mogą być nadal dostępne – prosimy o kontakt w celu ustalenia szczegółów. - Page 42 POZYCJA 5 – JAZDA NA TRÓJKOŁOWCU OSPRZĘT ZAWARTY W ZESTAWIE T1 x 8 (do K, M1/M2) Zaparkowany trójkołowiec zabezpiecz blokując oba tylne koła hamulcami. T2 x 1 (do E) T3 x 1 + N2 x 1 + x 1 (do D) T4 x 1 (do S) T5 x 2 (do O) Deaktywuj pedały...
- Page 43 • Nie próbować samodzielnej modyfikacji ani naprawy produktu. O pomoc proszę zwrócić się do Serwisu Deaktywuj pedały Konsumenta Little Tikes. • W przypadku zabrudzenia powierzchni przetrzeć ściereczką zwilżoną zimną wodą z mydłem. Do czyszczenia produktu nigdy nie stosować substancji żrących ani ściernych.
- Page 44 Koło prawe i hamulec prawy są oznaczone dwoma kreskami (=). Koło lewe i hamulec lewy sa oznaczone POZYCJA 3 - PEDAŁOWANIE jedną kreską (-). Po wewnętrznej stronie kół oraz pod hamulcami znajdują się oznaczenia R (prawy) i L (lewy). szczelina Zaparkowany trójkołowiec zabezpiecz blokując oba tylne koła hamulcami.
- Page 45 POZYCJA 2 - SPACEROWA T7 x 2 N1 x 2 Umieść podkładkę DEAKTYWUJ PEDAŁY DLA POZYCJI 2 Zaparkowany trójkołowiec zabezpiecz blokując oba tylne koła hamulcami. na trzpieniu ramy (A). Następnie nałóż z góry kierownicę i dociśnij. Deaktywuj pedały Place washer over frame. Then, push the handlebars down completely into the frame.
- Page 46 POZYCJA 1 - PÓŁLEŻĄCA T1 x 4 przycisk DEAKTYWUJ PEDAŁY DLA POZYCJI 1 Nałóż ramę (A) na przednie koło (F) i dociśnij aż przycisk zatrzaśnie się na ramie. Unieś rączkę znajdującą się na oparciu i pociągnij w tył, aby T6 x 2 odchylić...
- Page 47 T4 x 1 T8 x 2 T8 x 2 Delikatnie dokręć śruby z gałką (T8) aż poczujesz Przesuń siedzisko w tył. Następnie delikatnie dokręć śruby z gałką (T8) aż poczujesz opór. opór. T8 x 2 T5 x 2 T9 x 2 Długość...
- Page 48 WYPUST Zamocuj tackę na drobiazgi jedną stroną do uchwytu. Następnie przyłóż tackę z drugiej strony do uchwytu i zatrzaśnij. Przed zamocowaniem daszku do siedziska wciśnij wypusty. REGULACJA DŁUGOŚCI : WAŻNE: Zabezpiecz pas przed poluzowaniem. Przeciągnij środkowy pas bezpieczeństwa przez otwór w pokrowcu (U).
Need help?
Do you have a question about the Ride & Relax 5-in-1 Trike and is the answer not in the manual?
Questions and answers