
Related Manuals for Proroute RAPID-NR550


Summary of Contents for Proroute RAPID-NR550
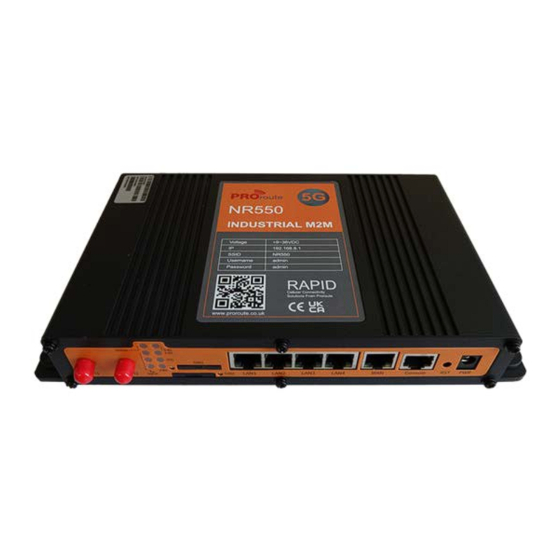
- Page 1 5G Industrial Router RAPID-NR550 User Manual This manual is applicable to the following products: NR550...
- Page 2 Note: There may be differences between models of accessories and interfaces, actual products shall prevail.
- Page 3 Copyright Notice All contents in the files are protected by copyright law, and all copyrights are reserved by Proroute Ltd Without written permission, all commercial use of the files from Proroute Ltd are forbidden, such as copy, distribute, reproduce the files, etc., but non-commercial purpose, downloaded or printed by individual (all files shall be not revised, and the copyright and other proprietorship notice shall be reserved) are welcome.
-
Page 4: Table Of Contents
Content ................... Chapter 1 Product Introduction 1.1 Product Overview ..................1 1.2 Diagram of Working Principle ................. 2 ......................Chapter 2 Installation 2.1 Overview............................3 2.2 Packing List ............................ 3 2.3 Installation and Cable Connection ....................4 2.4 Power Supply ..........................7 2.5 Indicators ............................ - Page 5 GRE ..................40 3.3.5 Security ..................42 Firewall ................... 42 3.3.6 Access Restrictions ................. 44 WAN Access ................44 URL Filter ................47 Packet Filter ................48 3.3.7 NAT ................... 49 Port Forwarding ................49 Port Range Forward ..............49 DMZ ..................
-
Page 6: Chapter 1 Product Introduction
Chapter 1 Product Introduction 1.1 Product Overview RAPID NR550 is a wireless communication router for the Internet of Things, which uses public 3G/4G/5G networks to provide users with wireless long-distance big data transmission functions. The product adopts high-performance industrial-grade 32-bit communication processor and industrial-grade wireless module, with embedded real-time operating system as the software support platform, and provides 1 RS232 (or RS485) + 4 Ethernet LAN + 1 Ethernet WAN + 2 WIFI interfaces, which can connect serial devices, Ethernet devices... -
Page 7: Diagram Of Working Principle
1.2 Block Diagram of Working Principle... -
Page 8: Chapter 2 Installation
Chapter 2 Installation 2.1 Overview 5G routers must be installed correctly to achieve the designed functions. Usually the installation of the equipment must be carried out under the guidance of qualified engineers approved by the company. 2.2 Packing List When you open the box, please keep the packing materials, so that you can use it when you need to transfer in the future. -
Page 9: Installation And Cable Connection
2.3 Installation and Cable Connection Size(mm): Antenna installation: The 5G antenna interface is an SMA female socket. Screw the SMA male of the matching wireless cellular antenna to the antenna interface and make sure to tighten it. To increase the isolation of the 5G antenna, try to keep the antenna at an angle of 30 degrees to enhance signal quality. - Page 10 The WIFI antenna interface is an SMA male socket. Screw the SMA female of the matching WIFI antenna to the antenna interface and make sure to tighten it. In addition, to increase the isolation of the Wi-Fi antenna, it is recommended that the two Wi-Fi are placed at a 90- degree angle.
- Page 11 Console (RS232) RJ45 Color Pin Map DB9F Content White/Orang RS485-A (Optional) RS485-B Orange (Optional) White/Green RS232 RX Blue White/Blue RS232 Green White/Brown Brown...
-
Page 12: Power Supply
2.4 Power Supply 5G routers are usually used in complex external environments. To adapt to the complex application environment and improve the stability of the system, the router adopts advanced power supply technology. Users can use the standard 12VDC/1.5A power adapter to power the 5G router, or directly use the DC 9~36V power supply to power the router. -
Page 13: Reset Button
2.6 Reset Button The 5G router has a reset button, marked as "RST" The function of this button is to restore the parameter configuration of the 5G router to factory values Methods as below: Power on device, let it running for 30 seconds, use a pen keep pressing the reset button for about 15 seconds, until all led turn off, the device will restart and reset to factory. -
Page 14: Chapter 3 Configuration And Management
Chapter 3 Configuration and Management This chapter describes how to configure and manage the Router. Configuration Connection Before configuration, you should connect the Router and your configuration PC with the supplied network cable. Plug the cable’s one end into the Local Network port of the Router, and another end into your configure PC’s Ethernet port. - Page 15 After access to the information main page Users need to input user name and password if it is their first time to login.
-
Page 16: Management And Configuration
Input correct username and password to visit relevant menu page. Default username is admin, password is admin. (available to modify user name and password on management page, then click submit) Management and Configuration 3.3.1 Setting The Setup screen is the first screen users will see when accessing the Router. Most users will be able to configure the Router and get it work properly using only the settings on this screen. - Page 17 Static IP WAN IP Address: Users set IP address by their own or ISP assigns Subnet Mask: Users set subnet mask by their own or ISP assigns Gateway: Users set gateway by their own or ISP assigns Static DNS1/DNS2/DNS3: Users set static DNS by their own or ISP assigns Automatic Configuration-DHCP IP address of WAN port gets automatic via DHCP PPPOE...
- Page 18 Username: Login users' ISP (Internet Service Provider) Password: Login users' ISP Dial String: Dial number of users' ISP APN: Access point name of users' ISP PIN: PIN code of users' SIM card Connection Type Connection type: Auto, Force 3G, Force 2G, prefer 3G, Prefer 2G options. If using 4G module, there has 4G network option.
- Page 19 Backup Detection Server IP: The server used to response the Router’s detection packet. This item is valid for method "Ping" and "Route". Note: When users choose the “Route” or “Ping” method, it’s quite important to make sure that the “Primary Detection Server IP” and “Backup Detection Server IP” are usable and stable, because they have to response the detection packet frequently.
- Page 20 Local IP Address: IP address of the Router Subnet Mask: The subnet mask of the Router Gateway: Set internal gateway of the Router. If default, internal gateway is the address of the Router Local DNS: DNS server is auto assigned by network operator server. Users enable to use their own DNS server or other stable DNS servers, if not, keep it default 13.
- Page 21 Maximum DHCP Users: Enter the maximum number of PCs that users want the DHCP server to assign IP addresses to. The absolute maximum is 253 if 192.168.1.2 is users' starting IP address. Client Lease Time: The Client Lease Time is the amount of time a network user will be allowed connection to the Router with their current dynamic IP address.
-
Page 22: Dynamic Dns
Dynamic DNS If user's network has a permanently assigned IP address, users can register a domain name and have that name linked with their IP address by public Domain Name Servers (DNS). However, if their Internet account uses a dynamically assigned IP address, users will not know in advance what their IP address will be, and the address can change frequently. -
Page 23: Clone Mac Address
DDNS Status shows connection log information Clone MAC Address Some ISP need the users to register their MAC address. The users can clone the Router MAC address to their MAC address registered in ISP if they do not want to re-register their MAC address Clone MAC address: Can clone three parts: Clone LAN MAC, Clone WAN MAC, Clone Wireless MAC. - Page 24 Dynamic Routing enables the Router to automatically adjust to physical changes in the network's layout and exchange routing tables with other Routers. The Router determines the network packets’ route based on the fewest number of hops between the source and destination.
-
Page 25: Vlans
VLANs VLANs function is to divide different VLAN ports by users' will. The system supports 15 VLAN port from VLAN1-VLAN15. However, there is only 5-time ports (1 WAN port and 4 LAN port) divided by users themselves, and LAN port and WAN port disable to divide into one VLAN port meanwhile. - Page 26 Bridging-Create Bridge: Creates a new empty network bridge for later use. STP means Spanning Tree Protocol and with PRIO users can set the bridge priority order. The lowest number has the highest priority. Bridging - Assign to Bridge: Allows users to assign any valid interface to a network bridge.
- Page 27 bridge. Note: Only create a bride can apply it. Assign to Bridge option: to assign different ports to created bridge. For example: assign port (wireless port) is ra0 in br1 bridge as below: Prio means priority level: work if multiple ports are within the same bridge. The smaller the number, the higher the level.
-
Page 28: Wireless
Choose not bridge to set the port's own properties, detailed properties are as below: MTU: Maximum transfer unit Multicast Forwarding:Enable or disable multicast forwarding Masquerade/NAT: enable or disable Masquerade/NAT IP Address: Set ra0's IP address, and do not conflict with other ports or bridge Subnet Mask: set the port's subnet mask Multiple DHCPD: Using multiple DHCP service. - Page 29 Wireless Network:“Eanble”, radio on. “Disable”, radio off. Wireless Mode:AP, Client, Adhoc, Repeater, Repeater Bridge four options。 Wireless Network Mode: Mixed:Support 802.11b, 802.11g, 802.11n wireless devices. BG-Mixed:Support 802.11b, 802.11g wireless devices. B-only:Only supports the 802.11b standard wireless devices. G-only:Only supports the 802.11g standard wireless devices. NG-Mixed:Support 802.11g, 802.11n wireless devices.
-
Page 30: Wireless Security
devices in the wireless network. It is case-sensitive and must not exceed 32 alphanumeric characters, which may be any keyboard character. Make sure this setting is the same for all devices in your wireless network. Wireless Channel:A total of 1-13 channels to choose more than one wireless device environment, please try to avoid using the same channel with other devices. - Page 31 Wireless security options used to configure the security of your wireless network. This route is a total of seven kinds of wireless security mode. Disabled by default, not safe mode is enabled. Such as changes in Safe Mode, click Apply to take effect immediately. WEP: It’s a basic encryption algorithm is less secure than WPA.
-
Page 32: Services
WPA Personal/WPA2 Personal/WPA2 Person Mixed: TKIP/AES/TKIP+AES, dynamic encryption keys. TKIP + AES, self-applicable TKIP or AES. WPA Person Mixed, allow WPA Personal and WPA2 Personal client mix. WPA Shared Key:Between 8 and 63 ASCII character or hexadecimal digits. Key Renewal Interval(In seconds):1-99999. WPA Enterprise/WPA2, Enterprise/WPA2,Enterprise Mixed: WPA Enterprise uses an external RADIUS server to perform user authentication. - Page 33 DHCPd assigns IP addresses to users’ local devices. While the main configuration is on the setup page users can program some nifty special functions here. Use NVRAM for Client Lease DB: Users can store data to the system NVRAM area is enabled.
- Page 34 Local DNS: Enables DHCP clients on the LAN to resolve static and dynamic DHCP hostnames. No DNS Rebind: When enabled, it can prevent an external attacker to access the Router’s internal Web interface. It is a security measure Additional DNSMasq Options: Some extra options users can set by entering them in Additional DNS Options.
- Page 35 SSH TCP Forwarding: Enable or disable to support the TCP forwarding admin Password Login: Allows login with the Router password (username is Port: Port number for SSHd (default is 22) Authorized Keys: Here users paste their public keys to enable key-based login (more secure than a simple password) System log Enable Syslog to capture system messages.
-
Page 36: Vpn
Ttraff Daemon: Enable or disable wan traffic counter function 3.3.4 VPN 1. PPTP PPTP Server Broadcast Support: Enable or disable broadcast support of PPTP server Force MPPE Encryption: Enable of disable force MPPE encryption of PPTP data DNS1/DNS2/WINS1/WINS2: Set DNS1/DNS2/WINS1/WINS2 Server IP: Input IP address of the Router as PPTP server, differ from LAN address Client IP(s): IP address assigns to the client, the format is xxx.xxx.xxx.xxx-xxx CHAP Secrets: Username and password of the client using PPTP service... -
Page 37: L2Tp
Server IP or DNS Name: PPTP server’s IP Address or DNS Name Remote Subnet: The network of the remote PPTP server Remote Subnet Mask: Subnet mask of remote PPTP server MPPE Encryption: Enable or disable Microsoft Point-to-Point Encryption。 MTU: Maximum Transmission Unit MRU: Maximum Receive Unit NAT: Network Address Translation Username: User name to login PPTP Server. -
Page 38: Openvpn
The format of CHAP Secrets is user * password *. L2TP Client Gateway (L2TP Server): L2TP server’s IP Address or DNS Name Remote Subnet: The network of remote PPTP server Remote Subnet Mask: Subnet mask of remote PPTP server MPPE Encryption: Enable or disable Microsoft Point-to-Point Encryption MTU: Maximum transmission unit MRU: Maximum receive unit NAT: Network address translation... - Page 39 Router (TUN): Network: Network address allowed by OPENVPN server Netmask: Netmask allowed by OPENVPN server Bridge (TAP): DHCP-Proxy mode: Enable or disable DHCP-Proxy mode Pool start IP: Pool start IP of the client allowed by OPENVPN server Pool end IP: Pool end IP of the client allowed by OPENVPN server Gateway: The gateway of the client allowed by OPENVPN server Netmask: Netmask of the client allowed by OPENVPN server Port: Listen port of OPENVPN server...
- Page 40 Use LZO Compression: Enable or disable use LZO compression for data transfer Redirect Default Gateway: Enable or disable redirect default gateway Allow Client to Client: Enable or disable allow client to client Allow Duplicate cn: Enable or disable allow duplicate cn TUN MTU Setting: Set the value of TUN MTU TCP MSS: MSS of TCP data TLS Cipher: TLS (Transport Layer Security) encryption standard supports AES-128 SHA...
- Page 41 Additional Config: Additional configurations of the server CCD-Dir DEFAULT file: Other file approaches TLS Auth Key: Authority key of Transport Layer Security Certificate Revoke List: Configure some revoke certificates OPENVPN Client Server IP/Name: IP address or domain name of OPENVPN server Port: Listen port of OPENVPN client Tunnel Device: TUN----Router mode, TAP --------------Bridge mode Tunnel Protocol: UDP and TCP protocol...
- Page 42 Use LZO Compression: Enable or disable use LZO compression for data transfer NAT: Enable or disable NAT through function Bridge TAP to br0: Enable or disable bridge TAP to br0 Local IP Address: Set IP address of local OPENVPN client TUN MTU Setting: Set MTU value of the tunnel TCP MSS: Mss of TCP data TLS Cipher: TLS (Transport Layer Security) encryption standard supports AES-128...
-
Page 43: Ipsec
4. IPSEC Connect Status and Control Show IPSEC connection and status of current Router on IPSEC page. Name: The name of IPSEC connection Type: The type and function of current IPSEC connection Common Name: Local subnet, local address, opposite end address and opposite end subnet of current connection Status: Connection status: closed, negotiating, establish Closed: This connection does not launch a connection request to opposite... - Page 44 Connection: This part contains basic address information of the tunnel Name: To indicate this connection name, must be unique Enabled: If enable, the connection will send tunnel connection request when it is reboot or re-connection, otherwise it is no need if disable Local WAN Interface: Local addresss of the tunnel Remote Host Address: IP/domain name of end opposite;...
-
Page 45: Gre
Enable Advanced Settings: Enable to configure 1 st and 2 nd phase information, otherwise it will automatic negotiation according to opposite end IKE Encryption: IKE phased encryption mode IKE Integrity: IKE phased integrity solution IKE Grouptype: DH exchange algorithm IKE Lifetime: Set IKE lifetime, current unit is hour, the default is 0 ESP Encryption: ESP encryption type ESP Integrity: ESP integrity solution ESP Keylife: Set ESP keylife, current unit is hour, the default is 0... - Page 46 GRE Tunnel: Enable or disable GRE function Number:Switch on/off GRE tunnel app Status:Switch on/off someone GRE tunnel app Name:GRE tunnel name Through:The GRE packet transmit interface Peer Wan IP Addr:The remote WAN address Peer Subnet:The remote gateway local subnet, eg: 192.168.1.0/24 Peer Tunnel IP:The remote tunnel IP address Local Tunnel IP:The local tunnel IP address Local Netmask:Netmask of local network...
-
Page 47: Security
3.3.5 Security Firewall You can enable or disable the firewall, filter specific Internet data types, and prevent anonymous Internet requests, ultimately enhance network security. Firewall Protection Firewall enhance network security and use SPI to check the packets into the network. To use firewall protection, choose to enable otherwise disabled. - Page 48 from the Ping or detection of other Internet users. so that make More difficult to break into your network. The default state of this feature is enabled ,choose to disable allow anonymous Internet requests. Filter IDENT (Port 113): Enable this feature can prevent port 113 from being scaned from outside.
-
Page 49: Access Restrictions
Log Level: Set this to the required log level. Set Log Level higher to log more actions. Options: When select Enable, the corresponding connection will be recorded in the journal, the disabled are not recorded. Incoming Log: To see a temporary log of the Router's most recent incoming traffic, click the Incoming Log button. - Page 50 applications. You can set specific PC-based Internet access policies. This feature allows you to customize up to ten different Internet Access Policies for particular PCs, which are identified by their IP or MAC addresses. Two options in the default policy rules: "Filter" and "reject". If select "Deny”, you will deny specific computers to access any Internet service at a particular time period.
- Page 51 Website Blocking by URL Address: You can block access to certain websites by entering their URL. Website Blocking by Keyword: You can block access to certain website by the keywords contained in their webpage set up Internet access policy 1. Select the policy number (1-10) in the drop-down menu. 2.
-
Page 52: Url Filter
designated days and time, then keep the default setting, Deny. If you want the listed PCs to have Internet filtered during the designated days and time, then click the radio button next to Filter. 8. Set the days when access will be filtered. Select Everyday or the appropriate days of the week. -
Page 53: Packet Filter
Discard packets conform to the following rules: Only discard the matching URL address in the list. Accept only the data packets conform to the following rules: Receive only with custom rules of network address, discarded all other URL address. Packet Filter To block some packets getting Internet access or block some Internet packets getting local network access, you can configure filter items to block these packets. -
Page 54: Nat
Source IP: Packet's source IP address Destination IP: Packet's destination IP address Note: "Source Port" ,"Destination Port" ,"Source IP" ,"Destination IP" could not be all empty ,you have to input at least one of these four parameters. 3.3.7 NAT Port Forwarding Port Forwarding allows you to set up public services on your network, such as web servers, ftp servers, e-mail servers, or other specialized Internet applications. -
Page 55: Dmz
such as web servers, ftp servers, e-mail servers, or other specialized Internet applications. Specialized Internet applications are any applications that use Internet access to perform functions such as videoconferencing or online gaming. When users send this type of request to your network via the Internet, the Router will forward those requests to the appropriate PC. -
Page 56: Qos Setting
DMZ Host IP Address: To expose one PC to the Internet, select Enable and enter the computer's IP address in the DMZ Host IP Address field. To disable the DMZ, keep the default setting:Disable Check all values and click Save Settings to save your settings. Click the Cancel changes button to cancel your unsaved changes. -
Page 57: Applications
Netmask Priority You may specify priority for all traffic from a given IP address or IP Range. Check all values and click Save Settings to save your settings. Click the Cancel changes button to cancel your unsaved changes. 3.3.9 Applications Serial Applications There is a console port on router. - Page 58 Enable Serial TCP Function: Enable the serial to TCP function Protocol Type: The protocol type to transmit data. UDP(DTU) – Data transmit with UDP protocol, work as a Proroute IP MODEM device which has application protocol and hear beat mechanism.
-
Page 59: Administration
3.3.10 Administration Management The Management screen allows you to change the Router's settings. On this page you will find most of the configurable items of the router code. The new password must not exceed 32 characters in length and must not include any spaces. - Page 60 Remote Access:This feature allows you to manage the Router from a remote location, via the Internet. To disable this feature, keep the default setting, Disable. To enable this feature, select Enable, and use the specified port (default is 8080) on your PC to remotely manage the Router.
-
Page 61: Keep Alive
Remote Upgrade: Custom-developed remote management server for this station router monitoring and management, configuration parameters, WIFI advertising updates. Keep Alive Schedule Boot & Shutdown The user can set the startup or shutdown time: For example, the user wants to set the start time at 8:07 and boot time at 9:07. Schedule Reboot... -
Page 62: Commands
You can schedule regular reboots for the router: Regularly after xxx seconds. At a specific date time each week or every day. Note: For date-based reboots Cron must be activated. See Management for Cron activation. Commands Commands:You can run command lines directly via the Web interface. Run Command:You can run command lines via the web interface. -
Page 63: Firmware Upgrade
Reset Router Settings:Click the Yes button to reset all configuration settings to their default values. Then click the Apply Settings button. Note: Any settings you have saved will be lost when the default settings are restored. After restoring the Router is accessible under the default IP address 192.168.1.1 and the default password admin. -
Page 64: Status
Backup Settings:You may backup your current configuration in case you need to reset the Router back to its factory default settings. Click the Backup button to back up your current configuration. Restore Settings:Click the Browse... button to browse for a configuration file that is currently saved on your PC. - Page 65 Router Name: Name of the router, setting basic setting to modify Router Model: Model of the Router, unavailable to modify Firmware Version: software version information MAC Address: MAC address of WAN, setting Clone MAC Address to modify Host Name: Host name of the Router, setting basic setting to modify WAN Domain Name: Domain name of WAN, setting basic setting to modify LAN Domain Name: Domain name of LAN, unavailable to modify Current Time: Local time of the system...
-
Page 66: Wan
Active IP Connections: Total active IP connections Protocol: Connection protocol Timeouts: Connection timeouts, unit is second Source Address: Source IP address Remote Address: Remote IP address Service Name: Connecting service port Status: Displayed status Connection Type: Disabled, static IP, automatic configuration-DHCP, PPPOE, PPTP, L2TP, 3G/UMTS Connection Uptime: Connecting uptime;... - Page 67 IP Address: IP address of router WAN Subnet Mask: Subnet mask of router WAN Gateway: The gateway of router WAN DNS1, DNS2, DNS3: DNS1/DNS2/DNS3 of Router WAN Remaining Lease Time: Remaining lease time of IP address in DHCP way DHCP Release: Release DHCP address DHCP Renew: Renew IP address in DHCP way, default is 1 day Login Status: Connection status of WAN Disconnection: Disconnect...
-
Page 68: Lan
Total Flow: Flow from power-off last time until now statistics, download and upload direction Monthly Flow: The flow of a month, unit is MB Last Month: The flow of last month Next Month: The flow of next month Backup: Backup data administration Restore: Restore data administration Delete: Delete data administration... - Page 69 MAC Address: MAC Address of the LAN port ethernet IP Address: IP Address of the LAN port Subnet Mask: Subnet Mask of the LAN port Gateway: Gateway of the LAN port Local DNS: DNS of the LAN port Host Name: Host name of LAN client IP Address: IP address of the client MAC Address: MAC address of the client Conn.
- Page 70 Host Name: Host name of LAN client IP Address: IP address of the client MAC Address: MAC address of the client Expires: The expiry the client rents the IP address Delete: Click to delete DHCP client Interface: The interface assigned by dial-up system Username: Username of PPPoE client Local IP: IP address assigned by PPPoE client Delete: Click to delete PPPoE client...
-
Page 71: Wireless
Interface: The interface assigned by dial-up system Username: Username of the client Local IP: Tunnel IP address of PPTP client Remote IP: IP address of PPTP client Delete: Click to delete PPTP client Wireless MAC Address: MAC address of wireless client Radio: Display whether radio is on or not Mode: Wireless mode Network: Wireless network mode... -
Page 72: Bandwidth
MAC Address: MAC address of wireless client Interface: Interface of wireless client Uptime: Connecting uptime of wireless client TX Rate: Transmit rate of wireless client RX Rate: Receive rate of wireless client Signal: The signal of wireless client Noise: The noise of wireless client SNR: The signal to noise ratio of wireless client Signal Quality: Signal quality of wireless client Neighbor's Wireless Network: Display other networks nearby... - Page 73 Bandwidth Monitoring-LAN Graph Abscissa axis: Time Vertical axis: Speed rate Bandwidth Monitoring-WAN Graph Abscissa axis: Time Vertical axis: Speed rate...
-
Page 74: Sys-Info
Bandwidth Monitoring-Wireless (W10) Graph Abscissa axis: Time Vertical axis: Speed rate Sys-Info Router Name: The name of the Router Router Model: The model of the Router LAN MAC: MAC address of LAN port WAN MAC: MAC address of WAN port... - Page 75 Wireless MAC: MAC address of the wireless WAN IP: IP address of WAN port LAN IP: IP address of LAN port Radio: Display whether radio is on or not Mode: Wireless mode Network: Wireless network mode SSID: Wireless network name Channel: Wireless network channel TX Power: Reflection power of wireless network Rate: Reflection rate of wireless network...
- Page 76 DHCP Server: Enabled or disabled ff-radauth: Enabled or disabled USB Support: Enabled or disabled Total Available: The room for total available of RAM (that is physical memory minus some reserve and the kernel of binary code bytes) Free: Free memory, the Router will reboot if the memory is less than 500kB Used: Used memory, total available memory minus free memory Buffers: Used memory for buffers, total available memory minus allocated memory Cached: The memory used by high-speed cache memory...
-
Page 77: Appendix
Appendix The following steps describe how to setup Windows XP Hyper Terminal. 1. Press Start Programs Accessories Communications Hyper Terminal 2. Input connection name, choose “OK” 3. Choose the correct COM port which connects to modem, choose “OK” 4. Configure the serial port parameters as following, choose “OK” Bits per Second: 115200 Data bits: 8... - Page 78 Parity: None Stop bits: 1 Flow control: None 5. Complete Hyper Terminal operation, it runs as following Note: If the user is using the win7 system, you can download a win7 super terminal on the internet. Universal serial interface or other similar software.
Need help?
Do you have a question about the RAPID-NR550 and is the answer not in the manual?
Questions and answers