
Summary of Contents for Cosmopolitan Phoenix Univue Series
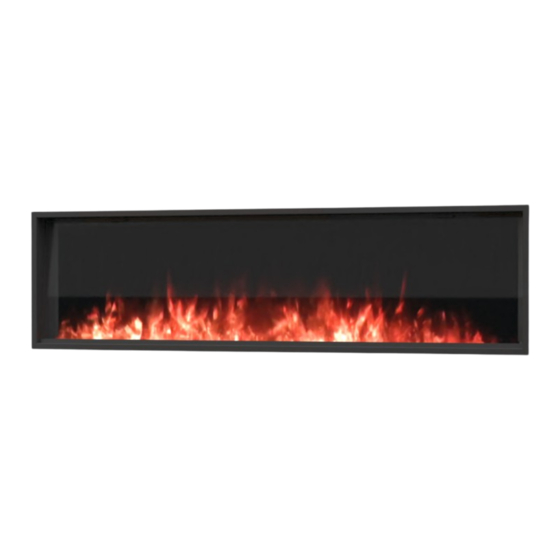
- Page 1 Phoenix Univue Series PUV-44 • PUV-56 • PUV-68 • PUV-80 • PUV-96 Installation, Operation and Maintenance Manual...
-
Page 2: Table Of Contents
User Instructions Important Instructions Appliance Data Box Contents Pre-Installation Installation Operation Service Parts Troubleshooting Frequently Asked Questions Cleaning and Maintenance Wiring Diagram Notes... -
Page 3: Important Instructions
Important Instructions shutdown. Allow surfaces to cool before touching. When using electrical heaters, basic precautions should always be followed to reduce CAUTION: In order to avoid overheating, do not cover the heater. the risk of fire, electric shock and injury to persons, including the following: Read all instructions before installing or using this heater. -
Page 4: Appliance Data
Appliance Data PUV-44 PUV-56 PUV-68 PUV-80 PUV-96 Volts/HZ AC 120V 60Hz 14 Amps AC 120V 60Hz 14 Amps AC 120V 60Hz 14 Amps AC 120V 60Hz 14 Amps AC 120V 60Hz 14 Amps Amps Heater AC 120V 1500W AC 120V 1500W AC 120V 1500W AC 120V 1500W AC 120V 1500W... -
Page 5: Box Contents
Box Contents Pre-Installation Installing fireplace Select a suitable location that is not susceptible to moisture and is a safe distance from drapes, furniture and high traffic areas. A qualified electrician should add a dedicated flexible 20 amp 120V circuit per local building codes. Quantity Item Note: Follow all national and local electrical codes. -
Page 6: Installation
Installation Fully Recessed Installation 2. Install L Metal Nailing Flanges to the top and bottom 4. Mask the exposed fire unit during the drywall Model of the fire unit. process. Install drywall to the drywall stops on the perimeter of the fire box. For more information on 3. - Page 7 Insert Installation 1. This installation is optimized for a 2x4 framed wall. 2. Install L Metal Nailing Flanges to the fireplace. 4. The unit can be covered with a custom facade. Prepare the framed opening according to the chart Decorate as desired. 3.
- Page 8 Installing Optional Wall Mounted Touch Control 1. Locate 2-gang low voltage bracket within 20 feet (6m) of fireplace. Install according to manufacturer’s instructions. 2. Remove glass face (attached with magnets) from metal bracket. 3. Attach the metal bracket to the low voltage bracket with the included screws.
-
Page 9: Operation
Operation The unit has a main power switch just in front of the glass on the right hand side. A Power indicator lights for wall switch as well as upper right hand-held remote is included. corner of the main unit This will cycle the machine on and off. -
Page 10: Service Parts
Service Parts ITEM PHOTO DESCRIPTION ITEM PHOTO DESCRIPTION PRINTED CIRCUIT BOARD CONTROLS LOW VOLTAGE AND TB-3 3 POLE TERMINAL BLOCK 120 V HIGH VOLTAGE FUNCTIONS AND TRANSFORMER MANUAL TOUCH CONTROL HF-230 HEATER FAN 120 V BOARD PTC HEATER 120 V 1500 WATTS 20 AMP POWER SWITCH SM-230 SPINDLE MOTOR 120 V 50-60 HZ... - Page 11 ITEM PHOTO DESCRIPTION FLED-44 FLED-56 FLED-68 RGB FLAME LED BAR SET FLED-80 FLED-96 EB/DL-44 EB/DL-56 RGB EMBER BED/DOWNLIGHT EB/DL-68 LED STRIP EB/DL-80 EB/DL-96 SR-44 SR-56 SPINDLE ROD FOR FLAME AND SR-68 EMBER BED SR-80 SR-96 GF-44 GF-56 GF-68 FRONT GLASS GF-80 GF-96 PS/F-44...
-
Page 12: Troubleshooting
Troubleshooting Problem Possible Cause Corrective Action A. Breaker tripped or circuit has no power A. Reset breaker, test circuit for power B. Internal component is frozen and needs to be reset B. Turn power off at the main breaker for 20 seconds. Turn power back on. Nothing comes on (touch screen, etc.) C. -
Page 13: Frequently Asked Questions
Frequently Asked Questions Cleaning and Maintenance Q. How do you change the optional Wall Touch Control to Fahrenheit/Celsius? There is very little maintenance involved with your electric fireplace. Please follow the few points below: A. Long press on the up and down arrows on the fire unit to toggle between Fahrenheit and Celsius. -
Page 14: Wiring Diagram
Wiring Diagram WIFI Flame light Ember Bed light Downlight Ember Flame Motor Motor... -
Page 15: Notes
Notes...
Need help?
Do you have a question about the Phoenix Univue Series and is the answer not in the manual?
Questions and answers