Table of Contents
Advertisement
Quick Links
STEP BY STEP INSTALLATION INSTRUCTIONS
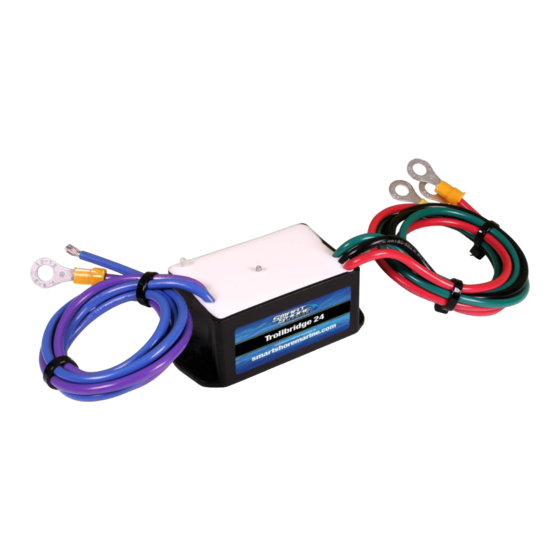
Trollbridge 24
24-Volt Charger/Combiner
Table Of Contents
How it Works................................................................................................................................................2
Features.......................................................................................................................................................2
Parts & Tools for Installation..........................................................................................................................2
Operating Modes.........................................................................................................................................3
Battery Chargers. ......................................................................................................................................4-5
Safeguards.................................................................................................................................6
Installation.............................................................................................................................7-11
Troubleshooting.....................................................................................................................................12-13
Warranty.................................................................................................................................................14-15
Technical Support.......................................................................................................................................15
Technical Support: 901.382.8888 M-F 8a-5p Central • Tech@SmartShoreMarine.com • SmartShoreMarine.com
© 2023 SmartShore Marine
Advertisement
Table of Contents

Related Manuals for Hypertech SMART SHORE MARINE Trollbridge 24


Summary of Contents for Hypertech SMART SHORE MARINE Trollbridge 24
-
Page 1: Table Of Contents
STEP BY STEP INSTALLATION INSTRUCTIONS Trollbridge 24 24-Volt Charger/Combiner Table Of Contents How it Works..............................2 Features...............................2 Parts & Tools for Installation..........................2 Operating Modes............................3 Battery Chargers............................4-5 Safeguards..........................6 Installation..........................7-11 Troubleshooting.............................12-13 Warranty..............................14-15 Technical Support............................15 Technical Support: 901.382.8888 M-F 8a-5p Central • Tech@SmartShoreMarine.com • SmartShoreMarine.com ©... -
Page 2: How It Works
Trollbridge 24 Installation Instructions How The Trollbridge 24 Charger/Combiner Works The SmartShore Marine Trollbridge 24™ Charger/Combiner allows you to charge your 24-Volt trolling motor batteries from the 12-Volt alternator on your outboard. It will do the same with any single output 12-Volt charger, or even your trailer hookup. -
Page 3: Operating Modes
Trollbridge 24 Installation Instructions Operating Modes TROLLING MODE The Trollbridge 24 automatically switches from Charging to Trolling Mode when you turn on the trolling motor. Trolling Mode activates quickly when the trolling motor is detected and the GREEN LED will turn on to indicate 24-Volts is going to the trolling motor. When the trolling motor is active the Trollbridge 24 powers off. -
Page 4: Battery Chargers
Trollbridge 24 Installation Instructions Battery Chargers Multi-Output Battery Charger (Shore Power Charger) The Trollbridge 24 is compatible with multi-output chargers, but they are not necessary. If you already have a multi-output charger you can configure it two (2) ways; separate from, or through the Trollbridge 24. - Page 5 Trollbridge 24 Installation Instructions Battery Chargers (Cont’d) 3 BATTERY SYSTEM This configuration uses the starting battery, house battery, and separate trolling battery to make 24-Volts. The trolling motor should be dedicated and NOTHING else should connect to it. For maximum life, the batteries should be matched as closely as possible for age, capacity, and chemistry.
-
Page 6: Safeguards
Trollbridge 24 Installation Instructions Trollbridge 24 Safeguards Safeguards Care must be taken during the installation process of your Trollbridge 24. Damage to the batteries and/or electrical equipment can occur if the Trollbridge 24 is installed or configured incorrectly. Please read through these instructions completely before installation. This installation process will require you to work near multiple batteries. -
Page 7: Installation
Trollbridge 24 Installation Instructions Trollbridge 24 Installation WARNING! Don’t Destroy Your Trollbridge 24 Our quality control requires that each Trollbridge 24 is thoroughly tested and passes various tests multiple times prior to shipment. If you install it improperly you can destroy it. The cost for a replacement after improper installation can be up to half the original purchase price plus shipping to replace. - Page 8 Trollbridge 24 Installation Instructions Trollbridge 24 Installation (Cont’d) CLEAN BATTERY TERMINALS BEFORE CHARGING BATTERIES Lead Acid – After the battery has been charged, fill each battery to the appropriate level with distilled water. Do not add water to a discharged battery or it may result in acid leaking which could cause injury or damage to your boat.
- Page 9 Trollbridge 24 Installation Instructions Trollbridge 24 Installation (Cont’d) 5. MOUNTING LOCATION Mount the Trollbridge 24 such that you can see the green Charging LED. This will need to be in an area that is away from a direct heat source, vibration, gas vapors, battery gases, and above the boat waterline.
- Page 10 Trollbridge 24 Installation Instructions Trollbridge 24 Installation (Cont’d) 8. Connect the BLACK Trollbridge 24 ground (-) wire to the negative terminal of the starting battery. This terminal also connects to the negative (-) of the starting battery and the negative (-) side of the trolling motor. Extending this wire with 8- or 6-gauge wire can be done, if necessary.
- Page 11 Trollbridge 24 Installation Instructions Trollbridge 24 Installation (Cont’d) 12. TROLLING MOTOR CONNECTION Connect the BLUE cable to trolling motor positive (+) input. 8- or 6-gauge wire is normal and can be used to extend this wire, if necessary. A 60-Amp circuit breaker with an on/off switch is recommended in this motor connection for protection against shorts, motor failure and as a safety disconnect.
-
Page 12: Troubleshooting
Trollbridge 24 Installation Instructions Troubleshooting CHARGE MODE WON’T ACTIVATE DO YOU HAVE A BAD BATTERY? The amount of charging available is limited by the alternator output and how long it runs. Older outboard alternators often have minimal output so running time for the trolling motor will be governed by the running time of the main engine and the battery capacity. - Page 13 Trollbridge 24 Installation Instructions Troubleshooting (Cont’d) WHAT IS THE NORMAL BATTERY VOLTAGE MEASURMENTS? You can check your battery voltages with a volt meter. In Trolling Mode, the GREEN LED is ON. Check the wiring by putting the negative (-) meter lead on the BLACK cable connected to the Starting battery.
- Page 14 Trollbridge 24 Installation Instructions Warranty Information Limited One (1) Year Warranty The Trollbridge 24 is warranted to the original purchaser against defects in material and workmanship appearing within one (1) year after the date of purchase. The unit will either be repaired or replaced, free of charge.
-
Page 15: Warranty
Trollbridge 24 Installation Instructions Warranty Information (Cont’d) Fuses And Circuit Breakers - STRONGLY RECOMMENDED To avoid the risk of melted cables or fire you SHOULD install a circuit breaker rated for your motor (typically 60-Amps or less) on the positive connection to the trolling motor. We also recommend the installation of a 100-Amp in-line fuse on the red wire from the Trollbridge 24 unit to the positive post on the starting motor battery (+12V) and a 100-Amp in-line fuse on the purple (or white) wire from the Trollbridge 24 unit to the positive post of the trolling motor battery (+24V).
Need help?
Do you have a question about the SMART SHORE MARINE Trollbridge 24 and is the answer not in the manual?
Questions and answers