Table of Contents
Advertisement
Quick Links
SEM-DSC PowerSeries Dual-Path (SEM300) - Installation Guide
Alarm.com Dual-Path System Enhancement Module (SEM) is the most cost-effective and comprehensive solution to
migrate compatible DSC PowerSeries™ PC1616, PC1832, and PC 1864 panels to Alarm.com's award-winning
interactive services. The Dual-Path SEM supports the 4G LTE cellular network and optional Broadband Ethernet. This
ensures the longest life cycle with the most secure and reliable service.
Equipment
System Enhancement Module
Installation guide
https://answers.alarm.com/Partner/Installation_and_Troubleshooting/Panels/SEM/SEM-DSC_PowerSeries/SEM-DSC_Power...
Updated: Wed, 13 Sep 2023 15:24:21 GMT
1
Advertisement
Table of Contents

Summary of Contents for Knowledge SEM-DSC Power Series
- Page 1 SEM-DSC PowerSeries Dual-Path (SEM300) - Installation Guide Alarm.com Dual-Path System Enhancement Module (SEM) is the most cost-effective and comprehensive solution to migrate compatible DSC PowerSeries™ PC1616, PC1832, and PC 1864 panels to Alarm.com’s award-winning interactive services. The Dual-Path SEM supports the 4G LTE cellular network and optional Broadband Ethernet. This ensures the longest life cycle with the most secure and reliable service.
- Page 2 Wire Wall anchors and screws https://answers.alarm.com/Partner/Installation_and_Troubleshooting/Panels/SEM/SEM-DSC_PowerSeries/SEM-DSC_Power… Updated: Wed, 13 Sep 2023 15:24:21 GMT...
-
Page 3: Recommended Tools And Supplies
Panel compatibility The SEM-DSC PowerSeries is only compatible with the following panels that are version 4.20+: • PC1616 • PC1832 • PC1864 Recommended tools and supplies Note: These are not included. • Screwdrivers: Small blade and Phillips • Drill and bits for screws and/or wall anchors •... - Page 4 Inspect for peripheral devices 1. Take inventory of all peripheral devices (wireless receivers, zone expanders, keypads, power supplies, etc.) wired to the system. 2. Inspect peripheral device wiring to verify there are no loose ends or intermittent connections between the device and system.
- Page 5 Disarm and power down the panel 1. Verify the panel is disarmed and clear of any alarms, troubles, or system faults. 2. If you do not know the current installer code, check the installer code at the panel before powering down the panel. 3.
- Page 6 https://answers.alarm.com/Partner/Installation_and_Troubleshooting/Panels/SEM/SEM-DSC_PowerSeries/SEM-DSC_Power… Updated: Wed, 13 Sep 2023 15:24:21 GMT...
- Page 7 Create an Alarm.com account 1. Create a new Alarm.com customer account using the Partner Portal or MobileTech app. The IMEI located on the Alarm.com module will be needed to create this account. 2. During the account creation process, you are prompted to enter the current installer code on the panel. Alarm.com uses this code to access panel programming and read information stored on the panel.
- Page 8 3. At the end of the Create New Customer process, you are able to print or email a Welcome Letter for the customer, which includes login information for the Alarm.com Customer Website. For more information about creating a customer account, see How to create an Alarm.com customer account.
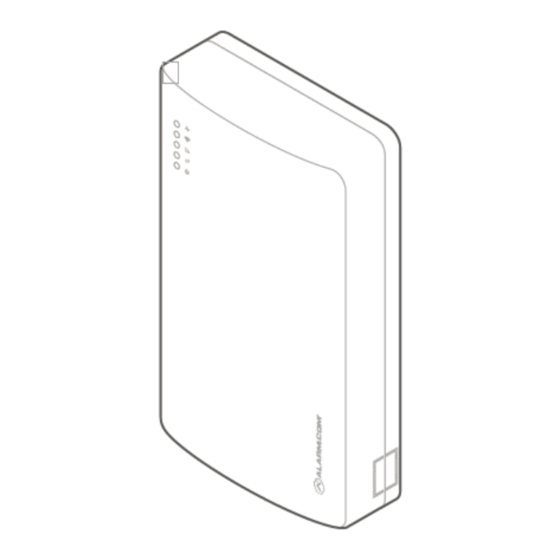
- Page 9 When ready to mount: 1. Press in on the thumb tabs located at the bottom of the enclosure, then swing up the top half of the enclosure cover to expose the internal components. 2. Place the SEM enclosure backplate against the wall at the desired mounting location and mark the four mounting holes.
- Page 10 against the unit and wall before moving to the next step. Important: This screw is critical for the wall tamper functionality and should not be overlooked. 7. Tighten the first two mounting screws fully to the unit and wall to complete the mounting process. https://answers.alarm.com/Partner/Installation_and_Troubleshooting/Panels/SEM/SEM-DSC_PowerSeries/SEM-DSC_Power…...
- Page 11 Wiring To wire the panel: 1. Connect the yellow/green data cables and red/black power supply cables to the designated locations at the SEM and panel. 2. Connect an Ethernet cable to the pre-installed Ethernet jack to utilize dual-path communication. Local network changes may be required before the broadband path activates.
- Page 12 4. Before completing the mounting, verify the wiring connections are secure and all internal components are in their proper location. 5. Then close the enclosure by sliding the cover into the mounting points at the top of the enclosure base and then swinging down the cover to snap the thumb tabs into place.
-
Page 13: Additional Information
Important: If the system was previously communicating over a phone line, we recommend Disabling Telco Line Monitoring (Section 015, Option 7) and Removing the Phone Numbers (Section 301-303). Broadcast sensor names For the SEM to be able to read the sensor names stored on the panel and display them on Alarm.com, you must broadcast the sensor names stored on the keypads. -
Page 14: Installation Settings
PowerSeries. For more information about Z-Wave communication, Z-Wave signal strength, and additional Z-Wave resources, General Z-Wave Information. Installation settings For the SEM to communicate with the panel and report all alarms, certain panel settings must be set at the panel. These settings are automatically changed during installation, so no further action is required by the installer. - Page 15 Note: For advanced troubleshooting, open the cover to look at the Alarm.com module LEDs. For more information about the module LEDs, see SEM-DSC PowerSeries - Module LED Troubleshooting. Trouble LED The Trouble LED flashes 1 to 8 times in a four-second interval to indicate specific error conditions. Flash pattern Description The Alarm.com module cannot communicate with the...
- Page 16 Flash pattern Description The Alarm.com module provisioning process could not 2 then 4 be completed. Power cycle the system. If the error persists, contact Alarm.com CORE Technical Support. The Alarm.com module provisioning process could not 2 then 5 be completed because the module is currently roaming off the carrier’s primary network.
-
Page 17: Troubleshooting
Flash pattern Description Steady long flash (~2 sec) The cellular communication path is active. Both cellular and broadband communication paths are Long flash (~2 sec) followed by a short flash (~0.5 sec) active. The broadband communication path is active. This Steady short flash (~0.5 sec) should also accompany an error LED flash. - Page 18 Customer equipment list If the device list is empty on the MobileTech app or Partner Portal equipment page, the SEM may be having problems communicating with the panel. To resolve: 1. Check for and remove any incompatible devices. For information about incompatible devices, see Are any devices incompatible with the SEM-DSC PowerSeries?.
-
Page 19: Specifications
Questions? If you are experiencing difficulties with your installation, please contact Alarm.com CORE Technical Support and we'll be happy to assist further. Specifications 12 V nominal, 130 mA (continuous) 2000 mA Power requirements (instantaneous peaks) maximum (from panel battery) 4G LTE with 3G HSPA, 2G GSM fallback Cellular network Note: Cat-M uses the 4G LTE Cat-M1 network, no fallback... - Page 20 • Reorient or relocate the receiving antenna. • Increase the separation between the equipment and receiver. • Connect the equipment into an outlet on a circuit different from that to which the receiver is connected. • Consult the dealer or an experienced radio/TV technician for help. Operation is subject to the following two conditions: 1.
Need help?
Do you have a question about the SEM-DSC Power Series and is the answer not in the manual?
Questions and answers