Advertisement
- 1 Safety First
- 2 Handling EdgeRunner
- 3 Battery Charging and Care
- 4 Drain Down — Cool Down — Charge Up
- 5 Battery Heat
- 6 Running and Charging Times
- 7 Battery Installation
- 8 Transmitter Battery Installation
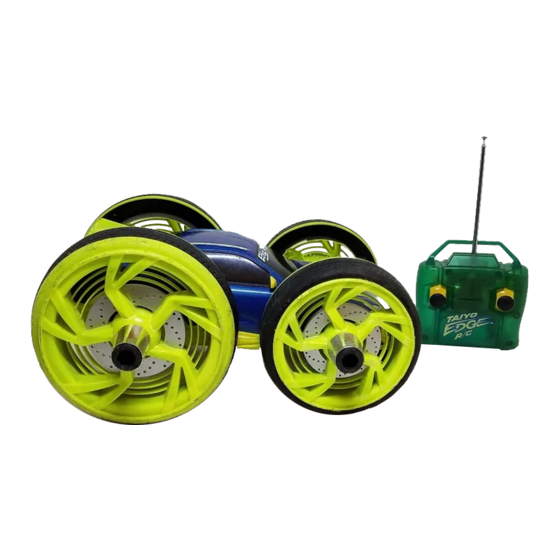
- 9 Transmitter Operation
- 10 EdgeRunner Tips
- 11 R/C Facts for Improved Operation
- 12 Troubleshooting Guide
- 13 Documents / Resources
Safety First
- Adult supervision is recommended.
- Drive your vehicle in a safe area away from people, pets, cars, etc. Not in streets, in or near water, or in darkness!
- Don't touch or try to pick up vehicle when it is in motion. Wait until it stops completely. Hold vehicle by back end as shown in Fig. 1 of these instructions (next page). Never pick up by the wheels.
- Keep hair, fingers, face and loose clothing away from wheels while the vehicle is switched on or while the transmitter is operating.
- Be a responsible EdgeRunner® operator! DO NOT RUN VEHICLE IN WATER OR RAIN—WARRANTY WILL BE VOIDED
Batteries and Charger Required (not included)
- 6.0-Volt Rechargeable NiCd or NiMH Battery Pack (commonly available for R/C vehicles at many toy and hobby dealers). For longer run time, use high-capacity "NiMH" (Nickel-Metal Hydride) or "NiCd" (Nickel-Cadmium) battery packs with highest "mAh" rating number (650mAh or higher).
- Matching Battery Charger for NiMH or NiCd Battery Packs. (Adult supervision of recharging is recommended)
- One 9-Volt Alkaline Battery for Transmitter required (not rechargeable).
IMPORTANT BATTERY SAFETY INFORMATION
Battery Cautions

TO AVOID BATTERY LEAKAGE
- Make sure the batteries are inserted with the correct polarity and follow the toy and battery manufacturers' instructions.
- Do not mix old and new batteries.
- Do not mix alkaline, standard (carbon-zinc), or rechargeable (nickel-cadmium, nickel-metal hydride) batteries, or different types of rechargeable batteries.
- Remove weak or exhausted batteries from the product. Remove batteries from product when not in use.
ADDITIONAL IMPORTANT BATTERY SAFETY INFORMATION
- An adult should help with battery replacement.
- Only batteries of the same or equivalent type as recommended in the "Battery Installation" (or replacement) instructions are to be used.
- Non-rechargeable batteries are not to be recharged.
- If removable rechargeable batteries are used, they are only to be charged under adult supervision.
- Rechargeable batteries are to be removed from the product before they are charged.
- If you use a battery charger, it should be examined regularly for damage to the cord, plug, enclosure and other parts.
Do not use a damaged battery charger until it has been properly repaired. - Dispose of batteries safely and properly.
NOTE: NICKEL CADMIUM BATTERIES MUST BE RECYCLED OR DISPOSED OF PROPERLY.
Contact your local area office of solid waste management or other appropriate local agency for information.

Handling EdgeRunner®
Always pick up and hold your EdgeRunner vehicle from the back as shown, or from the front and back with both hands. Keep hair, hands, fingers, face and loose clothing away from wheels while the vehicle is switched on or while the transmitter is operating. Never pick up by the wheels. (Fig. 1)

Battery Charging and Care
(Battery Pack and Charger not included)
Vehicle will not run without a 6.0V rechargeable NiCd or NiMH battery pack and matching charger, commonly available for R/C vehicles at many toy and hobby dealers. Always follow the instructions that came with your battery pack and recharger. Adult supervision of battery charging is required.
Drain Down — Cool Down — Charge Up
- For best performance, run battery pack all the way down before recharging. Run until wheels slow to a stop.
- Allow the battery pack to cool before recharging.
- Charge fully according to the battery/charger manufacturer's instructions. Charging times differ with different types, brands, models, ages and conditions of battery packs and chargers. The first few charges of a new battery will provide shorter run times than later charges.
Battery Heat
- Battery gets hot after use! This is normal, but be careful. Wait until battery is cool (20 minutes or more if needed) before charging. Charging batteries when they are hot will severely reduce the number of times they can be recharged.
- After charging, battery pack will be warm. This is normal.
Running and Charging Times
- NiCd and NiMH battery packs are not like alkaline batteries. They lose all their power suddenly, not gradually, and vehicle will stop very soon after slowing down becomes noticeable, with little warning. This is normal.
- Typical running time will be between 9 to 15 minutes for a typical freshly charged NiCd battery pack in good condition, depending on how you operate your vehicle, but observe how long your battery runs in your vehicle under the conditions you operate in.
Running time may vary over life of battery, with the first 6 charge cycles yielding significantly shorter run times than later charges. "Cycle" your battery (Drain Down/ Cool Down/Charge Up) at least 6 times before evaluating run time.
Battery Installation

The 6.0V battery pack drops into the open battery box on the bottom of the vehicle. You then slide the pack toward the rear of the vehicle and turn the latch to secure it.
- Turn BATTERY LATCH on the bottom of the vehicle clockwise to open position. (Fig. 2)

- Drop fully charged BATTERY PACK straight into BATTERY OPENING with ARROW on BATTERY PACK pointing AWAY from LATCH. (Fig. 3)


- Slide BATTERY PACK all the way in direction of ARROW (toward back of vehicle) until it stops. (Fig. 4)

- Turn LATCH all the way to CLOSED position to secure BATTERY PACK inside BATTERY OPENING. (Fig. 5)


Transmitter Battery Installation
- Slide open BATTERY DOOR on back of TRANSMITTER. (Fig. 6)
![]()
- Insert a fresh, new 9-VOLT ALKALINE BATTERY with the polarity (+/-) as shown on the bottom of battery compartment. (Fig. 7)
![]()
- Hold battery in place with thumb and replace BATTERY DOOR. (Fig. 8)
![]()
- Check for transmitter operation by looking for the red "POWER ON" LIGHT on front to light when a JOYSTICK is pushed. If LIGHT does not come on, check battery polarity. If LIGHT still does not light, install a brand-new battery.


Transmitter Operation
EdgeRunner is controlled similar to a tank — each stick on the transmitter controls a pair of wheels, left or right.

LEFT STICK
Left Wheels Forward
Release for Left Side Neutral
Left Wheels Reverse
"POWER ON" LIGHT
Note: There is no on/off switch on Transmitter.
Moving the sticks turns it on.
It turns off after a period of non-use to save battery power.
ANTENNA
Hold Transmitter so antenna points straight up in the air. Don't touch during operation.
RIGHT STICK
Right Wheels Forward
Release for Right Side Neutral
Right Wheels Reverse
- LEFT STICK powers left side wheels. When pushed up (forward) it turns vehicle to RIGHT.
- RIGHT STICK powers right side wheels. When pushed up (forward) it turns vehicle to LEFT.
- BOTH STICKS when pushed up together make the vehicle go straight ahead.
- BOTH STICKS when pulled down make the vehicle go straight in reverse.
- "PULSE" THE STICKS (rapid push-release-push-release) to achieve slower speeds for better maneuverability.
EdgeRunner Tips
- In order to race or operate two vehicles together, one must be 27MHz and one must be 49MHz.
| PULSING THE STICKS To get your EdgeRunner® smoothly up to speed, move both sticks rapidly up (forward), quickly release them, move up again, release, etc., continuously until up to speed. | AUTO SHUTDOWN EdgeRunner has electronic protection circuitry that may shut it off during operation. Just release both joysticks for a few seconds to reset. | SEE EDGERUNNER R/C STUNT GUIDE FOR STUNT DRIVING TECHNIQUES |
R/C Facts for Improved Operation
- When battery start to fully discharge, vehicle may slow, stop, or refuse to respond to your control. It's time to recharge vehicle battery or replace transmitter battery. This is absolutely the #1 cause of all problems and questions!
- Radio frequency interference can interfere with the control of your vehicle. Buildings, power wires, other R/C transmitters, or CB radio can all cause problems. Pick a place to drive that's away from these things.
- Hold Transmitter so antenna points up, not toward the vehicle. Keep vehicle within range (about 65 feet) to keep control. If vehicle goes out of range, try lifting transmitter high into air to increase range for vehicle recovery.
- Wipe vehicle clean and dry after each use, including inside battery compartments.
- Turn vehicle power switch off immediately after running. Remove batteries for storing. Keep vehicle and Transmitter away from heat and direct sunlight and moisture.
Troubleshooting Guide
Don't take your EdgeRunner back to the store--try solving problems using this valuable guide.
| Problem | Probable Cause | Correction |
Vehicle runs slowly, or won't move, or won't steer |
|
|
Erratic operation, loss of control, short range |
|
|
Vehicle stops working after going through water, mud or snow |
|
|

Documents / ResourcesDownload manual
Here you can download full pdf version of manual, it may contain additional safety instructions, warranty information, FCC rules, etc.
Download Taiyo Edge R/C EDGE RUNNER 2 - Motorized Toy Car Manual
Advertisement

Need help?
Do you have a question about the EDGE RUNNER 2 and is the answer not in the manual?
Questions and answers