Table of Contents
Advertisement
Available languages
Available languages
Quick Links
FM/AM Compact Disc Player
Autoestéreo para disco
compacto
Operating Instructions
Manual de instrucciones
To cancel the demonstration (DEMO) display, see page 9.
Para cancelar la pantalla de demostración (DEMO), consulte la página 11.
CDX-GT450S
CDX-GT450
© 2005 Sony Corporation
2-653-154-11 (1)
GB
ES
CS
Advertisement
Chapters
Table of Contents

Related Manuals for Sony CDX-GT450


Summary of Contents for Sony CDX-GT450
- Page 1 FM/AM Compact Disc Player Autoestéreo para disco compacto Operating Instructions Manual de instrucciones To cancel the demonstration (DEMO) display, see page 9. Para cancelar la pantalla de demostración (DEMO), consulte la página 11. CDX-GT450S CDX-GT450 © 2005 Sony Corporation 2-653-154-11 (1)
- Page 2 BBE MP works by generating even-order harmonics from the source material, effectively recovering warmth, detail and nuance. SonicStage and its logo are trademarks of Sony Corporation. ATRAC, ATRAC3, ATRAC3plus and their logos are trademarks of Sony Corporation.
-
Page 3: Table Of Contents
Table of Contents Getting Started Resetting the unit ......4 Setting the clock ......4 Detaching the front panel . -
Page 4: Getting Started
Getting Started Resetting the unit Before operating the unit for the first time, or after replacing the car battery or changing the connections, you must reset the unit. Detach the front panel and press the RESET button with a pointed object, such as a ballpoint pen. -
Page 5: Attaching The Front Panel
Attaching the front panel Place the hole A of the front panel onto the spindle B on the unit, then lightly push the left side in. Press (SOURCE) on the unit (or insert a disc) to operate the unit. Note Do not put anything on the inner surface of the front panel. -
Page 6: Location Of Controls And Basic Operations
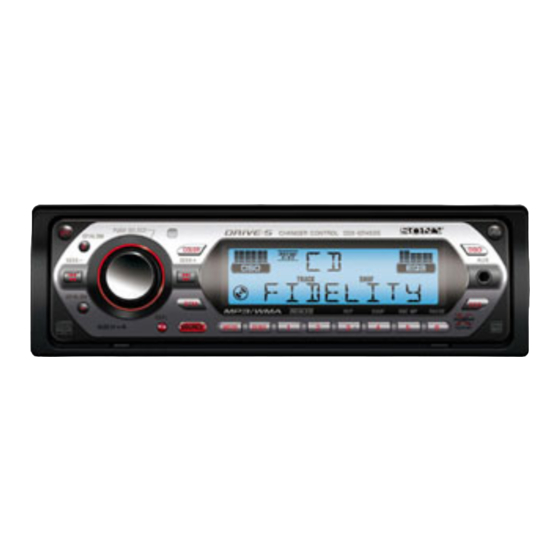
To select one of 7 colour settings for the LCD. E Display window F DSO button 2 To select the DSO mode (1, 2, 3 or OFF). The larger the number, the more enhanced the effect. G OPEN button 5 CDX-GT450S CDX-GT450... -
Page 7: Reset Button
H GP* /ALBM* +/– buttons* To skip groups/albums (press); skip groups/ albums continuously (press and hold). I SEEK –/+ buttons To skip tracks (press); skip tracks continuously (press, then press again within about 1 second and hold); reverse/fast- forward a track (press and hold). Radio: To tune in stations automatically (press);... -
Page 8: Display Items
For details on selecting a CD/MD changer, see page 10. Display items A ATRAC CD indication B Source C WMA/MP3/BBE MP indication D Track number/Elapsed playing time, Disc/ artist name, Album/group number* group name, Track name, Text information* Clock *1 Album/group number is displayed only when the album/group is changed. -
Page 9: Other Functions
Other functions Changing the sound settings Adjusting the sound characteristics — BAL/FAD/SUB You can adjust the balance, fader, and subwoofer volume. Press the select button repeatedly until “BAL,” “FAD” or “SUB” appears. The item changes as follows: LOW* t MID* t HI* BAL (left-right) t FAD (front-rear) t SUB (subwoofer volume)*... -
Page 10: Using Optional Equipment
A.SCRL (Auto Scroll) To scroll long displayed item automatically when the disc/group/track/album is changed. – “A.SCRL-ON”: to scroll. – “A.SCRL-OFF” ( ): to not scroll. LPF (Low Pass Filter) To select the subwoofer cut-off frequency: “LPF OFF” ( ), “LPF125Hz” or “LPF 78Hz.” * When the unit is turned off. -
Page 11: Rotary Commander Rm-X4S
Repeat and shuffle play 1 During playback, press (3) (REP) or (4) (SHUF) repeatedly until the desired setting appears. Select To play REP-DISC* disc repeatedly. SHUF- tracks in the changer in random CHGR* order. SHUF-ALL* tracks in all units in random order. -
Page 12: Additional Information
Additional Information Precautions • If your car has been parked in direct sunlight, allow the unit to cool off before operating it. • Power aerial will extend automatically while the unit is operating. Moisture condensation On a rainy day or in a very damp area, moisture condensation may occur inside the lenses and display of the unit. -
Page 13: Replacing Lithium Battery
SonicStage 2.0 or later, or SonicStage Simple Burner 1.0 or 1.1. If you have any questions or problems concerning your unit that are not covered in this manual, consult your nearest Sony dealer. Maintenance Replacing the lithium battery of the card remote commander Under normal conditions, the battery will last approximately 1 year. -
Page 14: Fuse Replacement
If the fuse blows again after replacement, there may be an internal malfunction. In such a case, consult your nearest Sony dealer. Cleaning the connectors The unit may not function properly if the connectors between the unit and the front panel are not clean. In... -
Page 15: Specifications
Fraunhofer IIS and Thomson. Note This unit cannot be connected to a digital preamplifier or an equalizer which is Sony BUS system compatible. Design and specifications are subject to change without notice. • Lead-free solder is used for soldering certain parts. -
Page 16: Troubleshooting
• The position of the fader control (FAD) is not set for a 2-speaker system. • The CD changer is incompatible with the disc format (MP3/WMA/ATRAC CD). t Play back with a Sony MP3 compatible CD changer, or this unit. No beep sound. • The beep sound is cancelled (page 9). -
Page 17: Error Displays/Messages
*2 The disc number of the disc causing the error appears in the display. If these solutions do not help improve the situation, consult your nearest Sony dealer. If you take the unit to be repaired because of CD playback trouble, bring the disc that was used at the time the problem began. - Page 18 Bienvenido Gracias por adquirir este reproductor de discos compactos Sony. Mientras maneja puede disfrutar de las funciones siguientes: • Reproducción de CD Puede reproducir CD-DA (incluidos CD TEXT*), CD-R/CD-RW (archivos MP3/WMA, incluidos también Multi Session (página 13)) y CD de ATRAC (formato ATRAC3 y ATRAC3plus (página 14)).
- Page 19 Tabla de contenido Procedimientos iniciales Restauración de la unidad ....4 Ajuste del reloj ......4 Extracción del panel frontal.
-
Page 20: Procedimientos Iniciales
Procedimientos iniciales Restauración de la unidad Antes de utilizar la unidad por primera vez, o después de sustituir la batería del automóvil o de cambiar las conexiones, debe restaurarla. Extraiga el panel frontal y presione el botón RESET con un objeto puntiagudo, como un bolígrafo. -
Page 21: Colocación Del Panel Frontal
Colocación del panel frontal Coloque el orificio A del panel frontal en el eje B de la unidad y, a continuación, presione ligeramente el lado izquierdo hacia adentro. Presione (SOURCE) en la unidad (o inserte un disco) para utilizarla. Nota No coloque nada sobre la superficie interior del panel frontal. -
Page 22: Ubicación De Los Controles Y Operaciones Básicas
Para seleccionar uno de los 7 ajustes de color para la pantalla LCD. E Pantalla F Botón DSO 2 Para seleccionar el modo DSO (1, 2, 3 u OFF). Cuanto más alto sea el número, mejor será el efecto. CDX-GT450S CDX-GT450... - Page 23 G Botón OPEN 5 H Botones GP* /ALBM* +/–* Para omitir grupos/álbumes (presionar); para omitir grupos/álbumes en forma continua (mantener presionado). I Botones SEEK –/+ Para omitir pistas (presionar); para omitir pistas en forma continua (presionar y volver a presionar dentro de 1 segundo y mantener); para retroceder o avanzar una pista rápidamente (mantener presionado).
-
Page 24: Cd
Si desea obtener información adicional sobre cómo seleccionar un cambiador de CD/MD, consulte la página 11. Elementos de la pantalla A Indicador de CD de ATRAC B Fuente C Indicador de WMA/MP3/BBE MP D Número de pista/Tiempo de reproducción transcurrido, Nombre del disco/artista, Número del álbum/grupo* álbum/grupo, Nombre de la pista, Información de texto*... -
Page 25: Radio
Radio Almacenamiento y recepción de emisoras Precaución Para sintonizar emisoras mientras maneja, utilice la función Memoria de la mejor sintonía (BTM) para evitar accidentes. Almacenamiento automático — BTM Presione (SOURCE) varias veces hasta que aparezca “TUNER”. Para cambiar de banda, presione (MODE) varias veces. -
Page 26: Otras Funciones
Otras funciones Cambio de los ajustes de sonido Ajuste de las características del sonido — BAL/FAD/SUB Puede ajustar el balance, el equilibrio y el volumen del altavoz potenciador de graves. Presione el botón de selección varias veces hasta que aparezca “BAL”, “FAD”... -
Page 27: Uso De Un Equipo Opcional
CONTRAST Para ajustar el contraste de la pantalla. El nivel de contraste puede ajustarse en 7 pasos. M.DSPL (Desplazamiento de indicaciones) Para seleccionar el modo de desplazamiento de indicaciones. – “M.DSPL-SA” ( ): para mostrar patrones en movimiento y el analizador de espectro. –... -
Page 28: Mando Rotatorio Rm-X4S
Omisión de álbumes y discos 1 Durante la reproducción, presione (GP/ALBM) +/–. Presione (GP/ALBM) Para omitir álbumes y suéltelo (manténgalo presionado durante un momento). álbumes en a los 2 segundos de haberlo forma continua soltado por primera vez. discos varias veces. discos en forma y, a continuación, vuelva a continua... -
Page 29: Información Complementaria
Información complementaria Precauciones • Si estaciona el automóvil bajo la luz directa del sol, deje que la unidad se enfríe antes de usarla. • La antena motorizada se extenderá automáticamente mientras la unidad se encuentre en funcionamiento. Condensación de humedad En días lluviosos o en zonas muy húmedas, es posible que se condense humedad en el interior de las lentes y la pantalla de la unidad. -
Page 30: Acerca De Los Cd De Atrac
Si desea realizar alguna consulta o solucionar algún problema relativo a la unidad que no se trate en este manual, póngase en contacto con el distribuidor Sony más cercano. Mantenimiento Sustitución de la pila de litio del control remoto de tarjeta En condiciones normales, la pila dura aproximadamente 1 año (la duración puede ser... -
Page 31: Sustitución Del Fusible
En tal caso, consulte con el distribuidor Sony más cercano. Limpieza de los conectores Es posible que la unidad no funcione correctamente si los conectores entre ésta y el panel frontal están sucios. -
Page 32: Especificaciones
Nota Esta unidad no puede conectarse a un preamplificador digital ni a un ecualizador que sea compatible con el sistema BUS de Sony. El diseño y las especificaciones están sujetos a cambios sin previo aviso. • Se ha utilizado soldadura sin plomo para soldar ciertos componentes. -
Page 33: Solución De Problemas
2 altavoces. • El cambiador de CD no es compatible con el formato del disco (MP3/WMA/CD de ATRAC). t Reproduzca con un cambiador de CD de Sony compatible con MP3 o con esta unidad. No se escuchan pitidos. -
Page 34: Mensajes/Indicaciones De Error
Cierre la tapa o inserte los MD correctamente. OFFSET Es posible que se haya producido una falla interna. t Revise la conexión. Si el indicador de error permanece en pantalla, póngase en contacto con el distribuidor Sony más cercano. - Page 35 *2 La pantalla muestra el número del disco que causa el error. Si estas soluciones no ayudan a mejorar la situación, póngase en contacto con el distribuidor Sony más cercano. Si entrega la unidad para su reparación a causa de problemas en la reproducción de CD, lleve el disco...
- Page 36 鸣谢惠顾! 感谢您惠购 Sony CD 播放机。使用下列功能 可以愉悦您的驾驶心情。 • CD 播放 您可以播放 CD-DA (也包括 CD TEXT*) 、 CD-R/CD-RW (也包括 Multi Session 的 MP3/WMA 文件 (第 12 页) )和 ATRAC CD (ATRAC3 和 ATRAC3plus 格式 (第 13 页) ) 。 光盘类型 光盘上的标签 CD-DA ATRAC CD •...
- Page 37 目录 入门指南 重设本机 ...4 设定时钟 ...4 拆卸前面板 ...4 安装前面板 ...5 将光盘插入本机 ...5 退出光盘 ...5 控制器位置和基本操作 主机 ...6 卡片式遥控器 RM - X151 ...6 显示项目 ...8 重复和随机播放 ...8 收音机 存储和接收电台 ...8 自动存储- BTM ...8 手动存储 ...8 接收已存储的电台 ...8 自动调谐 ...8 其他功能 更改声音设定 ... 9 调整声音特性-...
-
Page 38: 入门指南 重设本机
入门指南 重设本机 在第一次使用本机前,或更换汽车电瓶或改 变连接后,必须重设本机。 卸下前面板,并用尖头物体,如圆珠笔等, 按 RESET 按钮。 RESET 按钮 注意 按 RESET 按钮将会清除时钟设定和某些已存储的内容。 设定时钟 时钟采用 12 小时制数字显示。 按住选择按钮。 出现设定画面。 反复按选择按钮直至出现 “CLOCK-ADJ” 。 按 (DSPL)。 小时指示闪烁。 转动音量控制拨盘,设定小时和分钟。 若要移动数字指示,按 (DSPL)。 按选择按钮。 设定完成,时钟开始走时。 若要显示时钟,则按 (DSPL)。再次按 (DSPL) 将返回前一个画面。 用卡片式遥控器 在步骤 4 中,若要设定小时和分钟,按 M 或 m。 拆卸前面板... -
Page 39: 安装前面板
安装前面板 将前面板上的孔 A 放在装置的轴 B 上,然 后将左侧轻轻推入。 按装置上的 (SOURCE) (或装入光盘) ,操 作装置。 注意 切勿在前面板内表面放任何东西。 将光盘插入本机 按 (OPEN)。 装入光盘 (标签面朝上) 。 关上前面板。 播放自动开始。 退出光盘 按 (OPEN)。 按 Z。 光盘退出。 关上前面板。... -
Page 40: 控制器位置和基本操作 主机
B 音量控制拨盘 / 选择按钮 9 MODE 调节音量 (转动);选择设定项目 (按 并转动) 。 C 卡片式遥控器接收器 D COLOR 按钮 从 7 种颜色设置中为 LCD 选择一种颜色。 SCRL E 显示窗 F DSO 按钮 2 选择 DSO 模式 (1,2,3 或 OFF) 。数字 越大,增强的效果越大。 G OPEN 按钮 5 CDX-GT450S CDX-GT450... - Page 41 H GP* /ALBM* +/- 按钮 * 跳过群组 / 乐曲集 (按);连续跳过群 组 / 乐曲集 (按住) 。 I SEEK -/+ 按钮 CD: 跳过曲目 (按);连续跳过曲目 (按, 然后在约 1 秒钟内再按并保持不放);快 退 / 快进曲目 (按住) 。 收音机: 自动调入电台(按);手动搜台(按住) 。 J DSPL (显示)按钮 8 改变显示项目。 K BTM 按钮 8 启动...
-
Page 42: 显示项目
关于选择 CD/MD 换碟机的详细信息,请参阅 第 10 页。 显示项目 A ATRAC CD 指示 B 音源 C WMA/MP3/BBE MP 指示 D 曲目号 / 已播放时间, 光盘 / 艺术家名称, 乐曲集 / 群组号 * ,乐曲集 / 群组名称, 曲目名称,文字信息 * *1 仅当更改了乐曲集 / 群组时, 才会显示乐曲集 / 群组 号。... -
Page 43: 其他功能 更改声音设定
其他功能 更改声音设定 调整声音特性- BAL/FAD/SUB 您可以调整平衡、音量衰减和超重低音扬声 器音量。 反复按选择按钮,直至出现 “BAL” 、 “FAD”或 “SUB” 。 项目如下改变: LOW* t MID* t HI* BAL (左-右) t FAD (前-后) t SUB (超重低音扬声器音量) * *1 启动 EQ3 时 (第 9 页) 。 *2 最低设定时显示 “ATT” ,最多可以调整 20 级。 *3 启动... -
Page 44: 使用选购设备
使用选购设备 辅助音频设备 将选购的便携式音频设备连接至本机上的 AUX 输入插孔 (立体声迷你插孔) ,然后只 需选择音源,您即可在小汽车扬声器上收 听。对于本机和便携式音频设备间的区别, 可调整音量。按以下步骤操作: 连接便携式音频设备 1 关闭便携式音频设备。 2 调低本机音量。 3 连接到本机。 连接线 * 必须使用直插头。 调整音量电平 必须在播放之前调整每个连接的音频设备的 音量。 1 调低本机的音量。 2 反复按 (SOURCE), 直至出现“AUX FRONT IN” 。 3 以适中的音量开始播放便携式音频设备。 4 在本机上设定通常的收听音量。 5 反复按选择按钮直至出现 “AUX” ,然后旋 转音量控制拨盘以调整音量。... -
Page 45: 旋转式控制器 Rm-X4S
旋转式控制器 RM-X4S 贴标签 根据您安装旋转式控制器的方法贴指示标 签。 D S P L SE L M O D E M O D E S E L D SP L 控制器位置 旋转式控制器与本机相对应的按钮控制相同 的功能。 PRESET/ DISC SOURCE DSPL SEEK/AMS 旋转式控制器的下列控制器的操作与本机不 同。 • PRESET/DISC 控制器 与本机的 (GP/ALBM) +/– 相同 (推入并转 动)... -
Page 46: 附加信息 使用前注意事项
附加信息 使用前注意事项 • 倘若您的汽车停在直射阳光下,则在操作前必 须先让本机充分冷却。 • 本机工作时,电动天线将自动伸出。 湿气凝结 在雨天或非常潮湿的地区,本机的透镜和显示 屏内可能会产生湿气凝结。一旦如此,本机将 无法正常运行。此时,请将光盘取出,并等待 约一小时,直至湿气蒸发。 保持高质量声音 请随时注意,切勿将果汁或其它饮料溅在本机 或光盘上。 光盘注意事项 • 为保持光盘清洁,切勿接触表面。拿光盘时请 持其边缘。 • 不使用时请将光盘装入光盘盒或光盘匣内。 • 切勿使光盘受到热源 / 高温的影响。避免将光 盘遗留在停泊的汽车内或仪表盘 / 后备箱中。 • 切勿贴标签,或使用带有粘性墨水 / 残留物的 光盘。这类光盘在使用时可能会停止转动,从 而造成故障,或者可能会毁坏光盘。 • 切勿使用任何贴有标签或粘纸的光盘。 使用此类光盘可能会引起如下故障: – 不能退出光盘 (因标签或粘纸脱落而堵塞弹 出装置)... -
Page 47: 关于 Atrac Cd
入的文字信息。 关于 ATRAC CD 的详细信息,请参阅 SonicStage 或 SonicStage Simple Burner 的说明书。 注意 必须使用 SonicStage 2.0 或更新版本或 SonicStage Simple Burner 1.0 或 1.1 等许可软件制作 ATRAC CD。 如果您对本机有疑问或问题,而本说明书中未 提及,请向附近的 Sony 经销商咨询。 保养 更换卡片式遥控器的锂电池 一般情况下,电池能维持大约一年的时间。 (使 用寿命可能会变短,这取决于电池的使用状 况。 ) 当电池的电力变弱时,卡片式遥控器的操作距 离将变短。此时,请更换一个新的 CR2025 锂电... -
Page 48: 拆卸本机
拆卸本机 拆卸保护环。 1 拆卸前面板 (第 4 页) 。 2 将开锁钥匙与保护环啮合。 如图所示定位开锁钥匙。 3 拉出开锁钥匙以拆下保护环。 取出装置。 1 将两把开锁钥匙同时插入,直至听到喀 嗒声。 2 拉出开锁钥匙,使装置脱离原位。 3 将本机从安装位置滑出。 规格 CD 播放机部分 信噪比:120 dB 频率响应:10 - 20000 Hz 抖晃率:低于可测限定值 调谐器部分 调谐范围: 87.5 - 108.0 MHz (以 50 kHz 为一级) 87.5 - 107.9 MHz (以... -
Page 49: 故障排除
• 启动了 ATT 功能, 或启动了电话 ATT 功能 (当汽车 电话的接口电缆连接至 ATT 导线时) 。 • 衰减控制器 (FAD) 的位置未设定为2扬声器系统。 • CD 换碟机与光盘格式 (MP3/WMA/ATRAC CD)不兼 容。 t 请使用与 Sony MP3 兼容的 CD 换碟机或本机进 行播放。 无提示音。 • 提示音功能被取消 (第 9 页) 。 • 连接了选购的功率放大器,且您没有使用内置放 大器。... -
Page 50: 出错显示 / 信息
NOT READ 本机未读取光盘信息。 t 装入光盘,然后在列表中选择此光盘。 NOTREADY MD 换碟机的盖子处于打开状态或 MD 未被正确装 入。 t 关上盖子或正确装入 MD。 OFFSET 可能发生内部故障。 t 检查连接。如果此出错指示仍然显示在显示屏 中,请联系当地的 Sony 经销商。 READ 本机正在读取光盘上所有曲目和群组信息。 t 请等待至读取完成并自动开始播放。视光盘的 结构而定,可能要花一分多钟。 RESET 由于某些原因,CD 装置和 CD/MD 换碟机无法操 作。 t 按 RESET 按钮 (第 4 页) 。 “... - Page 52 Sony Corporation Printed in Thailand...
Need help?
Do you have a question about the CDX-GT450 and is the answer not in the manual?
Questions and answers