Advertisement
The application of AP mode
In AP mode, Cloud-Box-M1(short for M1 bellow)works as a Wi-Fi hotspot. Users can connect to the hotspot to monitor the MPPT controller via APP. (In AP mode, M1 works with MyGreen SolarMonitor APP only. It does not support web logging in.

How to connect M1 with APP in AP mode?

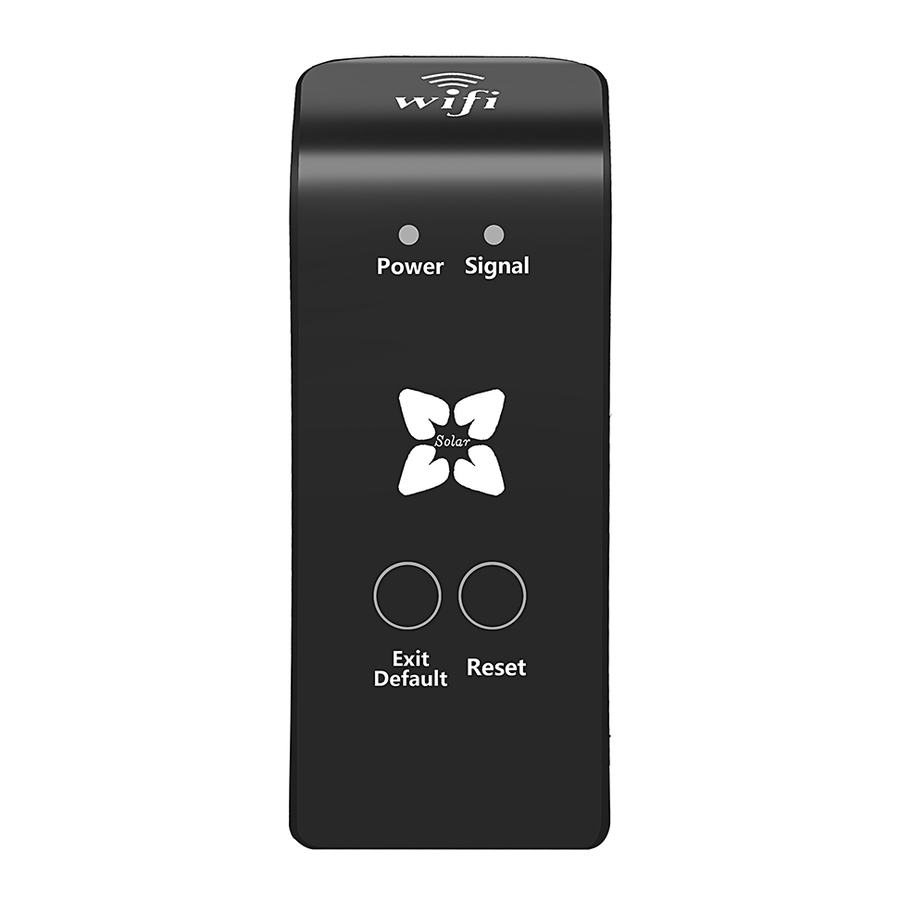
The green light indicates the power is on.
The blue light is on for 10s then flashes, it indicates AP mode.
Exit Default
The button is for AP mode and STA mode switching.
Reset
Tap the button to confirm the device works normally after the power is on. Combining with blue light, it helps judge current working mode.
Step 1: Connect M1 device with MPPT charge controller by cable, and make sure the green power indicator is on.
Step 2: Short press on "Reset" button, it is AP mode if the blue signal light flashes after 10s on. If not, please have a short press on "Exit/Default" button and switch to AP mode.)
Step 3: Download and install "MyGreen SolarMonitor" phone APP, then go to Setting>WLAN (WIFI)>Select "MyGreen-Solar-XXXX">Input password "88888888"> Connected.
Step 4: Open "MyGreen SolarMonitor" APP Home page, click "AP mode" on the upper left corner. The APP will jump to data interface of the connected MPPT controller.
Friendly tips of AP mode
- In AP mode, device M1 works as a router. M1 will generate a Wi-Fi hotspot. It supports 2-3 users connecting to the same hotspot at the same time.
- Wi-Fi hotspot covers 50 meters in open area. And it goes through 1 layer of non-metallic shield wall indoor.
- The Wi-Fi hotspot is for "MyGreen SolarMonitor" APP ONLY. It does not support web service.
- Parameter setting password: 888888
The application of STA mode
In STA mode, Cloud-Box-M1(short for M1 bellow) works as a wireless transmitter and receiver between MPPT controller and network. When M1 connects to network, user can remote control MPPT controller by phone APP.

M1 STA Initial connection instructions

The green light indicates the power is on.
The blue indicator flashes 2 times in every interval.it Indicates STA mode.
Exit Default
The button is for AP mode and STA mode switching.
Reset
Tap the button to confirm the device works normally after the power is on. Combining with blue light, it helps judge current working mode.
Step 1. Access Point is necessary. Wide band and 2.4G router should be near MPPT controller to make sure the Wi-Fi hotspot works normally. (In tutorial, the Wi-Fi hotspot is TP-LINK).
Setp 2. Devices connection. Connect MPPT controller and M1, power indicator should be on.
Step 3. M1 STA working modes setting. Press "Reset", if the blue signal indicator flashes twice regularly, the M1 is in STA mode. (If the blue signal light is on for 10s then flashes, it is in AP mode. Please press "Exit/ Default" and switch from AP to STA mode.)
Step 4. Connection:
- Access to phone Settting/WLAN, connect TP-LINK with password. (Figure4-1 )
![]()
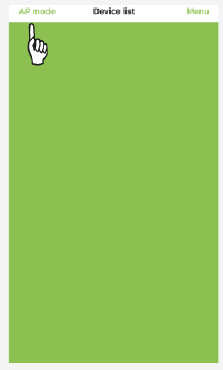
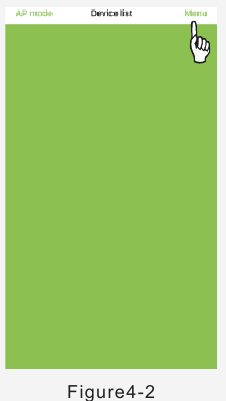
- Download, install and tap on "MyGreen-SolarMonitor" APP,go to Device list.(Figure4-2 )
![]()
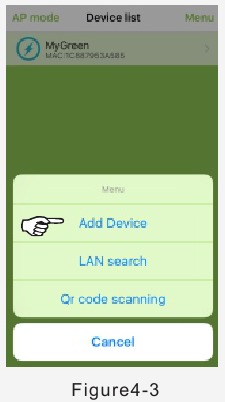
- Click Menu/Add device.(Figure4-3 )
![]()
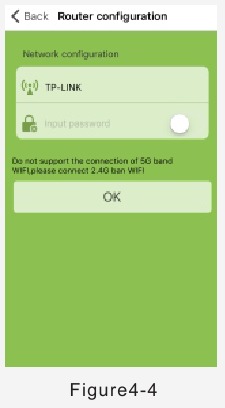
- Input TP-LINK's password and click "OK".(Figure4-4 )
![]()
- In 60s, if the connection succeeds, there will be notifications. If failed, please check Wi-Fi range, click "OK" and retry connection.
- If the connection succeeds, it will jump to "Device list" and refresh the connected M1 device. Click on the connected device, the APP will automatically jump to data interface of the MPPT controller.

- In case, there is no device shown after refreshment in Device list, please click "Menu/LAN search" to refresh Device list.


Clearance of connected Cloud-Box-M1 data
If users change M1 working places or change router, the previous M1 connection data should be deleted first. Then it can make new connection in new working place or under new router.
Step 1: Keep M1 on and in STA mode.
Step 2: Long press "Exit/Default" for 8-10 seconds. The data is completely cleared if the blue indicator flashes twice in every interval.
Setp 3: User can follow initial STA connection steps, reconnect to new devices.
Note: when the blue indicator flashes 3 times in every interval, M1 can be in new network but the old data still remained.
Cloud-Box-M1 sharing
M1 data can be shared on the basis of successful connection.
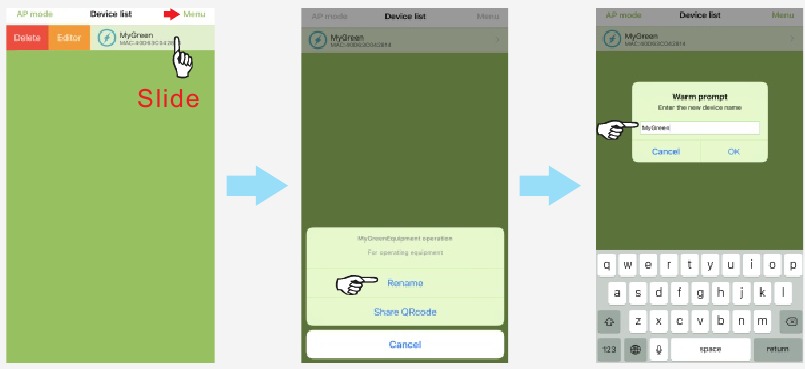
- If user change phone or redownload APP, the connected M1 devices will be shown in Device list by following Setting/ WLAN/TP-Link >APP Device list/Menu/LAN search.
- M1 QR code sharing and M1 device deleting iOS user can slide the connected device to delete or edit it.
Chose "Delete", the connected M1 device can be deleted;
Choose "Edit", the M1 device can be renamed or generate QR code for sharing.
![]()
Android user should long press the connected M1device, it will jump out 3 options: Rename, QR code sharing and delete. Operation and functions are same as iOS above.

- Users can access to connected device easily by scanning QR code. Go to APP/Device list/Menu/QR code scanning, then scan the QR code and refresh the device list.


Dear valued users,
Please scan the above QR codes to get "MyGreen Solar Monitor" APP.
You can search "MyGreen" or "MyGreen SolarMonitor" in APP Store and Google Play to get the APP, too.


If you have questions in using Cloud-Box-M1, please refer to on-line video tutorial.
AP mode: https://youtu.be/Kv_QaK32xQM
STA mode: https://youtu.be/vFGvLDIT2oI

Documents / Resources
References
![www.apple.com]() App Store - Apple
App Store - Apple![play.google.com]() Google Play
Google Play![youtu.be]() Connection instruction of wifi module (AP mode) - YouTube
Connection instruction of wifi module (AP mode) - YouTube![youtu.be]() Connection instruction of wifi module (STA mode) - YouTube
Connection instruction of wifi module (STA mode) - YouTube
Download manual
Here you can download full pdf version of manual, it may contain additional safety instructions, warranty information, FCC rules, etc.
Advertisement

Need help?
Do you have a question about the Cloud-Box-M1 and is the answer not in the manual?
Questions and answers