Table of Contents
Advertisement
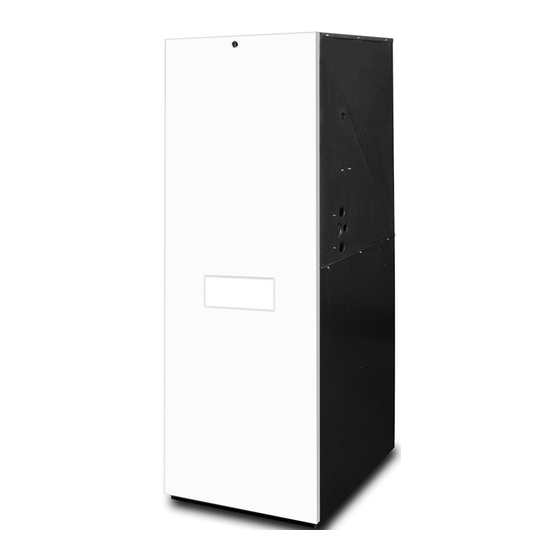
E7 Series Electric Furnace
INSTALLATION INSTRUCTIONS
Downflow & Upflow Models
E7EM MULTI-POISE
WARNING
ELECTRICAL SHOCK, FIRE OR
EXPLOSION HAZARD
Failure to follow safety warnings exactly could
result in serious injury, death or property
damage.
Improper servicing could result in dangerous
operation, serious injury, death or property
damage.
• Before servicing, disconnect all electrical
power to Appliance both poles.
• When servicing controls, label all wires prior
to disconnecting. Reconnect wires correctly.
• Verify proper operation after servicing.
DO NOT DESTROY. PLEASE READ CAREFULLY &
KEEP IN A SAFE PLACE FOR FUTURE REFERENCE.
E7EU UPFLOW
ATTENTION INSTALLERS:
It is your responsibility to know this product better than your
customer. This includes being able to install the product
according to strict safety guidelines and instructing the
customer on how to operate and maintain the equipment
for the life of the product. Safety should always be the
deciding factor when installing this product and using
common sense plays an important role as well. Pay
attention to all safety warnings and any other special
notes highlighted in the manual. Improper installation of
the Appliance or failure to follow safety warnings could
result in serious injury, death, or property damage.
These instructions are primarily intended to assist qualified
individuals experienced in the proper installation of this
appliance. Some local codes require licensed installation/
service personnel for this type of equipment. Please read
all instructions carefully before starting the installation.
Return these instructions to the customer's package for
future reference.
E7ED DOWNFLOW
Advertisement
Table of Contents

Subscribe to Our Youtube Channel
Summary of Contents for Nortek Global E7 Series
- Page 1 E7 Series Electric Furnace INSTALLATION INSTRUCTIONS Downflow & Upflow Models E7EM MULTI-POISE E7EU UPFLOW E7ED DOWNFLOW ATTENTION INSTALLERS: WARNING It is your responsibility to know this product better than your customer. This includes being able to install the product ELECTRICAL SHOCK, FIRE OR...
-
Page 2: Table Of Contents
TABLE OF CONTENTS IMPORTANT SAFETY INFORMATION ....3 Upflow Appliances ............8 Over-the-Floor Return Air System (Non-Ducted) ..9 REQUIREMENTS & CODES ........3 Through-the-Floor Return Air System (Ducted) ....9 Minimum Installation Clearances ........3 ELECTRICAL WIRING ..........10 Minimum Unobstructed Airflow ........3 Line Voltage Wiring ............10 Clearances to Combustible Materials ......4 Connecting Supply Service Wires ........10... -
Page 3: Important Safety Information
IMPORTANT SAFETY INFORMATION This unit E7 is a PARTIAL UNIT AIR CONDITIONER, complying with PARTIAL UNIT requirements of this INSTALLER: Please read all instructions before servicing International Standard, and must only be connected to this equipment. Pay attention to all safety warnings and other units that have been confirmed as complying any other special notes highlighted in the manual. -
Page 4: Clearances To Combustible Materials
• For closet installations with less than 6” front clearance, Downflow alcove installations but not less than 1” (25 mm), a louvered door must – E7EM Models: A grille may be attached to the top be used having a minimum 250 sq in2 (1,613 cm2) of the Appliance and all paneling and trim flushed free area opening directly in line with openings in the to it. -
Page 5: Without Optional Upflow Stand
Without optional upflow stand APPLIANCE INSTALLATION • Install a filter with a minimum unrestricted medium NOTE: Since all installations are different, the sequence of area of 324 in (2087cm ) below the coil cabinet/ these steps may differ from the actual installation. These Appliance assembly that is accessible for monthly installation procedures are suggested for typical Appliance cleaning or replacement by the homeowner. -
Page 6: Standard Duct Connector Installation
Standard Duct Connector Installation 2. Using the centerline as a starting point, draw the rest The standard duct connector is designed for use on ducts of the duct cut-out to the dimensions shown in Figure 12” (305 mm) in width. NOTE: Ducts narrower than 12” Figure (305 mm) may not allow sufficient clearances for this NOTE: Additional provisions may be necessary for... -
Page 7: Narrow Duct Connectors
FLOOR OPENING “X” SUPPLY AIR DUCT FLOOR MOUNTING CAVITY PLATE Figure 4. Floor Cavity DUCT CONNECTOR DUCT CONNECTOR IF FLOOR CAVITY TYPE & PART NUMBER “X” IS: STANDARD DUCT SCREW DOWN 7/8” / (22 mm) 901987A 904008 2” / (51 mm) 901988A 904009 Figure 5. -
Page 8: Alcove Installation
STAPLES OR SHEET METAL SCREWS DUCT CONNECTOR TABS Wall Return Air Grille Coil Air Filters NARROW DUCT NARROW 27" DUCT DUCT (686 mm) FLAP 56" (1423 mm) DUCT CONNECTOR A/C or H/P Coil SHEET METAL SCREWS 29" Furnace NARROW ( 737 mm) 24 3/4"... -
Page 9: Over-The-Floor Return Air System (Non-Ducted)
Over-the-Floor Return Air System (Non-Ducted) 2. Use optional upflow stand (refer to the technical 1. If floor underneath Appliance is made of combustible specifications literature for part number) with filters or material, locate a pan fabricated of non-combustible construct a suitably braced mounting platform in closet. material with 1”... -
Page 10: Electrical Wiring
4. Position optional coil cabinet over floor cutout and containing the correct fuse or circuit breaker for the secure with three or more fasteners. Appliance. For minimum circuit ampacity and maximum 5. Position Appliance onto coil cabinet and secure with over-current protection, see Table 7. -
Page 11: Grounding
1. If the room thermostat incorporates a humidity sensor 5. Insert supply service wire(s) through cable connector(s) and DHUM output, connect the DHUM on the thermostat and connect wires to circuit breakers (Figure 14 & to the D terminal on the motor control board. See Figure 15). -
Page 12: Start-Up & Adjustments
START-UP & ADJUSTMENTS Start-up Procedures 1. Reinstall control box cover(s). Pre-Start Check List 2. Switch circuit breaker(s) to the ON position. √ Verify the polarity of the connections are correct, 3. Replace outer Appliance door. the line voltage power leads are securely connected 4. - Page 13 13 1/2” (34.26) VentilAire Bracket Attachment Location 17” (43.15) VIEW Refrigerant Line Knockout (1 1/2” (3.81) X 5” (12.69)) T-Stat (Ø 5/8” (1.59)) 20” (50.76) 24 1/2” (62.18) RIGHT LEFT FRONT T-Stat SIDE SIDE VIEW (Ø 5/8” (1.59)) Electric Ø 1 1/8” (2.86) 29”...
- Page 14 Self Tapping Screws Electric Heater Kit Supply Wire Bracket Electrical Left Control Knockouts Door Right Control Door Blower Assembly Filter Filter Retainer Figure 19. E7 Supply Wire Bracket 13 1/2” (34.26 cm) 17” (43.15 cm) VIEW 24 3/4” (62.82 cm) 6”...
-
Page 15: Airflow Data
Airflow Data AIRFLOW (CFM) MOTOR SWITCH EXTERNAL STATIC PRESSURE (IN. W.C.) SETTINGS MODEL (0=OFF, 1=ON) NUMBER 1,012 1,084 1,047 1,011 1,157 1,119 1,084 1,047 1,009 1,197 1,166 1,130 1,093 1,056 1,017 E7E*-0**K3 1,245 1,215 1,178 1,143 1,105 1,066 1,293 1,263 1,225 1,192 1,154... - Page 16 MAXIMUM HEATING AIRFLOW SETTING E7EM E7ED E7EU E7E*-0**K3 DOWNFLOW UPFLOW DOWNFLOW UPFLOW 0101 0001 0011 0101 0101 0101 0001 0101 0101 0101 0101 0011 0001 0011 0001 0011 NOTES: 1. MH and Res represent Manufactured Housing and Residential (modular home) applications, respectively 2.
-
Page 17: Electrical Data & Diagrams
Electrical Data & Diagrams 5-WIRE THERMOSTAT 4-WIRE THERMOSTAT WIRE WIRE NUTS NUTS TO FURNACE CONTROL WIRING TO FURNACE CONTROL WIRING HEAT PUMP THERMOSTAT WIRE NUTS VIOLET TO FURNACE CONTROL WIRING NOTE: For optional dehumidifcation violet wire connection, refer to the Dehumidication Options section. Figure 21. - Page 18 MODEL MAXIMUM MINIMUM SUPPLY TOTAL NUMBER OVER-CURRENT CIRCUIT CIRCUIT AMPERES E7E*- RATING AMPACITY 010K3 Single 43.7 48.5 54.7 Single 50.1 54.9 62.6 012K3 Dual "A" 27.0 31.7 33.7 Dual "B" 23.2 23.2 28.9 Single 63.7 68.4 79.6 015K3 Dual "A" 43.7 48.5 54.7...
- Page 19 Figure 23. E7EB-010K Models...
- Page 20 Figure 24. E7EB-012K Models...
- Page 21 Figure 25. E7EB-015K Models...
- Page 22 Figure 26. E7EB-017K Models...
- Page 23 Figure 27. E7EB-020K & E7EB-023K Models...
- Page 24 CONTROL SIGNAL TOTAL OPERATION BOARD ACTION & MODE Stage 1 Heat on immediately HEAT Blower on after 3 second delay Stage 2 heat on after 10 second delay Stage 1 Heat on immediately HEAT Blower on after 3 second delay Stage 2 heat on after 10 second delay Stage 1 Heat on immediately HEAT Blower on after 3 second delay...
-
Page 28: Installation Checklist
Has the literature package been left near the Appliance? Complies with H.U.D. Manufactured Home Construction & Safety Standards. Specifications & illustrations subject to change without notice or incurring obligations (08/23). 10453410 O’Fallon, MO, © Nortek Global HVAC LLC 2023. All Rights Reserved. (Replaces 10349280)
Need help?
Do you have a question about the E7 Series and is the answer not in the manual?
Questions and answers
Why is my air flow so slow after installing a new unit? Air flow was great before they installed this new unit and new A\C unit
Slow airflow in a Nortek Global E7 Series unit after installation could be caused by several factors:
1. Dirty or clogged air filter: A blocked filter restricts airflow through the system.
2. Improper ductwork installation: Undersized, kinked, or poorly connected ducts can reduce airflow.
3. Blower motor issues: A malfunctioning or incorrectly wired blower motor may not run at full speed.
4. Incorrect blower speed setting: If the blower is set to a low speed, airflow will be reduced.
5. Closed or blocked registers and vents: Obstructions or closed vents restrict air distribution.
6. Obstructions in the evaporator coil or blower assembly: Debris or dirt buildup can reduce airflow.
7. Improperly installed or missing return air pathways: This limits the amount of air entering the system.
8. Electrical supply issues: Inadequate voltage can cause the blower to run slowly.
Careful inspection of these components is needed to identify and fix the cause.
This answer is automatically generated