Advertisement
Quick Links
Advertisement

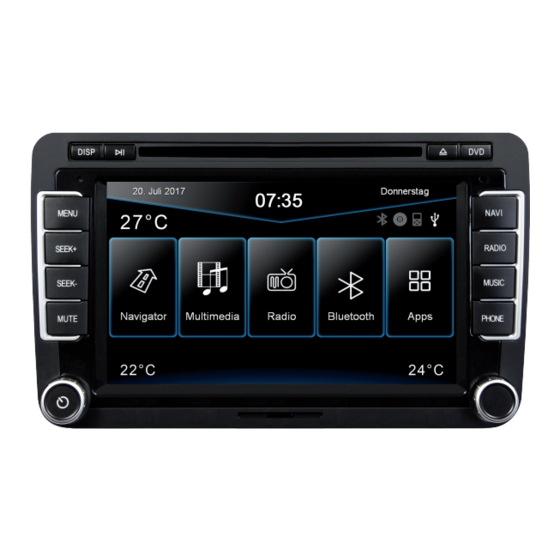
Summary of Contents for ESA VISION NAVICEIVER VN735 VO-M2
- Page 1 VN735 VO-M2...
- Page 2 INSTALLATION NOTES / Installationshinweise Important Notes before installation: This is an installation guide for a proper installation of the device. Please read the following instructions before installation: 1.) Please treat all parts of the sound system and the components of your vehicle with caution. 2.) Follow under all circumstance the regulations of the vehicle manufacturer and do not make any modifications on the vehicle, which could interfere the driving safety.
-
Page 3: Table Of Contents
INDEX / Inhaltsverzeichnis Scope of delivery ..........................4 Lieferumfang ............................4 Connection Diagram ........................... 6 Anschlussdiagramm ..........................6 Installation notes ..........................11 Installationshinweise .......................... 11 Installation example ......................... 13 Einbaubeispiel ............................ 13 Recommended accessories: Empfohlenes Zubehör: Antenna Adapter „2 x Fakra (M) > Twinfakra (F) , VW“ Antennenadapter „2 x Fakra (M) >... -
Page 4: Scope Of Delivery
SCOPE OF DELIVERY / Lieferumfang ITEM FIGURE QUANTITY Artikel Abbildung Anzahl MAIN DEVICE Hauptgerät STYLUS Markierstift MICRO SD CARD 8GB INKL: NAVIGATION SOFTWARE MicroSD Speicherkarte 8GB Navigationssoftware REMOTE CONTROL Fernbedienung G71-AUD0205 AUDIO / VIDEO / AV INPUTS Audio / Video / AV-Eingänge G71-MNV0012 AUDIO OUTPUTS 5.1 WITH REMOTE TURN ON Audio-Ausgänge 5.1 mit Einschaltleitung... -
Page 5: Lieferumfang
SCOPE OF DELIVERY / Lieferumfang ITEM FIGURE QUANTITY Artikel Abbildung Anzahl G71-CCD0072 CAMERA CONNECTIONS Kamera-Anschlüsse G71-MNV0011 AUDIO/VIDEO OUTPUTS 1/2 Audio/Video-Ausgänge G71-USB0071 USB PORT 1 W/QUICK CHARGE FUNCTION USB-Anschluss 1 mit Schnellldadefunktion G71-USB0078 USB PORT 2 USB-Anschluss 2 G71-USB0065 ADAPTOR FOR FACTORY USB PORT Adapter für werksseitigen USB-Anschluss GPS ANTENNA GPS Antenne... -
Page 6: Connection Diagram
CONNECTION DIAGRAM / Anschlussdiagramm AM/FM ANTENNA AM/FM Antenne AUDIO / VIDEO / AV INPUTS Audio / Video / AV-Eingänge AUDIO OUTPUTS 5.1 WITH REMOTE TURN ON Audio-Ausgänge 5.1 mit Einschaltleitung SPECIFIC CONNECTOR USB PORT 1 OF THE VEHICLE QUICK CHARGE Fahrzeugspezifischer USB-Anschluss 1 Stecker... -
Page 7: Anschlussdiagramm
CONNECTION DIAGRAM / Anschlussdiagramm ENGLISH IMPORTANT NOTE: Usually the OEM quadlock plug of the vehicle can be used „plug and play“with the ESX Naviceiver, without chang- ing the PIN configuration in any way. Under certain circumstances, e.g. Installation in not appropriated vehicles, for functional testing outside a vehicle or for demonstration purposes, the device can also be operated without the CANBUS signal by using the terminals GND, ACC and BATT. -
Page 8: Installation Notes
INSTALLATION NOTES / Installationshinweise Camera connections G71-CCD0072 Name Connector/Color Function CCD-CVBS-IN RCA yellow Video signal input from the rear camera FRONT-CCD-IN RCA yellow Video signal input from the front camera REVERSE IN blue Reverse gear signal input. Please do not use when vehicle CAN BUS is operated. If CAN signal is not present, the reverse signal (12V, for example the reversing light) can be connected here. -
Page 9: Installationshinweise
INSTALLATION NOTES / Installationshinweise DEUTSCH WICHTIGER HINWEIS: In der Regel wird der OEM Quadlock Stecker des Fahrzeugs „plug and play“ an den ESX Naviceiver ange- schlossen, ohne dass die PIN Belegung in irgendeiner Weise geändert werden muss. Unter bestimmten Umständen, z.B. Installation in nicht vorgesehenen Fahrzeugen, zur Funktionsprüfung außerhalb des Fahrzeugs oder zu Demonstrationszwecken kann das Gerät auch ohne CANBUS Signal mit den Anschlüssen GND, ACC und BATT betrieben werden. - Page 10 INSTALLATION NOTES / Installationshinweise Kamera Anschlüsse G71-CCD0072 Kabelname Stecker/Farbe Funktion im Gerät CCD-CVBS-IN RCA gelb Videosignal-Eingang der Rückfahrkamera FRONT-CCD-IN RCA gelb Videosignal-Eingang der Frontkamera REVERSE IN blau Rückwärtsgangsignal-Eingang. Bitte nicht verwenden, wenn Fahrzeug mit CANBUS betrieben wird. Wenn CAN Signal nicht vorhanden ist, kann hier das Rückwärtsgangsignal (12V, z.B.
- Page 11 INSTALLATION NOTES / Installationshinweise Installation hints: Einbautipps: Transportation lock: Remove both transportation locks on top of the device before you start the installation. Transportsicherung: Entfernen Sie beide Transportsicherungen auf der Oberseite des Geräts, bevor Sie mit der Installation beginnen. AUX/USB Port*: 11 12 13 15 If your car is equipped with a factory USB and AUX port, the port is supported...
- Page 12 INSTALLATION NOTES / Installationshinweise GPS antenna: The GPS (14) antenna must be mounted horizontally in front on the dashboard (ensure a clear view to the sky). A metalized windscreen allows no recepti- on. If a factory GPS antenna with the same connector type (Fakra) is already available, it can be used.
-
Page 13: Installation Example
INSTALLATION EXAMPLE / Einbaubeispiel VOLKSWAGEN TIGUAN (05/2015 ->) 1.) At first remove the airbag indicators and then both lateral screws right and left behind the radio panel (Refer to the image). 1.) Entfernen Sie zuerst die Airbag-Anzeigen und die beiden Schrauben seitlich rechts und links hinter der Radioblende (Siehe Bild). -
Page 14: Einbaubeispiel
INSTALLATION EXAMPLE / Einbaubeispiel VOLKSWAGEN TIGUAN (05/2015 ->) 5.) Then disconnect the both antenna connectors (depending on car and configuration) and the huge car specific connector from the original radio. 5.) Entfernen Sie dann die beiden Antennenstecker (Modell-/Ausstattungs- abhängig) und den großen fahrzeugspezifischen Kabelstecker am Original- Radio. - Page 15 NOTES / Notizen...
- Page 16 ESX Car Media Systems · Audio Design GmbH Am Breilingsweg 3 · D-76709 Kronau/Germany Tel. +49 7253 - 9465-0 · Fax +49 7253 - 946510 www.esxnavi.de - www.audiodesign.de ©2017 All Rights Reserved...
Need help?
Do you have a question about the VISION NAVICEIVER VN735 VO-M2 and is the answer not in the manual?
Questions and answers