Table of Contents
Advertisement
Quick Links
4.8 A
180 mm
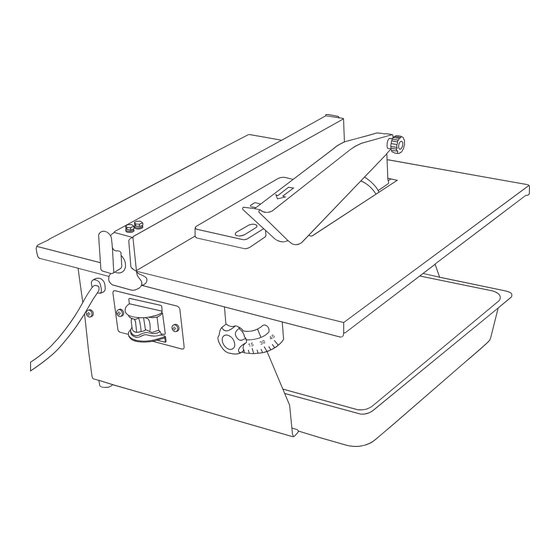
Portable Tile Saw
Español página 18
ATTACH YOUR RECEIPT HERE
Serial Number
Questions, problems, missing parts? Before returning to your retailer, call our customer
service department at 1-877-876-7562, 8 a.m. - 5 p.m.,CST, Monday - Friday.
7 in.
Purchase Date
# G02771
MNL_G02771_V02_20170328
Advertisement
Table of Contents

Summary of Contents for Pace Setter G02771
- Page 1 # G02771 7 in. 4.8 A 180 mm Portable Tile Saw Español página 18 ATTACH YOUR RECEIPT HERE Serial Number Purchase Date MNL_G02771_V02_20170328 Questions, problems, missing parts? Before returning to your retailer, call our customer service department at 1-877-876-7562, 8 a.m. - 5 p.m.,CST, Monday - Friday.
-
Page 2: Table Of Contents
TABLE OF CONTENTS Important Safety Information.................. Safety Symbols..................... Specifications......................Package Contents....................Setup........................Operation......................Maintenance......................Troubleshooting guide................... Warranty........................ -
Page 3: Important Safety Information
IMPORTANT SAFETY INFORMATION General Tool Safety Warnings WARNING Read all safety warnings and instructions. Failure to follow the warnings and instructions may result in electric shock, fire and/or serious injury. Save all warnings and instructions for future reference. 1. KEEP GUARDS IN PLACE and in working order. 2. - Page 4 GENERAL TOOL SAFETY WARNINGS Table A shows the correct size to use depending on cord length and nameplate ampere rating. If in doubt, use the next heavier gauge. The smaller the gauge number, the heavier the cord. 10. WEAR PROPER APPAREL. Do not wear loose clothing, gloves, neckties, rings, bracelets, or other jewelry which may get caught in moving parts.
- Page 5 GROUNDING INSTRUCTIONS WARNING To prevent electric shock and death from incorrect grounding wire connection read and follow these instructions: 110-120 V~ Grounded Tools: Tools with Three Prong Plugs 1. In the event of a malfunction or breakdown, grounding provides a path of least resistance for electric current to reduce the risk of electric shock.
- Page 6 TILE SAW SAFETY WARNINGS 1. For Your Own Safety Read Instruction Manual Before Operating Saw 2. Wear eye protection. 3. Use saw-blade guard and spreader for every operation for which it can be used, including all through sawing. 4. Keep hands out of the line of saw blade. 5.
- Page 7 TILE SAW SAFETY WARNINGS 11. As noted previously, Kickback is a sudden reaction to a pinched, bound, or misaligned blade, causing an uncontrolled workpiece to lift up and out of the saw toward the operator. Kickback is usually a result of tool misuse and can be limited or avoided by following the precautions below: •...
- Page 8 TILE SAW SAFETY WARNINGS 19. Stay alert, watch what you are doing and use common sense when operating a power tool. Do not use a power tool while you are tired or under the influence of drugs, alcohol or medication. A moment of inattention while operating power tools may result in serious personal injury.
- Page 9 POSITION OF TILE SAW Examine extension cord before using and replace if damaged. Do not abuse extension cords and do not yank on any cord to disconnect. Keep cord away from heat and sharp edges. Always disconnect the extension cord from the receptacle before disconnecting the product from the extension cord.
-
Page 10: Safety Symbols
Risk of injury when Wear gloves instructions are not followed Waste electrical products Wet conditions alert should not be disposed of with household waste SPECIFICATIONS Code G02771 Model TC180G Voltage 120V~ 60Hz 4.8AMP No load speed 3550 RPM Insulation class Class I Dimensions of the diamond disc 7"... -
Page 11: Package Contents
PACKAGE CONTENTS PART DESCRIPTION QUANTITY Tile saw (assembled) Rip Fence Miter Guide Upper Blade Guard (assembled) Saw Blade (assembled) Water Tray Spanners SETUP - BEFORE USE: Read the ENTIRE IMPORTANT SAFETY INFORMATION section at the beginning of this manual including all text under subheadings therein before set up or use of this product. - Page 12 TOOL SET UP TO PREVENT SERIOUS INJURY: DO NOT OPERATE WITH ANY GUARD DISABLED, DAMAGED, OR REMOVED. Moving guards must move freely and close instantly. Installing the Blade Outer Flange Inner Flange 1. Unthread the two Screws Hex Nut holding the Lower Blade Hex Wrench Guard in place.
- Page 13 INSTALLING/ADJUSTING THE RIP FENCE 1. Place the Rip Fence on the Miter Guide Table Top to the left of the Blade. Rip Fence 2. Pull up on the Lock Lever, slide the Rip Fence to the desired location, then press the Lock Lever down to lock the Rip Lock Fence in place on the Table Top.
- Page 14 GENERAL OPERATING INSTRUCTIONS CAUTION: Do not operate the Tile Saw with too little or too much water in the Water Tank. Keep the water level between the minimum and maximum level markings on the Lower Blade Guard. 3. For Straight/Miter Cuts: a.
-
Page 15: Maintenance
MAINTENANCE AND SERVICING Procedures not specifically explained in this manual must be performed only by a qualified technician. WARNING TO PREVENT SERIOUS INJURY FROM ACCIDENTAL OPERATION: Turn the Power Switch of the tool to its “OFF” position, remove the Safety Lock and unplug the tool from its electrical outlet before performing any inspection, maintenance, or cleaning procedures. - Page 16 TROUBLESHOOTING Problem Possible Causes Likely Solutions Performance 1. Accessory dull or 1. Keep cutting accessories decreases damaged. sharp. Replace as needed. over time. 2. Carbon brushes worn 2. Have qualified technician or damaged. replace brushes. Excessive 1. Belt (if equipped) too 1.
-
Page 17: Warranty
6 MONTHS LIMITED WARRANTY The manufacturer warrants this item against defects in materials and workmanship for 6 months from the date of purchase. If within this period the product is found to be defective in material or workmanship, the manufacturer will, at its option, repair, replace or refund the original purchase price to the customer.