Table of Contents
Advertisement
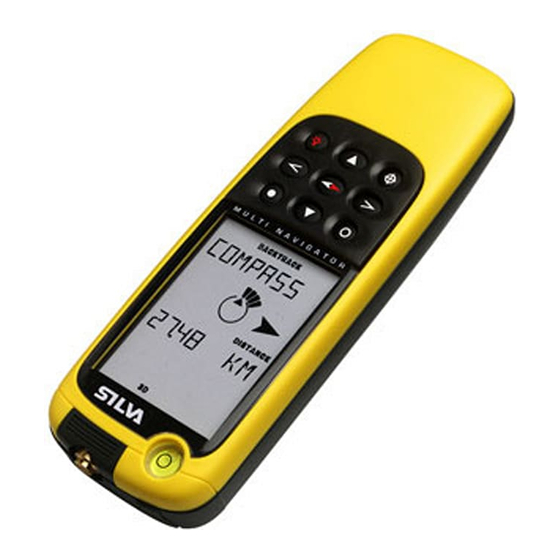
Multi-Navigator
Function Overview
POSITION
GPS ELEV
4.4.1
4.4.1.1
GPS
GPS
4.4.2
4.4.2
TIME
4.4.3
SUNSET
4.4.3.1
FORECAST
BARO
4.4.4.1
4.4.4
ALTITUDE
MIN/MAX
4.4.5
4.4.5.1
TM
TURN OFF
GPS
4.5.2.1
POSITION
FORMAT
4.5.2.2
GPS ELEV
OFFSET
4.5.2.3
MORE
SETTINGS
4.5.1
SAT STATUS
4.4.1.2
SUNRISE
4.4.3.2
BARO
HISTORY
4.5.5.1
BARO ALT
CORR
4.5.5.2
MORE
SETTINGS
4.5.1
SET REF
ALT
4.5.6.1
EDIT REF
ALT
4.5.6.2
CALIB
ALTITUDE
4.5.6.3
RESET
MIN/MAX
4.5.6.4
MORE
SETTINGS
4.5.1
STORE
POSITION
4.4.7.1
GOTO
WAYPOINT
4.5.3.1
MAGNI-
POINTER
4.4.7.3
GOTO
WAYPOINT
4.5.3.1
NEW
ODOMETER
WAYPOINT
MAX SPD
4.4.7.4
4.5.3.2
GOTO LEG
4.5.3.3
EDIT
WAYPOINT
MORE
4.4.7.5
SETTINGS
4.5.1
VIEW
WAYPOINT
12/24
4.4.7.6
HOURS
4.5.4.1
DELETE
SET
WAYPOINT
TIMEZONE
4.4.7.7
4.5.4.2
MORE
SETTINGS
ROUTE MENU
4.5.1
4.4.7.8
COMPASS
COMPASS
4.4.6
4.4.6
GOTO
WAYPOINT
4.5.3.1
MAGNETIC
VAR
4.5.7.2
DEVIATE
COMPASS
4.5.7.3
GOTO LEG
4.5.3.3
MORE
SETTINGS
4.5.1
NEW ROUTE
4.4.7.8.1
ACTIVATE
ROUTE
4.4.7.8.2
EDIT ROUTE
4.4.7.8.3
VIEW ROUTE
4.4.7.8.4
DELETE
ROUTE
4.4.7.8.5
Advertisement
Table of Contents

Related Manuals for Silva Multi-Navigator


Summary of Contents for Silva Multi-Navigator
-
Page 1: Function Overview
Multi-Navigator Function Overview POSITION GPS ELEV SAT STATUS 4.4.1 4.4.1.1 4.4.1.2 4.4.2 4.4.2 TIME 4.4.3 SUNSET SUNRISE 4.4.3.1 4.4.3.2 FORECAST BARO 4.4.4.1 4.4.4 ALTITUDE MIN/MAX 4.4.5 4.4.5.1 TURN OFF STORE POSITION 4.5.2.1 4.4.7.1 POSITION FORMAT 4.5.2.2 GOTO GPS ELEV WAYPOINT OFFSET 4.5.3.1... - Page 2 Built-in GPS antenna ON/OFF button LEFT/RIGHT buttons YES (SET) button DISPLAY (LCD) Battery compartment UP/DOWN buttons WAYPOINT button COMPASS button NO (ESC) button Bubble level External power / data in/out...
- Page 3 Introduction Thank you for choosing the SILVA Multi-Navigator and we are sure that whether you are an experienced navigator or a beginner in this field, the Silva Multi-Navigator will assist you in experiencing adventure and returning safely. A few words about the product itself: It is a Multi-Navigator that includes a GPS.
-
Page 4: Table Of Contents
THE MANUAL, THE LCD, THE BUTTONS AND THE MAIN FUNCTIONS About this manual THE DISPLAY (LCD) How to enter the lake as a waypoint in the Multi-Navigator How to store your ”* HOME *” position Now, let’s navigate to the lake! - Page 5 6.3 Other grid systems 7 MAINTENANCE, FAQS AND FAULT FINDING 7.1 Maintenance 7.2 Fault finding 7.2.1 The Multi-Navigator does not start at all 7 .2.2 The GPS receiver can not calculate its position 7 .2.3 My altimeter function shows incorrect values 7 .2.4...
-
Page 6: Contents
Once you have checked that you have all the parts listed, please take time to fill in the warranty document and return it to this address: SILVA SWEDEN AB Box 998 Kuskvägen 4 S-191 29 SOLLENTUNA SWEDEN By returning the warranty card, in the event of experiencing difficulties with this product, we will be able to assist you with prompt and expert attention. -
Page 7: One-Button-Gps
(your **HOME**) just press and hold the compass button and face in the direction indicated on the display. Now you have checked the compass direction that was valid the last time the Multi-Navigator calculated its position, using the GPS receiver. If you want an update of the data valid for your current position, you must start the Multi-Navigator by pressing the ON/OFF (FIG. -
Page 8: Navigation Definitions - What Do The Words Mean
In this manual and in the Multi-Navigator meaning of them will make your navigation more fun and the use of the Multi-Navigator GPS - Global Positioning System which, thanks to more than 24 satellites around Earth, can provide us with signals which are used by the GPS receiver in the Multi-Navigator that the GPS satellites circles around Earth at an elevation of approximately 20 000 km. -
Page 9: The Manual, The Lcd, The Buttons And The Main Functions
4.2 THE DISPLAY (LCD) The LCD is designed to perform in tough weather conditions and you will easily be able to use your Multi-Navigator in temperatures as low as -25C. It will work equally well in high temperatures up to +70C. Our main concern has been to give you clear and easy to read navigation information so that you can rely on your navigator, also when the going gets tough. -
Page 10: On / Off And Backlight (Fig. 002)
Shut off the Multi-Navigator Note! The barometer will continue to log weather data, when the Multi-Navigator Back light Turn ON or OFF the backlight with a short press on the ON/OFF button when in operation. In battery Fig.010... -
Page 11: The Different Main Functions And How To Find Them
GPS receiver. In the top row you see Time To Go and also Cross Track Error if you have selected that. -
Page 12: Time Function (Fig. 019)
Each ”segment” represents 0.5 hPa/mbar per hour change in pressure. Press RIGHT and you find... 4.4.4.1 FORECAST (FIG. 023) Here you find the weather forecast for the next 12 hours calculated by the Multi-Navigator Fig.023 SUNNY, PARTLY CLOUDY,CLOUDY, RAIN and STORM WARNING. Press DOWN and you will reach the... -
Page 13: Intellicompasstm Compass Function
As you do this you will see the name, bearing and distance to the waypoint. Thanks to the compass you will also instantly be able to point out the direction to the waypoint shown in the display. Turn the Multi-Navigator... -
Page 14: Edit Waypoint
(see 4.4.7 .4). 4.4.7.4 NEW WAYPOINT (FIG. 029) This function is used for entering new waypoints into the Multi-Navigator in the selected format will appear. Enter the correct co-ordinate by using UP/DOWN and LEFT/RIGHT buttons. When the complete co-ordinate is correct press SET and you can if you wish enter the altitude of the waypoint. -
Page 15: Edit Route
4.4.7.8.2 ACTIVATE ROUTE (FIG. 035) When a route is stored and you want to navigate along it, you must activate it. Press YES, to search for a stored route by pressing UP/DOWN and select by pressing YES. The next step is to select in which direction you want to navigate the route. -
Page 16: Settings/Alternatives In The Different Main Functions
When settings are entered, the small flashing arrows indicate that you can reach other settings/ alternatives by pressing UP or DOWN. For example if you press YES when in the GPS function the LCD will look like this. (FIG. 036). If you want to go to waypoint stored earlier just press YES (and you will be able to select which of the stored ones you want to go to). -
Page 17: Settings/Alternatives In The Position Function
YES, if not, select NO. 4.5.1.9 SET DEGREES/MILS Here is where you select which graduation you would like to use for the directions shown by the Multi-Navigator Available alternatives are DEGREES, MILS/6400, MILS/6300, MILS/6000 and 400gon. Normal graduation on the compass is 360 degrees. -
Page 18: Settings/Alternatives In The Gps Navigation Function
As described in 4.4.7 .8.2 the Multi-Navigator to your current position. If you wish to navigate on a different leg than the one selected by the Multi-Navigator make that selection here. Press YES and select your leg with UP/DOWN. When the leg is found press YES and navigation starts. -
Page 19: Settings/Alternatives In The Time Function
If you have not calibrated your altimeter for a long period of time and you are unsure of the changes in air-pressure since the last time, it can be a good idea (and quite accurate) to check the GPS ELEVATION (see 4.4.1.1) and use that as your calibration altitude. -
Page 20: Settings/Alternatives In The Intellicompasstm Function
See 4.5.1 5. PRACTICAL NAVIGATION EXAMPLE Here we will show you, step by step, a practical example of how you can use your Multi-Navigator 5.1 The fishing trip to the lake In this example we are going to fish in a lake we have never been to before. We have a topographic map of the area and we will drive by car to the spot where the road ends. -
Page 21: How To Store Your "* Home *" Position
ON/OFF. The display shows a version No., tempera- ture and the remaining battery capacity and after that it will start to search for satellites. As we do not need the GPS receiver to work while we are planning our trip, we turn it off by pressing YES twice. (FIG. 011) When that is done press WPT to open the function that handles everything that is connected with waypoints etc. -
Page 22: Checking The Direction During Your Trip
5.1.5 Checking the correct direction and distance to the lake When you have walked for a while and you would like to update the position in your Multi-Navigator by pressing ON/OFF. Wait for a few seconds until it shows POSITION in the LCD then press COMPASS and the distance and direction to the lake is updated. -
Page 23: The Multi-Navigator Tm Does Not Start At All
When the batteries are empty and you take them out of the Multi-Navigator in order not to lose the barometric history and the latest calculated GPS position as well as the time. Note! You will not lose any stored waypoints if the batteries are out for more than 2 hours. -
Page 24: Specifications
Receiver** type: 12-channel parallel, for continuous tracking of 12 satellites maximum. Position update rate: 1 per second when in continuous GPS navigation mode. Time to first fix: Frozen (first time in use) - approx. 1-2 min, Cold (has not been navigating the last 4 hours) - approx. 45 seconds Warm (has been navigating within the last 4 hours) - approx. -
Page 25: Warranty Card
5th minute. Continuous barometer logging. ***= GPS position update every 30th minute, compass 15 seconds every 5th minute. Continuous barometer logging. ****=Remember that alkaline batteries lose its ability to release a significant amount of energy when used at low temperatures. If the Multi-Navigator is to be used in freezing conditions we recommend 2 pcs 1.5 Volt Lithium batteries (AA size) or our Vehicle kit for onnection to... -
Page 26: Important Information/Warnings
The approximate accuracy achievable today is better than 15 metres 2D RMS. Remember that the availability of GPS signals can be limited in cities, deep valleys and in other areas where there are obstacles obscuring the sky in some or all directions. Note! Never use your Multi-Navigator map and a SILVA compass as backup.
Need help?
Do you have a question about the Multi-Navigator and is the answer not in the manual?
Questions and answers