
Related Manuals for Whirlpool AKZ 476


Summary of Contents for Whirlpool AKZ 476
- Page 1 AKZ 476 User and maintenance manual Manuel d’utilisation et d’entretien Handleiding voor gebruik en onderhoud...
- Page 3 IMPORTANT SAFETY INSTRUCTIONS YOUR SAFETY AND THAT OF OTHERS IS PARAMOUNT This manual and the appliance itself provide important safety warnings, to be read and observed at all times. This is the danger symbol, pertaining to safety, which alerts users to potential risks to themselves and others. All safety warnings are preceded by the danger symbol and the following terms: Indicates a hazardous situation which, if not avoided, will cause serious injury.
-
Page 4: Installation
INSTALLATION After unpacking the oven, make sure that it has not been damaged during transport and that the oven door closes properly. In the event of problems, contact the dealer or your nearest After-sales Service. To prevent any damage, only remove the oven from its polystyrene foam base at the time of installation. -
Page 5: Troubleshooting Guide
TROUBLESHOOTING GUIDE The oven does not work: • Check for the presence of mains electrical power and if the oven is connected to the electrical supply. • Turn off the oven and restart it to see if the fault persists. The door will not open: •... -
Page 6: Maintenance
Cleaning the rear wall and catalytic side panels of the oven (if present): IMPORTANT: do not use corrosive or abrasive detergents, coarse brushes, pot scourers or oven sprays which could damage the catalytic surface and ruin its self-cleaning properties. • Operate the oven empty with the fan-assisted function at 200°C for about one hour •... -
Page 7: Moving The Top Heating Element (Some Models Only)
MOVING THE TOP HEATING ELEMENT (SOME MODELS ONLY) Remove the side accessory holder grilles (Fig. 3). Pull the heating element out a little (Fig. 4) and lower it (Fig. 5). To reposition the heating element, lift it up, pulling it slightly towards you, making sure it comes to rest on the lateral supports. -
Page 8: Instructions For Oven Use
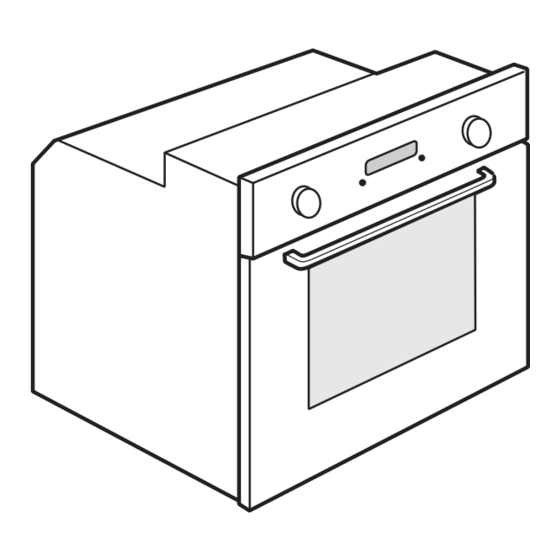
INSTRUCTIONS FOR OVEN USE FOR ELECTRICAL CONNECTION, SEE THE PARAGRAPH ON INSTALLATION Control panel Upper heating element/grill Cooling fan (not visible) Dataplate (not to be removed) Lamp Circular heating element (not visible) Turnspit (if present) Lower heating element (not visible) 10. -
Page 9: Control Panel Description
CONTROL PANEL DESCRIPTION ELECTRONIC PROGRAMMER DISPLAY FUNCTION SELECTOR KNOB: On/off and function selector knob BROWSE KNOB: for browsing the menu and adjusting pre-set values SELECTION/CONFIRMATION BUTTON N.B.: the display shows for indications regarding this button. LIST OF FUNCTIONS Turn the “Functions” knob to any position and the oven switches on: the display shows the functions or the associated submenus. -
Page 10: Fast Preheating
SELECTING COOKING FUNCTIONS Turn the “Functions” knob to the desired function: the cooking settings are shown on the display. If the values shown are those desired, press . To change them, proceed as indicated below. SETTING THE TEMPERATURE/OUTPUT OF THE GRILL To change the temperature or output of the grill, proceed as follows: Turn the “Browse”... -
Page 11: Selecting Special Functions
SETTING END OF COOKING TIME /START DELAYED IMPORTANT: the start delayed setting is not available for the following functions: FAST PREHEATING, BREAD/PIZZA, GENTLE CONVECTION BAKE. N.B.: with this setting, the selected temperature is reached in a more gradual way, so cooking times will be slightly longer than stated in the cooking table. - Page 12 BREAD/PIZZA FUNCTION SELECTION Turn the “Functions” knob indicator to the symbol to access a submenu containing two automatic cooking functions for “bread” and “pizza”. Bread Turn the “Functions” knob to symbol : the display shows “BREAD” and AUTO at the side. Press to select the function.
-
Page 13: Automatic Oven Cleaning
AUTOMATIC OVEN CLEANING For the description of this function, see the chapter CLEANING and the functions table at page 12. To activate the oven’s automatic cleaning cycle (pyro-cleaning), proceed as follows: Turn the “Functions” knob to symbol : the word PYRO appears on the display. Press button to confirm your choice and start the pyro-cleaning cycle. - Page 14 OVEN FUNCTION DESCRIPTION TABLE FUNCTIONS KNOB To stop cooking and switch off the oven. LAMP To switch the oven interior light on/off. To speed up defrosting of food. Place food on the middle shelf. Leave food in its packaging in order to prevent it from drying out on the outside.
-
Page 15: Cooking Table
COOKING TABLE Recipe Function Preheating Shelf Temperature Time Accessories (from bottom) (°C) (min) 160-180 30-90 Cake tin on wire shelf Leavened cakes Shelf 4: cake tin on wire shelf 160-180 30-90 Shelf 1: cake tin on wire shelf GENTLE Drip tray/ baking tray or cake 160-200 30-85 tin on wire shelf... - Page 16 Recipe Function Preheating Shelf Temperature Time Accessories (from bottom) (°C) (min) Lasagne / Baked pasta / 190-200 45-55 Oven tray on wire shelf Cannelloni / Flans Lamb / Veal / Beef / Pork Drip tray or oven tray on wire 190-200 70-100 1 Kg...
- Page 17 TESTED RECIPES (in compliance with IEC 60350:99+A1:05 +A2:08 and DIN 3360-12:07:07) Recipe Function Preheating Shelf Temperature Time Accessories and notes (from bottom) (°C) (min) IEC 60350:99+A1:05 +A2:08 § 8.4.1 15-25 Drip tray / baking tray Shortbread Shelf 3: baking tray (switch levels halfway through cooking) 20-30 Shelf 1: drip tray...
-
Page 18: Recommended Use And Tips
RECOMMENDED USE AND TIPS How to read the cooking table The table indicates the best function to use for any given food, to be cooked on one or more shelves at the same time. Cooking times start from the moment food is placed in the oven, excluding pre-heating (where required). Cooking temperatures and times are purely for guidance and will depend on the amount of food and type of accessory used. - Page 19 INSTRUCTIONS IMPORTANTES SUR LA SÉCURITÉ VOTRE SÉCURITÉ AINSI QUE CELLE D’AUTRUI EST PARTICULIÈREMENT IMPORTANTE Le présent manuel contient d’importants messages relatifs à la sécurité, qui figurent également sur l’appareil. Nous vous invitons à les lire soigneusement et à les respecter en toute circonstance. Ceci est le symbole de danger relatif à...
-
Page 20: Branchement De L'appareil
Mise au rebut des appareils ménagers usagés Cet appareil est fabriqué à partir de matériaux recyclables ou pouvant être réutilisés. Mettez-le au rebut en vous conformant aux prescriptions locales en matière d’élimination des déchets. Avant de mettre votre appareil au rebut, rendez-le inutilisable en sectionnant le câble d’alimentation. -
Page 21: Déclaration De Conformité
• votre numéro de téléphone. Nous vous invitons à enregistrer votre four sur le site : www.whirlpool.fr, rubrique « enregistrez votre produit » afin d’être rapidement reconnu et renseigné par l service consommateur en cas de conseil ou de panne. -
Page 22: Entretien
Enceinte du four REMARQUE IMPORTANTE : évitez l’emploi d’éponges abrasives et/ou de pailles de fer. À la longue, celles-ci risquent d’abîmer les surfaces émaillées et la vitre de la porte. • Après chaque utilisation, laissez refroidir le four et nettoyez-le, de préférence lorsqu’il est tiède, pour éviter que les résidus d’aliments ne s’incrustent (aliments à... -
Page 23: Remplacement De L'ampoule
Pour remonter la porte : Introduisez les charnières dans leur logement respectif. Ouvrez complètement la porte. Abaissez les deux manettes d’arrêt. Fermez la porte du four. Fig. 1 Fig. 2 DÉPLACEMENT DE LA RÉSISTANCE SUPÉRIEURE (UNIQUEMENT SUR CERTAINS MODÈLES) Déposez les grilles porte-accessoires latérales (Fig. 3). Dégagez légèrement la résistance (Fig. -
Page 24: Instructions Pour L'utilisation Du Four
INSTRUCTIONS POUR L’UTILISATION DU FOUR POUR LE BRANCHEMENT ÉLECTRIQUE, CONSULTEZ LA PARTIE RELATIVE À L’INSTALLATION Bandeau de commandes Résistance supérieure/gril Ventilateur (non visible) Plaque signalétique (à ne pas enlever) Éclairage Résistance circulaire (non visible) Ventilateur Tournebroche (si présent) Résistance inférieure (non visible) 10. -
Page 25: Description Du Bandeau De Commande
DESCRIPTION DU BANDEAU DE COMMANDE PROGRAMMATEUR ÉLECTRONIQUE AFFICHEUR BOUTON FONCTIONS : allumage/extinction et sélection des fonctions BOUTON NAVIGATION : navigation dans le menu, réglage valeurs pré-introduites TOUCHE DE SÉLECTION/CONFIRMATION REMARQUE : pour les indications relatives à cette touche, s’affichera à l’écran. LISTE DES FONCTIONS En tournant le bouton «... -
Page 26: Préchauffage Rapide
SÉLECTION DES FONCTIONS DE CUISSON Tournez le bouton « Fonctions » sur la fonction choisie : les paramètres de cuisson s’affichent. Si les paramètres proposés correspondent à ceux qui sont désirés, appuyez sur la touche . Pour les modifier, procédez comme indiqué... - Page 27 Pour retarder la fin de la cuisson, en retardant l’allumage du four, procédez comme suit : Tournez le bouton « Navigation » jusqu’à la visualisation de l’heure à laquelle vous désirez terminer la cuisson (par exemple 16:00). Confirmez la valeur choisie avec la touche : les deux points de l’heure de fin de cuisson clignotent pour indiquer que le paramétrage a été...
- Page 28 Pain Tournez le bouton « Fonctions » sur le symbole : l’afficheur visualise « BREAD » (pain) avec à côté AUTO. Appuyez sur pour sélectionner la fonction. Tournez le bouton « Navigation » pour introduire la température désirée (entre 180°C et 220°C) et confirmez avec la touche Tournez le bouton «...
- Page 29 Appuyez sur la touche pour confirmer le choix et lancer le cycle de pyrolyse. Pour sélectionner la pyrolyse ECO, tournez le bouton « Navigation » : ECO apparaît se trouve en bas à droite de l’affichage. Appuyez sur la touche et lancez le programme réduit.
- Page 30 TABLEAU DESCRIPTIF DES FONCTIONS DU FOUR BOUTON FONCTIONS Pour interrompre la cuisson et éteindre le four. LAMPE Pour allumer/éteindre la lumière à l’intérieur du four. Pour accélérer la décongélation des aliments. Placez l’aliment sur le gradin central. Laissez-le dans son emballage pour empêcher que la surface ne se déshydrate. DÉCONGÉLATION Pour conserver les aliments cuits chauds et croustillants (ex.
- Page 31 TABLEAU DE CUISSON Recette Fonction Préchauffage Gradin (en Température Durée Accessoires partant du bas) (°C) (min) 160-180 30-90 Moule à gâteau sur grille Gâteaux levés Grad. 4 : moule à gâteau sur grille 160-180 30-90 Grad. 1: moule à gâteau sur grille DÉLICATE Lèchefrite / plaque à...
- Page 32 Recette Fonction Préchauffage Gradin (en Température Durée Accessoires partant du bas) (°C) (min) 190-200 20-30 Lèchefrite / plaque à pâtisserie Vol-au-vent/Feuilletés Grad. 4 : plaque sur grille 180-190 20-40 Grad. 1 : lèchefrite/plaque à DÉLICATE pâtisserie Lasagnes/Pâtes au four/ 190-200 45-55 Plaque sur grille Cannellonis/Flans...
- Page 33 RECETTES TESTÉES conformément à la norme IEC 60350:99+A1:05 +A2:08 et DIN 3360-12:07:07 Recette Fonction Préchauffage Gradin Temp. Durée Accessoires et remarques (en partant du bas) (°C) (min) IEC 60350:99+A1:05 +A2:08 § 8.4.1 15-25 Lèchefrite / plaque à pâtisserie Biscuits de pâte brisée Grad.
- Page 34 CONSEILS POUR L’UTILISATION ET SUGGESTIONS Comment lire le tableau de cuisson Le tableau indique la meilleure fonction à utiliser pour un aliment déterminé, à cuire sur un ou plusieurs gradins simultanément. Les temps de cuisson commencent au moment de l’introduction du plat dans le four et ne tiennent pas compte du préchauffage (lorsque demandé).
-
Page 35: Belangrijke Veiligheidsinstructies
BELANGRIJKE VEILIGHEIDSINSTRUCTIES UW EIGEN VEILIGHEID EN DIE VAN ANDEREN IS ZEER BELANGRIJK Deze handleiding en het apparaat zelf zijn voorzien van belangrijke veiligheidsaanwijzingen, die te allen tijde moeten worden gelezen en opgevolgd. Dit is het waarschuwingssymbool waarmee mogelijke risico’s voor de gebruiker en voor anderen worden aangegeven. Alle veiligheidsberichten worden voorafgegaan door het waarschuwingssymbool en door de volgende termen: Duidt op een gevaarlijke situatie die ernstig letsel veroorzaakt. -
Page 36: Aansluiting Op Het Elektriciteitsnet
INSTALLATIE Controleer na het uitpakken van de oven of het apparaat tijdens het transport geen beschadigingen heeft opgelopen en of de ovendeur goed sluit. Neem in geval van twijfel contact op met uw leverancier of de klantenservice. Om eventuele schade te voorkomen wordt geadviseerd om de oven pas voor de installatie van de piepschuim bodem te halen. -
Page 37: Verklaring Van Overeenstemming
VERKLARING VAN OVEREENSTEMMING Dit apparaat is bedoeld om in aanraking te komen met voedingsmiddelen en is in overeenstemming met de richtlijn ( n.1935/2004 en is ontworpen, vervaardigd en op de markt gebracht in overeenstemming met de veiligheidsvoorschriften van de “Laagspanningsrichtlijn” 2006/95/EG (die 73/23/EEG en daaropvolgende amendementen vervangt), de beschermingsvoorschriften van de “EMC”... - Page 38 Binnenkant van de oven BELANGRIJK: gebruik geen schuursponsjes, sponsjes van staalwol of metalen schrapers. Hierdoor kunnen de gelakte oppervlakken en het glas van de deur op den duur beschadigd raken. • Laat de oven na elk gebruik afkoelen en reinig het apparaat bij voorkeur als het nog lauw is om aangekoekte etensresten (bijv.
-
Page 39: Vervangen Van Het Lampje
De deur weer terugplaatsen: Plaats de scharnieren in de zittingen. Open de deur helemaal. Duw de twee vergrendelingen omlaag. Sluit de deur. Fig. 1 Fig. 2 OMLAAGBRENGEN VAN HET BOVENSTE VERWARMINGSELEMENT (ALLEEN BIJ BEPAALDE MODELLEN) Verwijder de zijroosters (Fig. 3). Trek het verwarmingselement voorzichtig naar buiten (Fig. -
Page 40: Bijgeleverde Accessoires
INSTRUCTIES VOOR HET GEBRUIK VAN DE OVEN RAADPLEEG VOOR DE ELEKTRISCHE AANSLUITING HET HOOFDSTUK OVER DE INSTALLATIE Bedieningspaneel Bovenste verwarmingselement/grill Koelventilator (niet zichtbaar) Typeplaatje (verwijder dit nooit) Ovenlampje Circulair verwarmingselement (niet zichtbaar) Ventilator Draaispit (indien bijgeleverd) Onderste verwarmingselement (niet zichtbaar) 10. -
Page 41: Overzicht Functies
BESCHRIJVING BEDIENINGSPANEEL ELEKTRONISCHE PROGRAMMEERFUNCTIE DISPLAY FUNCTIEKNOP: in-/uitschakelen en selecteren van functies NAVIGATIEKNOP: navigatie door de menu’s, regeling van te voren ingestelde waarden SELECTIE-/BEVESTIGINGSTOETS OPMERKING: op het display verschijnt voor de aanwijzingen met betrekking tot deze toets. OVERZICHT FUNCTIES Als de knop “Functies” in willekeurig welke stand gezet wordt, wordt de oven ingeschakeld: op het display worden de bijbehorende functies of submenu’s weergegeven. -
Page 42: Snel Voorverwarmen
KEUZE VAN DE BEREIDINGSFUNCTIES Draai de knop “Functies” op de gewenste stand: de bereidingsinstellingen verschijnen op het display. Als de voorgestelde parameters overeenkomen met de gewenste instellingen, drukt u op de toets . Om ze te wijzigen gaat u te werk zoals hierna is beschreven. INSTELLEN VAN DE TEMPERATUUR/GRILLVERMOGEN Ga als volgt te werk om de temperatuur of het grillvermogen te wijzigen: Draai de knop “Navigatie”... - Page 43 INSTELLEN VAN HET TIJDSTIP EINDE BEREIDING / UITGESTELDE START BELANGRIJK: de instelling uitgestelde start is niet beschikbaar voor de volgende functies: SNEL VOORVERWARMEN, BROOD/PIZZA, HETELUCHT GELEIDELIJK. OPMERKING: met deze instelling wordt de gekozen temperatuur meer geleidelijk bereikt, daarom worden de bereidingstijden iets langer ten opzichte van de tijden die in de bereidingstabel zijn vermeld.
- Page 44 EEN BRUIN KORSTJE GEVEN Na afloop van de bereiding wordt, voor de functies waarbij dat kan, op het display de mogelijkheid weergegeven om uw gerecht een bruin korstje te geven. Deze functie kan alleen geactiveerd worden als u een bereidingstijd hebt ingesteld. Als de bereidingstijd is afgelopen, verschijnt op het display: “PRESS TO TO BROWN”...
- Page 45 Geluidssignaal Om het geluidssignaal te activeren of deactiveren, gaat u als volgt te werk: Draai de knop “Navigatie” tot “SOUND” wordt weergegeven. Druk op toets om toegang te krijgen tot de instellingen (ON/OFF). Draai aan de knop “Navigatie” om de gewenste instelling te selecteren en bevestig dit met de toets Helderheid Om de helderheid van het scherm te veranderen, gaat u als volgt te werk: Draai de knop “Navigatie”...
- Page 46 TABEL BESCHRIJVING FUNCTIES FUNCTIEKNOP Om de bereiding te onderbreken en de oven uit te schakelen. LAMP Om het lampje in de oven in/uit te schakelen. Voor het versnellen van het ontdooien van voedsel. Plaats het voedsel op de middelste steunhoogte. Laat het voedsel in de verpakking zitten zodat het niet uitdroogt. ONTDOOIEN Voor het warm en krokant houden van zojuist bereide gerechten (bv.
- Page 47 BEREIDINGSTABEL Recept Functie Voorver- Steunhoogte Temperatuur Tijd Accessoires warmen (van onder) (°C) (min) 160-180 30-90 Taartvorm op rooster Luchtig gebak Niv. 4: taartvorm op rooster 160-180 30-90 Niv. 1: taartvorm op rooster VOORZICHTIG Opvangbak / bakplaat of taartvorm 160-200 30-85 op rooster Gevulde taarten Niv.
- Page 48 Recept Functie Voorver- Steunhoogte Temperatuur Tijd Accessoires warmen (van onder) (°C) (min) Lasagne / pasta uit de oven / cannelloni / 190-200 45-55 Ovenschaal op rooster ovenschotels Lamsvlees / kalfsvlees / rundvlees / 190-200 70-100 Opvangbak of ovenschaal op rooster varkensvlees 1kg Kip / konijn / eend 1kg 200-230...
- Page 49 GETESTE RECEPTEN in overeenstemming met de norm IEC 60350:99+A1:05 +A2:08 en DIN 3360-12:07:07 Recept Functie Voorver- Steunhoogte Temperatuur Tijd Accessoires en opmerkingen warmen (van onder) (°C) (min) IEC 60350:99+A1:05 +A2:08 § 8.4.1 15-25 Opvangbak / bakplaat Koekjes van kruimeldeeg Niv. 3: bakplaat (verwissel de steunhoogtes (shortbread) halverwege de bereidingstijd) 20-30...
- Page 50 GEBRUIKSADVIEZEN EN -SUGGESTIES Lezen van de bereidingstabel De tabel geeft aan welke functie het best gebruikt kan worden voor een bepaald gerecht, dat op één of meerdere steunhoogtes tegelijk kan worden bereid. De bereidingstijden gelden vanaf het moment dat het gerecht in de oven wordt gezet, zonder de voorverwarmingstijd (indien nodig).
- Page 52 Printed in Italy 08/2011 5019 310 01347...
Need help?
Do you have a question about the AKZ 476 and is the answer not in the manual?
Questions and answers