Advertisement
Countertop Classic
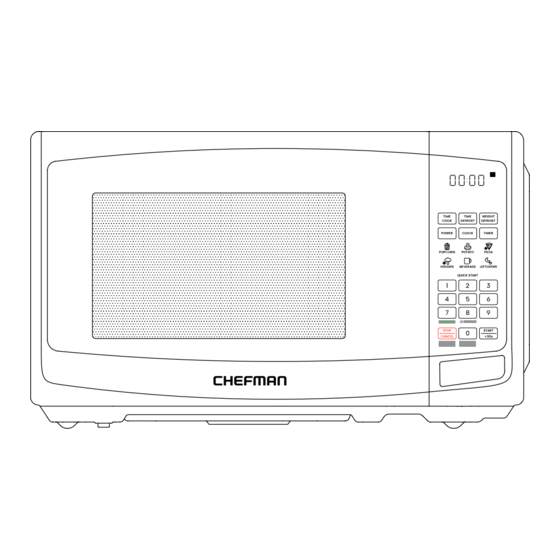
Countertop Classic
Compact
Compact
microwave
microwave
USER GUIDE
•
Safety Instructions
•
Features
•
Operating Instructions
•
Troubleshooting
•
Cleaning and Maintenance
•
Terms and Conditions
•
Warranty Registration
RJ55-7
Oz
TIME
TIME
WEIGHT
COOK
DEFROST
DEFROST
POWER
CLOCK
TIMER
POPCORN
POTATO
PIZZA
VEGGIES
BEVERAGE
LEFTOVERS
QUICK START
1
2
3
4
5
6
7
8
9
ECO MODE
ON | OFF
STOP
START
0
CANCEL
+30s
SAFETY
SELECT
LOCK
FAVORITE
Advertisement

Related Manuals for Chefman RJ55-7


Summary of Contents for Chefman RJ55-7
- Page 1 Cleaning and Maintenance • Terms and Conditions • Warranty Registration TIME TIME WEIGHT COOK DEFROST DEFROST POWER CLOCK TIMER POPCORN POTATO PIZZA VEGGIES BEVERAGE LEFTOVERS QUICK START ECO MODE ON | OFF STOP START CANCEL +30s SAFETY SELECT LOCK FAVORITE RJ55-7...
- Page 2 Thank you for choosing the Countertop Classic Compact Microwave as the newest addition to your kitchen. Whether this is your first Chefman® appliance or you’re already part of our family, we’re happy to be cooking with you. For everything from simple one-touch heating to multi-phase cooking with different power levels, the microwave covers all your needs.
-
Page 3: Table Of Contents
CONTENTS Safety Instructions Features Operating Instructions Troubleshooting Cleaning and Maintenance Terms and Conditions Warranty Registration... -
Page 4: Safety Instructions
DOOR (bent) b. HINGES AND LATCHES (broken or loosened) c. DOOR SEALS AND SEALING SURFACE 4. The oven should not be adjusted or repaired. If the oven breaks, please contact Chefman® Customer Support for assistance. Specifications Model RJ55-7 Voltage... - Page 5 SAFETY INSTRUCTIONS IMPORTANT SAFEGUARDS To reduce the risk of burns, electrical shock, fire, injury to persons, or exposure to excessive microwave energy when using your oven, follow basic safety precautions, including: Read all instructions before using the appliance. 2. Read and follow the specific “PRECAUTIONS TO AVOID POSSIBLE EXPOSURE TO EXCESSIVE MICROWAVE ENERGY”...
- Page 6 10. Do not operate this oven if it has a damaged cord or plug, if it is not working properly, or if it has been damaged or dropped. 11. Do not attempt to service or repair this microwave. Instead, contact Chefman® Customer Support for assistance.
- Page 7 SAFETY INSTRUCTIONS IMPORTANT SAFEGUARDS 18. When cleaning the oven, door, and sealing surfaces, use only mild, nonabrasive soaps or detergents applied with a sponge or soft cloth. 19. This appliance is for private household use only. 20. In a microwave, liquids such as water, coffee, or tea can become overheated beyond the boiling point without appearing to be boiling.
- Page 8 SAFETY INSTRUCTIONS IMPORTANT SAFEGUARDS GROUNDING INSTRUCTIONS DANGER Electrical Shock Hazard Touching some of the internal components can cause serious personal injury or death. Do not disassemble this appliance. This appliance must be grounded. In the event of an electrical short circuit, grounding reduces the risk of electrical shock by providing an escape wire for the electric current.
- Page 9 SAFETY INSTRUCTIONS IMPORTANT SAFEGUARDS If an extension cord is used: a. The marked electrical rating of the cord set and/or the marked electrical rating of the extension cord should be at least as great as the electrical rating of the appliance.
-
Page 10: Features
FEATURES O ST T IM O ST T IM T IM LE F C K S Q UI O N | O MOD IT E S EL N CE FA V S AFE Door Assembly 4. Display Turntable Shaft 2. Safety Interlock System 5. - Page 11 FEATURES CONTROL PANEL Clock/Timer Display Counts down to the end of an active cooking cycle. Displays time of day in Standby Mode. TIME COOK Button Press to set cooking time. DEFROST Buttons Press to defrost by time or by weight (see p.
-
Page 12: Operating Instructions
OPERA TING INSTRUCTIONS BEFORE FIRST USE Remove all packaging materials, and read and remove all removable stickers. (Leave the rating label on the unit.) Be sure that all parts and accessories are accounted for before throwing away any packaging. Gently wipe the exterior and interior of the oven with a clean, damp cloth and dry thoroughly. - Page 13 Never place the turntable upside down. 3. Always place food and food containers on the turntable for cooking. NOTE: If the turntable or turntable support cracks or breaks, contact Chefman® Customer Support.
- Page 14 OPERA TING INSTRUCTIONS MATERIALS YOU CAN AND CAN’T USE IN THE OVEN Material Can Use in the Oven? Notes Yes, microwave-safe Refer to manufacturer’s label and/or instructions. Dinnerware only Do not use cracked or chipped dishes. Always remove lid. Use to heat food only until just Glass jars warm.
- Page 15 OPERA TING INSTRUCTIONS MATERIALS YOU CAN AND CAN’T USE IN THE OVEN (continued) Material Can Use in the Oven? Notes Yes, microwave-safe Use to cover food containers during cooking to retain Plastic wrap only moisture. Do not allow plastic wrap to touch food. Plastic Yes, microwave-safe Check manufacturer’s label and instructions.
- Page 16 OPERA TING INSTRUCTIONS SETTING THE CLOCK To set the clock to the time of day, press the CLOCK button once; "00:00" will display. Then use the number keypad to enter the current time. Press CLOCK again to finish. TO USE THE QUICK-COOK FUNCTIONS Use the Quick-Cook buttons for simple, one-touch microwaving at 100% power.
- Page 17 OPERA TING INSTRUCTIONS Press START. The unit will begin cooking and counting down. While the unit is operating, press the +30 SEC button at any time to add 30 seconds of cooking time at the current power level. Pressing the STOP/CANCEL button OR opening the door pauses the cooking and the timer countdown.
- Page 18 OPERA TING INSTRUCTIONS TO USE PRESET FUNCTIONS The preset functions make it quick and easy to program the oven for cooking some popular foods. Open the door and place your food on the turntable in a microwave-safe vessel. Press one of the preset icons and continue pressing that button to toggle through the size/ quantity choices that appear on the display (the menu reflects only the relevant choices for your chosen preset).
- Page 19 OPERA TING INSTRUCTIONS TO USE THE FAVORITES FUNCTION You can program up to three favorite cooking cycles (for instance, 5 minutes and 30 seconds at 50% power) to be stored in memory and activated with one touch. To program: Press the "0" button on the keypad once (press it twice to program a second favorite cycle).
- Page 20 OPERA TING INSTRUCTIONS OTHER FUNCTIONS Turning Sound Off and On To mute all beeps on the unit, press and hold the "8" on the keypad for 3 seconds. To turn the sound back on, press and hold the same button for 3 seconds. Timer The built-in kitchen timer gives you a timer at your fingertips for all sorts of tasks that don't use the microwave.
-
Page 21: Troubleshooting
TROUBLESHOOTING If you encounter problems with your oven, refer to the chart below for possible causes and solutions. If you continue to have trouble, please contact Chefman® Customer Support. Problem Possible Cause Solution a. Electrical cord for oven is not a. - Page 22 TROUBLESHOOTING Problem Possible Cause Solution a. Increase cooking time and/or a. Cooking time is too short or power. power is too low. b. Completely defrost food before b. Food is not completely defrosted. cooking. Undercooked c. Wrong materials used in c.
-
Page 23: Cleaning And Maintenance
CLEANING & MAINTENANCE Periodically wipe down the interior of the microwave with a damp cloth. If food splatters on the interior or on the glass turntable, clean both with mild soap and a damp cloth. The turntable is also top-rack dishwasher safe. Do not immerse the unit in water. -
Page 24: Terms And Conditions
Chefman®. Any changes to the Terms and Conditions of this Warranty must be in writing, signed by a representative of Chefman®. No other party has the right or ability to alter or change the Terms and Conditions of this Warranty. - Page 25 • Altered Products – Damage that occurs from alterations or modifications by any entity other than Chefman® such as the removal of the rating label affixed to the product; • Catastrophic Events – Damage that occurs from fire, floods, or natural disasters; or...
-
Page 26: Warranty Registration
NOTE: Label depicted here is an example. How do I register my product? All you need to do is fill out a simple Chefman® registration form. You can easily access the form in one of the two ways listed below: Visit Chefman.com/register. - Page 27 PERFORM THIS WARRANTY OBLIGATION. THE REMEDIES PROVIDED HEREIN ARE THE EXCLUSIVE REMEDIES UNDER THIS WARRANTY, WHETHER BASED ON CONTRACT, TORT OR OTHERWISE. Chefman® is a registered trademark of RJ Brands, LLC. Cooking Forward™ is a trademark of RJ Brands, LLC.
- Page 28 ©CHEFMAN 2023 RJ55-7_UG_FINAL_OTP_032123...
Need help?
Do you have a question about the RJ55-7 and is the answer not in the manual?
Questions and answers
how do you set the clock?
To set the clock on the Chefman RJ55-7:
1. Press the CLOCK button once; "00:00" will display.
2. Use the number keypad to enter the current time.
3. Press CLOCK again to finish.
This answer is automatically generated
I press the power button and nothing happens
The Chefman RJ55-7 microwave may not be turning on due to the following possible causes:
1. The electrical cord is not plugged in. Solution: Plug it into a three-prong outlet.
2. The door is open. Solution: Close the door and try again.
3. The wrong operation is set. Solution: Check the instructions for proper operation.
This answer is automatically generated
how do you get to 1000 power level
The Chefman RJ55-7 microwave allows power levels from 0 to 10, with level 10 being full power. However, according to the specifications, the microwave has a maximum power of 700W. There is no option to set the power level to 1000, as the microwave does not support that wattage.
This answer is automatically generated
How do I set the time on my new Chefman model RJ55 -11-V2
How to get 50% power