Advertisement

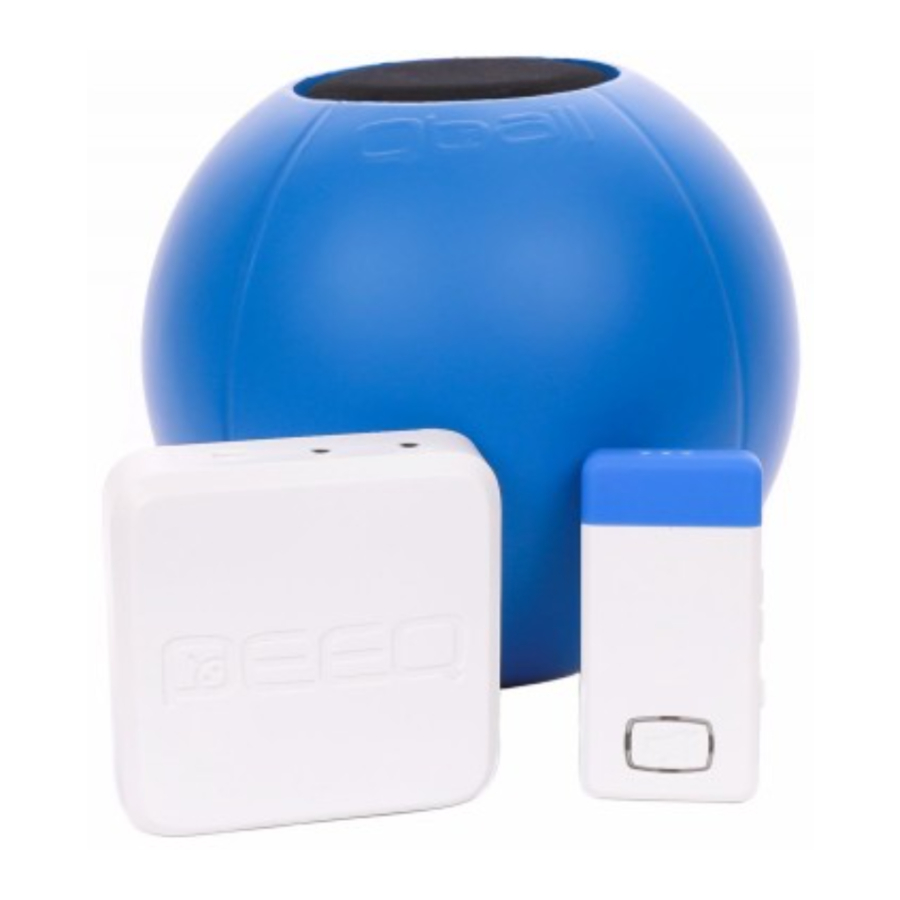
Microphone Diagram

Receiver Diagram

- Charge the Microphone Battery
![]()
- Plug the provided MicroUSB cable from the wall charger to the charging port on the side of the Mic.
- A red indicator light will appear below thecharging port, indicating the Mic is charging.
- The red indicator light will turn green once the Mic is fully charged.
- Power the PEEQ Receiver
![]()
- Plug the provided MicroUSB cable from the wall charger to the power port on the back of the PEEQ Receiver.
- Connect Your Speakers
![]()
- Plug one side of the provided 3.5mm aux cable into the "OUT" port on the back of the PEEQ Receiver.
- Plug the other side of the provided 3.5mm aux cableinto your speaker or amplifier.
**Make sure the aux cable is pushed all the way into the PEEQ Receiver. Not plugging the cable all the way in can result in a "hum" sound during use.**
![warning]() Note: To connect to desktop computer speakers, or for video-conferencing, see alternate setup instructions.
Note: To connect to desktop computer speakers, or for video-conferencing, see alternate setup instructions.
- Turn the PEEQ Receiver On
![]()
- Press and hold the power button on the front of the PEEQ Receiver until the blue light turns on below the "1" and "2" (this can take around five (5) seconds).
- The blue lights will begin flashing, indicating that the PEEQ Receiver is searching for a paired Mic.
- Turn the Microphone On
![]()
- Press and hold the power/mute button on the front of the Mic until the light turns on. (this can take around three (3) seconds).
- Press and hold the power/mute button on the front of the Mic until the light turns on. (this can take around three (3) seconds).
- Confirm Microphone Pairing
![]()
The Mic and PEEQ Receiver were paired from the factory and will automatically connect.- Confirm the flashing blue light on the Mic, and the flashing blue light under "1" on the PEEQ Receiver have changed to steady blue.
- If you have a secondary Mic, repeat steps 5-7. For step 7.2, confirm the flashing blue light under "2" on the PEEQ Receiver has changed to steady blue.
![warning]() Note: The flashing blue light under "2" will continue to flash - this is normal. The Receiver is looking for a secondary Mic to sync with. If you only have one Mic it will continue to flash.
Note: The flashing blue light under "2" will continue to flash - this is normal. The Receiver is looking for a secondary Mic to sync with. If you only have one Mic it will continue to flash.
- Adjust the Microphone Volume
![]()
- Adjust the volume using the volume button on the side of the Mic.
- Adjust the volume on your speakers or amplifier, if necessary, to your desired volume.
- Open the Qball
![]()
- Turn the black Microphone cover 1/8th of a turn counter-clockwise and pull out.
- Turn the black Microphone cover 1/8th of a turn counter-clockwise and pull out.
- Insert Microphone
![]()
- Move the clip inside the ball out of the way andinsert the Mic with the blue rubber grip facing up.
- Make sure the clip fits over the Mic securely.
- Replace the cover and turn clockwise until it it clicks into place.
![warning]() Note: If you put the Mic in upside-down (blue rubber grip facing down), the quality of sound will be negatively impacted.
Note: If you put the Mic in upside-down (blue rubber grip facing down), the quality of sound will be negatively impacted.
- Mute & Turn Off Microphone
![]()
- To mute the Mic, press the power/mute button on the front of the Mic. Press it again to unmute.
- To turn off the Mic, press and hold the power/ mute button for three (3) seconds and release.
- Adjust the Range on the Microphone

- Toggle the switch on the side of the Mic to format the power mode.
High Power Mode: This mode will increase the range up to a maximum of 75ft, while decreasing the battery life.
Low Power Mode: This mode will decrease the range, while increasing the battery life to a maximum of 10 hours.
- Toggle the switch on the side of the Mic to format the power mode.


Note: When connecting multiple Qballs in one location we HIGHLY recommend keeping the Mic in Low Power Mode
Having troubles getting your Mic and Receiver to pair? Go to http://buyqball.com/support/pair for pairing instructions.
Auto Mute
The Qball will automatically mute when being thrown in order to avoid loud thumps over the speakers. The Auto Mute feature may be toggled on and off by inserting a paperclip into the pinhole above the charging port on the Mic, and quickly pressing the internal button.

Auto Sleep
In order to save on battery life, the Mic will automatically go into standby mode if no movement is sensed for 15 minutes. To wake the Qball from sleep mode, simply give it a shake. If no movement is sensed for two hours the Mic will turn itself off completely. The Auto Sleep feature may be toggled on and off by inserting a paperclip into the pinhole above the charging port on the Mic, and pressing and holding the internal button for 2 seconds. The lights on the front of the Mic will flash alternatively to indicate that the mode has been toggled. Both green and blue lights indicate that the auto-sleep is on, blue lights only indicate that the auto-sleep is off.
Alternate Setup Instructions
Videoconferencing
The PEEQ Receiver may be connected to a computer for use with videoconferencing software (Skype, Hangoouts etc.) if your computer is equipped with a dedicated Mic Input. Most newer laptops are equipped with a combo headphone/microphone jack that will require an additional adapter to work with the PEEQ Receiver. We recommend the Audio Technica ATR2USB adapter.
Desktop Computer Speakers
If you are connecting the PEEQ Receiver to you desktop speakers, simply disconnect the desktop speakers from your computer and connect them directly into the "OUT" port on the back of the PEEQ Receiver. Then connect one end of the supplied 3.5mm Aux cable into the "IN" port on the back of the PEEQ Receiver, connect the other end into the audio jack on your computer. This will enable audio from both the computer and the Qball without changing cables.
This equipment has been tested and found to comply with the limits for a Class B digital device, pursuant to part 15 of the FCC rules. These limits are designed to provide reasonable protection against harmful interference in a residential installation. This equipment generates, uses and can radiate radio frequency energy and, if not installed and used in accordance with the instructions, may cause harmful interference to radio communications. However, there is no guarantee that interference will not occur in a particular installation. If this equipment does cause harmful nterference to radio or television reception, which can be determined by turning the equipment off and on, the user is encouraged to try to correct the interference by one or more of the following measures.
Reorient or relocate the receiving antenna.
Increase the separation between the equipment and the receiver.
Connect the equipment into an outlet on a circuit different from that to which the receiver is connected. COnsult the dealer or and experienced radio/TV technician for help.

Any changes or modifications to this device not explicitly approved by the manufacturer could void your authority to operate this equipment.
This device complies with part 15 of the FCC rules. Operation is subject to the following two conditions
- This device may not cause harmful nterference, and
- this device must accept and interference, including interference that may cause undesired operation.

Documents / ResourcesDownload manual
Here you can download full pdf version of manual, it may contain additional safety instructions, warranty information, FCC rules, etc.
Advertisement

Need help?
Do you have a question about the Qball and is the answer not in the manual?
Questions and answers