Table of Contents
Advertisement
Quick Links
Instructions - Parts List
Techni-flow
Diaphragm Pumps
200 and 400 FDA Models
For use in sanitary applications. For professional use only.
Important Safety Instructions
Read all warnings and instructions in this
manual. Save these instructions.
120 psi (0.8 MPa, 8 bar) Maximum Fluid Working Pressure
120 psi (0.8 MPa, 8 bar) Maximum Air Input Pressure
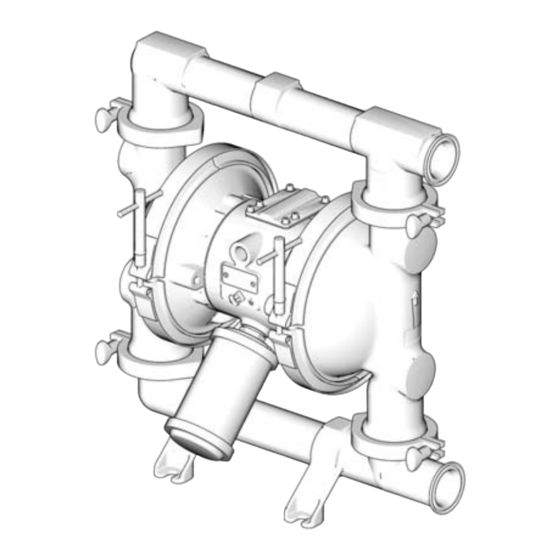
TFFT0005 and TFFT0006
TFFT0005
®
TI8924a
TFFT0006
332528C
TI8926a
EN
II 2 G
Advertisement
Table of Contents

Summary of Contents for Techni-flow 200 FDA
- Page 1 Instructions - Parts List ® Techni-flow Diaphragm Pumps 332528C 200 and 400 FDA Models For use in sanitary applications. For professional use only. Important Safety Instructions Read all warnings and instructions in this manual. Save these instructions. 120 psi (0.8 MPa, 8 bar) Maximum Fluid Working Pressure 120 psi (0.8 MPa, 8 bar) Maximum Air Input Pressure...
-
Page 2: Table Of Contents
Pressure Relief Procedure ....12 Techni-flow Standard Warranty ....34 Sanitize the Pump Before First Use ..12 Starting and Adjusting the Pump . -
Page 3: Models
Stainless Steel PTFE TFFT006 1.5 in. (40 mm) Your Part Number and Configuration Number are marked on the pump’s serial plate. The listing of existing Techni-flow 200 and 400 FDA pumps is below. Components Configuration Part Number Number Fluid Section... - Page 4 Reference: Techni-flow FDA Pumps Issue Date: July 2, 2013 All fluid contact materials in the Techni-flow FDA product family are FDA-Compliant and meet the United States Code of Federal Regulations (CFR) Title 21, Section 177 or are corrosion resistant grade Stainless Steel. This includes the below product groups: 1.
-
Page 5: Warnings
Warnings Warnings The following warnings are for the setup, use, grounding, maintenance, and repair of this equipment. The exclama- tion point symbol alerts you to a general warning and the hazard symbol refers to procedure-specific risk. When these symbols appear in the body of this manual, refer back to these Warnings. Additional, product-specific warnings may be found throughout the body of this manual where applicable. - Page 6 Warnings WARNING EQUIPMENT MISUSE HAZARD Misuse can cause death or serious injury. • Do not operate the unit when fatigued or under the influence of drugs or alcohol. • Do not exceed the maximum working pressure or temperature rating of the lowest rated system component.
-
Page 7: Installation
• The typical installations shown in Figs. 2-4 are only guides for selecting and installing system compo- nents. Contact your Techni-flow representative for assistance in planning a system to suit your needs. The equipment must be grounded. Grounding reduces the risk of static and electric shock by providing an •... -
Page 8: Mountings
Installation Mountings NOTICE In the step below, do not connect the quick-disconnect The pump exhaust air may contain contaminants. Ven- coupler (D) on the air hose to the mating fitting on the tilate to a remote area if the contaminants could affect pump until you are ready to operate the pump. -
Page 9: Fluid Outlet Line
Installation Fluid Outlet Line 1. Use flexible grounded fluid hoses (L). 2. For best sealing results, use a standard Tri-Clamp® style sanitary gasket of a flexible material such as EPDM, Buna-N, fluoroelastomer, or silicon A fluid drain valve (J) is required to relieve pressure in 3. -
Page 10: Changing The Orientation Of The Fluid Inlet And Outlet Ports
Installation Changing the Orientation of the Fluid Inlet and Outlet Ports The pump is shipped with the ports facing the same direction. To reverse the orientation of the ports: 1. Remove the clamps holding the inlet and/or outlet manifold to the covers. 2. -
Page 11: Air Exhaust Ventilation
Installation Air Exhaust Ventilation The air exhaust port is 3/4 npt(f). Do not restrict the air exhaust port. Excessive exhaust restriction can cause erratic pump operation. To provide a remote exhaust: Be sure the system is properly ventilated for your type 1. -
Page 12: Operation
Operation Operation Pressure Relief Procedure Starting and Adjusting the Pump 1. Be sure the pump is properly grounded. Refer to Grounding on page 4. 2. Check connections to be sure they are tight. Tighten The equipment stays pressurized until pressure is fluid inlet and outlet connections securely. -
Page 13: Maintenance
Maintenance Maintenance Lubrication Tightening Connections The air valve is designed to operate unlubricated, how- Before each use, check all hoses for wear or damage, ever if lubrication is desired, every 500 hours of opera- and replace as necessary. Check to be sure all connec- tion (or monthly) remove the hose from the pump air tions are tight and leak-free. -
Page 14: Troubleshooting
Troubleshooting Troubleshooting • Relieve the pressure before checking or servicing the equipment. • Check all possible problems and causes before dis- To reduce the risk of serious injury, whenever you are assembling the pump. instructed to relieve pressure, always follow the Pres- sure Relief Procedure on page 12. - Page 15 Troubleshooting PROBLEM CAUSE SOLUTION Leak in inlet or outlet sanitary fit- Loose sanitary clamp. Tighten clamp. ting. Damaged or worn gasket. Replace gasket. Misalignment of inlet/outlet hose or Use flexible hoses at pump inlet and pipe. outlet. Gasket does not seal. Use a standard sanitary gasket of flexi- ble material such as EPDM, Buna-N, fluoroelastomer, or silicon.
-
Page 16: Service
Service Service Repairing the Air Valve Reassembly 1. If you replaced the bearings (12, 15), reinstall as explained on page 22. Reassemble the fluid section. Tool Required • Torque wrench 2. Install the valve plate (8†) in the cavity, seal down. •... - Page 17 Service Insert narrow end first Torque to 52-60 in-lb (5.6-6.8 • Grease Install with lips facing narrow end of piston (11) Insert wide end first 4† 10† TI9086A TI9089A 17† Detail Tighten screws until they bottom out on the housing. See detail at right.
-
Page 18: Ball Check Valve Repair
Service Ball Check Valve Repair Tools Required 1 Arrow (A) must point toward outlet manifold (103) • O-ring pick Radiused seating surface must face the ball (301). Large chamfer on O.D. must face o-ring. Disassembly NOTE: • A Fluid Section Repair Kit is available. Refer to the Repair Kit Matrix parts section for the appropriate pump size so that the correct kit for your pump is ordered. -
Page 19: Diaphragm Repair
Service Diaphragm Repair Tools Required • Torque wrench • 15 mm socket wrench • 19 mm open end wrench 1. Relieve the pressure. • O-ring pick • Lithium-base grease 2. Remove the manifolds and disassemble the ball check valves as explained on page 18. Disassembly 3. - Page 20 Service 4. Loosen but do not remove the diaphragm shaft bolts e. Install the air side diaphragm plate (104) so the (107), using a 15 mm socket wrench on both bolts. rounded side faces the diaphragm (401). This See F .
- Page 21 Service 402* Cutaway view, with diaphragms in place 403* 24 104 401* TI8935a 401* 403* 108* TI8934a Lips face out of housing (1). Rounded side faces diaphragm (401). Air side must face center housing (1). Grease. ® Apply medium strength (blue) Loctite equivalent.
-
Page 22: Bearing And Air Gasket Removal
Service Bearing and Air Gasket Removal Tools Required bearing so it is flush with the surface of the center housing. • Torque wrench • 10 mm socket wrench 3. Reassemble the air valve as explained on page 16. • Bearing puller •... - Page 23 Service Insert bearings tapered end first Press-fit bearings flush with surface of center housing (1) ® Apply medium strength (blue) Loctite or equivalent. Torque to 130-150 in-lb (15-17 N•m) Detail of air valve bearings TI9093A TI9092a . 12 332528C...
-
Page 24: Parts - Tfg200 Models
Parts - TFG200 Models Parts - TFG200 Models ▲ †4 †10 108* 6† 301* 7† †17 202* 8† †18 401* 17† 403* 10† 402* 301* 202* These parts are included in Pump Repair Kit FK1111, which may be purchased separately. †... - Page 25 Parts - TFG200 Models Air Motor Fluid Section Ref. Part No. Description Ref. Part No. Description 15K009 HOUSING, center; SST 277262 COVER, fluid; SST 15K696 COVER, air valve; SST 277265 MANIFOLD, inlet; SST 8† 15H178 PLATE, air valve; SST 277266 MANIFOLD, outlet;...
-
Page 26: Parts - Tfg400 Models
Parts - TFG400 Models Parts - TFG400 Models ▲ †4 *301 †10 403* *202 108* †17 6† 7† 8† †18 17† 401* 10† *301 402* *202 These parts are included in Pump Repair Kit FK2111, which may be pur- chased separately. †... - Page 27 Parts - TFG400 Models Air Motor Fluid Section Ref. Part No. Description Ref. Part No. Description 15K009 HOUSING, center; SST 277263 COVER, fluid; SST 15K696 COVER, air valve; SST 277267 MANIFOLD, inlet; SST 8† 15H178 PLATE, air valve; SST 277268 MANIFOLD, outlet;...
-
Page 28: Dimensional Drawing - Tfg200 Models
Dimensional Drawing - TFG200 Models Dimensional Drawing - TFG200 Models Pump Mounting Hole Pattern TI9094A 332528C... -
Page 29: Dimensional Drawing - Tfg400 Models
Dimensional Drawing - TFG400 Models Dimensional Drawing - TFG400 Models Pump Mounting Hole Pattern 332528C... -
Page 30: Performance Chart - Tfg200 Models
Performance Chart - TFG200 Models Performance Chart - TFG200 Models Test Conditions: Pump tested in water with inlet submerged Fluid Pressure Curves A at 120 psi (0.7 MPa, 7 bar) operating air pressure (0.84, 8.4) B at 100 psi (0.7 MPa, 7 bar) operating air pressure C at 70 psi (0.48 MPa, 4.8 bar) operating air pressure (0.7, 7) D at 40 psi (0.28 MPa, 2.8 bar) operating air pressure... -
Page 31: Performance Chart - Tfg400 Models
Performance Chart - TFG400 Models Performance Chart - TFG400 Models Test Conditions: Pump tested in water with inlet submerged Fluid Pressure Curves A at 120 psi (0.7 MPa, 7 bar) operating air pressure (0.96, 9.6) B at 100 psi (0.7 MPa, 7 bar) operating air pressure (0.84, 8.4) C at 70 psi (0.48 MPa, 4.8 bar) operating air pressure D at 40 psi (0.28 MPa, 2.8 bar) operating air pressure... -
Page 32: Technical Data - Tfg200 Models
Technical Data - TFG200 Models Technical Data - TFG200 Models Maximum fluid working pressure ....120 psi (0.8 MPa, 8 bar) Air pressure operating range ..... . 20-120 psi (0.14-0.8 MPa, 1.4-8 bar) Maximum air consumption . -
Page 33: Technical Data - Tfg400 Models
Technical Data - TFG400 Models Technical Data - TFG400 Models Maximum fluid working pressure ....120 psi (0.8 MPa, 8 bar) Air pressure operating range ..... . 20-120 psi (0.14-0.8 MPa, 1.4-8 bar) Maximum air consumption . -
Page 34: Techni-Flow Standard Warranty
Techni-flow’s written recommendations. This warranty does not cover, and Techni-flow shall not be liable for general wear and tear, or any malfunction, damage or wear caused by faulty installation, misapplication, abrasion, corrosion, inadequate or improper maintenance, negligence, accident, tampering, or substitution of non-Techni-flow component parts.
Need help?
Do you have a question about the 200 FDA and is the answer not in the manual?
Questions and answers