Advertisement
Quick Links
Advertisement

Subscribe to Our Youtube Channel
Related Manuals for Dynapac LP8500


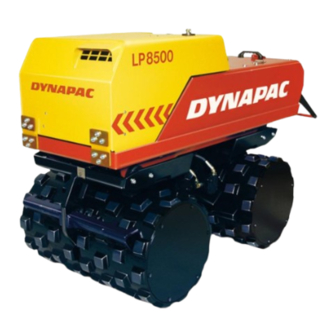
Summary of Contents for Dynapac LP8500
- Page 1 Service Training LP8500...
- Page 3 oupling oupling...
- Page 17 Replacing the rubber element 1. Lift the upper part of the machine (1) to relieve the load on the rubber elements. Replacing the front rubber elements: 2. Loosen the screws (2) on both sides of the machine. 3. Lift the machine approx. 10-15 cm (4-6 inches). Risk of personal injury if the spacer is not used netween the top and bottom part.
- Page 18 13. Loosen the nuts and lift off the old rubber elements (9). 14. Clean the contact surfaces on the rubber elements. 15. Fit the new rubber element (9) by hand. Fig. Removing the rubber element 1. Top 6. Safety arch 7.
-
Page 19: Removing The Drum
Removing the drum Removing the drum 1. Remove the screws (1) holding the scrapers (2) in position. 2. Remove the screws (3) for the protective cover (4). 3. Lift the machine. Risk of pinch injuries between drum and pallet lift. Fig. - Page 20 Removing the drum...
-
Page 21: Removing The Drum Motor
Removing the drum motor Removing the drum motor 1. Remove the drums (pair) as per the previous instruction. Both drums must be removed in order to remove the drum motor (1). Fig. Blocking up the machine 1. Drum motors 2. Block 3. - Page 22 Removing the drum motor...
- Page 23 Fitting the drum motor Fitting the drum motor Remove the safety plugs fitted on the drum motor. Top up with 0.9 L hydraulic oil. Fig. Filling the oil 1. Funnel 2. O-ring 3. Grease the new O-rings (2). The O-rings must always be replaced to reduce the risk of leakage.
- Page 24 Fitting the drum motor 6. Tighten crosswise to 270 Nm, dry. Fig. Fitting the drum motors. 6. Screw 7. Washer 8. Nut...
- Page 25 Fitting the drum Fitting the drum Clean the contact surfaces. Risk of pinch injuries between drum and pallet lift. Fit the drum (1). Fit the washers (2) and screws (3). Tighten dry crosswise to 370 Nm. Lower down the machine. 6.
- Page 26 Fitting the drum Fig. Incorrectly fitted lifting gear Fig. Correctly fitted lifting gear 10. Lifting gear 10. Lifting gear...
- Page 27 Removing the eccentric element Removing the eccentric element Fig. Removing the hydraulic motor: 1. Shield 2. Hydraulic oil hoses 3. Hydraulic motor 1. Clean the machine before removing. Protect electrical equipment. 2. Remove the shield for the hydraulic motor (1). 3.
- Page 28 Removing the eccentric element...
- Page 29 Removing the eccentric element bearing 1. Remove the right bearing's outer race (1) from the eccentric housing (2). Drive out the bearing race from left to right. 2. Remove the snap ring (3) on the right side of the eccentric shaft.
- Page 30 Fitting the eccentric element bearing Fitting the eccentric element bearing Fitting the eccentric element bearing The shims must always be replaced when ~ removing and fitting bearings. 1. Fit the right bearing's outer race (1) and shim (2) in the eccentric housing (3).
- Page 31 Fitting the eccentric element bearing 7. Fit the eccentric shaft (11). 8. Fit the left cover (12). 9. Tighten the screws (13) crosswise to 78 Nm. Fig. Fitting the eccentric shaft 11. Eccentric shaft 12. Cover 13. Screw 10. Fit the hydraulic pump (14). 11.
- Page 32 Fuel line, fuel filter - feed pump 7 Starter motor Fuel line, Unit for extra fuel 34 Fuel filter pressure side supply 8 Air conductor Cylinder head Oil drain plug cover Air intake Oil pipe, return Fan guard * Not fitted on DYNAPAC engines.
-
Page 34: Electrical System
Electrical system Description of the electrical system Switching on the main switch. When the battery switch (Q1) is switched on, current flows through the fuse (F1) to the diode (V1), buzzer (H10) and emergency stop switch (S2). If the switch (S2) is released, current can then flow to the main power relay (K3), which is then energised. - Page 35 Electrical system Operating: When the toggle switch for the throttle is changed to the position for full throttle on the transmitter a signal is sent from receiver terminal (X2-E/1) for pulling current for the gas solenoid. After approx. 4 seconds the pulling current is disconnected and replaced with holding current (X 1-J/3).
-
Page 36: Hydraulic System
Hydraulic system Hydraulic system Description of the hydraulic system Description of components. The hydraulic system is built up around a valve block, three pumps, four drum motors, one vibration motor, and a hydraulic oil tank. The drum motors are installed inside the drums, two on the left side and two on the right. - Page 37 Hydraulic system Functional description: When the main valve (Y10) is not actuated, oil only flows through the hydraulic block and back to the hydraulic oil tank. To operate the machine pressure must be built up in the hydraulic system, which is done by closing the main valve (Y1 O).
- Page 38 Hydraulic system Technical specifications - Drum motor's oil flow: 565 cc/rev = 34.5 cu in/rev - Opening pressure for cooler's overflow valve: 0.55 MPa = 80 PSI - Opening pressure for return filter: 0.17 MPa = 25 PSI - Opening pressure for tank breather filter: 0.035 MPa = 5 PSI - Opening pressure for drive system: 28 MPa = 4,060 PSI...
- Page 39 Hydraulic system...
- Page 40 Removing the safety bar Removing the safety bar 1. Take out the transmitter (1). 2. Remove the battery cables from the battery (2). Fig. Removing the battery Transmitter Battery Holder 3. Remove the battery holders (3) and take out the battery (2).
- Page 41 Removing the safety bar...
- Page 42 Replacing the return springs on the safety bar Replacing the return springs on the safety bar Replacing the return springs on the safety bar 1. Remove the screws (1). Lift off the handle. Fig. Removing the handle 1. Screw 2. Handle 2.
- Page 43 Replacing the return springs on the safety bar 6. Fit the washers (6) and screws (7). Tighten to 23 Nm. 7. Fit the hand le (8), together with the washers (9), nuts (10) screws (11). Fig. Fitting the handle 8. Handle 9.
- Page 44 Replacing or adjusting the safety bar sensor Replacing or adjusting the safety bar sensor Replacing the sensor: 1. Lift off the transmitter (1). 2. Remove the battery cables from the battery (2). 3. Remove the battery holders (3) and lift off the battery (2). 4.
- Page 45 9. Tighten the nuts on the sensor (8). Fig. Adjusting the sensor 10. Connect the sensor. 11. Fit the rear cover on the control box (9). 12. Fit the washers (10) and screws (11). Fig. Fitting the sensor 8. Nut 9. Cover 10. Washer 11. Screw LP8500...
- Page 46 Replacing the springs for the stop Replacing the springs for the stop Replacing the springs for the stop 1. Remove the safety bar. 2. Release the knob (1) and nut (2). Fig. Removing the stop 1. Knob 2. Nut 3. Remove the screw (3). 3. Replace the spring (4).
- Page 47 Replacing the springs for the stop...
- Page 48 Removing the parking brake Removing the parking brake 1. Remove the screws (1) and lift off the handbrake (2). 2. Tap out the guide pin (3). . Removing the parking brake 1.Screw 2. Brake 3. Remove the snap ring (4). Fig.
- Page 49 Removing the parking brake...
- Page 50 Fitting the parking brake Fitting the parking brake 1. Fit the spring (1). Fig. Fitting the spring 1. Spring 2. Spacer 2. Fit the spacer (2). Fig. Fitting the guide pin 3. Guide pin 4. Snap ring 3. Fit the guide pin (3). Lock the guide pin with Loctite 641.
- Page 51 Fitting the parking brake...
-
Page 52: Replacing The Flexible Coupling
Replacing the flexible coupling: Replacing the flexible coupling: Dismantling the machine These are general instructions for the dismantling of the machine, additional steps may be necessary. Disconnect the battery and take out the transmitter. 1. Remove the screws (1) for the front service panel (2). Fig. - Page 53 Replacing the flexible coupling: 5. Remove the screws for the engine wedge (9). 6. Remove the screws (10) and (11) for the air conductor plate (12). 7. Lift off the air conductor plate (12). 8. Remove the air conductor hose (13). Fig.
- Page 54 Removing the flexible coupling Removing the flexible coupling 1. Remove the socket head screw (1). Fig. Removing the pump 's clutch 1. Screw 2.Hub 2. Remove the hub (2). 3. Remove the engine shaft's center screw (3). 4. Remove the engine hub (4). Fig.
- Page 55 Removing the flexible clutch...
- Page 56 Fitting the flexible coupling Fitting the flexible coupling Fit the hydraulic pump's hub (1). Fit the socket head screw (2). Tighten to 49 Nm. Fig. Fitting the pump's clutch hub 1. Hub 2. Screw 3. Fit the engine's hub (3). 4.
- Page 57 Fitting the flexible coupling...
-
Page 58: Installing The Machine
Installing the machine Installing the machine These are general instructions for the installation of the machine, additional steps may be necessary. 1. Fit the adapter housing (1). 2. Fit the hydraulic pump (2). 3. Tighten the screws (3) to 49 Nm. 4. - Page 59 Installing the machine Fitting the engine wedge The engine wedge is fitted between the engine (11) and the air conductor plate (8). One of the engine head attachments (12) is fitted on the air conductor plate. Before fitting the engine wedge, make sure that the air conductor plate is correctly fitted and that all screwed joints are co ectl y tightened.
- Page 60 Installing the machine 13. Fit the engine's exhaust system. 14. Release the pipe clamp (22) to simplify fitting the muffler (23) and the pipe (24). 15. Fit the exhaust seal (25) and screws (26). Replace the exhaust seal if necessary. 16.
- Page 61 Installing the machine...
Need help?
Do you have a question about the LP8500 and is the answer not in the manual?
Questions and answers