Table of Contents
Advertisement
Advertisement
Table of Contents

Summary of Contents for Wasp Barcode Technologies DR6
- Page 1 DR6 Rugged Handheld Computer User's Manual Version 1.0...
-
Page 2: Table Of Contents
Table of Contents Chapter 1 - Overview ................1 1.1 Package ....................1 1.2 Product Detail ..................2 1.3 Specifications ..................4 1.4 Getting Started ..................7 Chapter 2 – Installation & Operation ..........14 2.1 Barcode Setting ..................14 2.2 HF Setting .................... -
Page 3: Chapter 1 - Overview
Chapter 1 - Overview 1.1 Package Please make sure the following contents are in the DR6 gift box. If something is missing or damaged, please contact your Wasp representative. The basic package contents DR6 Rugged Handheld Computer Battery ... -
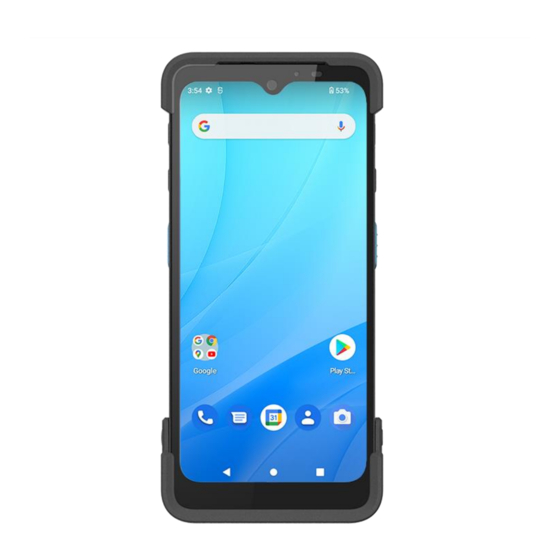
Page 4: Product Detail
1.2 Product Detail DR6 Product View Top View Left View Front View Right View 1. Barcode Scanner Window 6. Scanner Trigger Key 2. Receiver 7. Power Key 3. LED Indicator 8. Programmable Key 4. Front Camera 9. Scanner Trigger Key... - Page 5 Rear View Bottom View 10. Microphone (Sub) 16. Pogo Pin for gun grip 11. Flash LED 17. Pogo Pin for cradle 12. Rear Camera 18. Microphone (Main) 13. Speaker 19. Hand Strap Hole 14. Hand Strap Holes 20. USB Type-C Hole 15.
-
Page 6: Specifications
1.3 Specifications System Features Qualcomm Snapdragon™ 6490 Processor, 64bits, Octa Cores up to 2.7 GHz Memory 6 GB RAM 64 GB UFS Flash (128GB option) Android 12 with GMS & AER certified GMS certified GMS certified Languages support Multiple languages Display Screen Size 6.3”... - Page 7 Power Source Main Battery Hot Swappable 5100mAh Li-Polymer battery / battery with cover in one piece Extended battery 7600mAh / battery with cover in one piece (optional) Hot Swap Regulatory Approvals CE, FCC, NCC, VCCI, TELEC, CCC, SRRC, BQB, N-Mark, RoHS 2.0 Communication Bluetooth ®...
- Page 8 Storage temperature -40°F to 158°F (-40°C to 70°C), without battery Relative Humidity 5% ~ 95% (Non-Condensing) Drop Specification 1.8 meter with bumper 1.5 meter without bumper Sealing IP67 Vibration/Tumble test Tumble 600 times (1.6 ft./0.5 m) Software MDM Software SOTI, AirWatch, 42Gears, 12Manage, and MoboLink Accessories ■...
-
Page 9: Getting Started
1.4 Getting Started 1.4.1 Inserting the Micro SD/Nano SIM Card 1. Pick out the Micro SD/Nano SIM card holder. You may put in 2 SIM cards or one SIM card and one SD card at a time. - Page 10 1.4.2 Install the Battery 1. Align the battery with the battery compartment following the picture below. 2. Press and hold both of the plastic buckles at the bottom, then push against the front. 3. Press down the battery to secure in place...
- Page 11 1.4.3 Remove the battery 1. Press and hold both of the plastic buckles at the bottom. 2. Push the battery against the front and lift to remove.
- Page 12 To charge the DR6, please use the USB charging cable or the cradle. Connect the type C USB cable to the USB port on DR6 and the other end of the USB cable connect to AC power adapter into the electrical outlet on the USB plug.
- Page 13 1.4.5 Battery Info Please go to Settings → BatteryInfo for more detailed battery information.
- Page 14 1.4.6 Turning on the DR6 for the first time It is recommended to fully charge DR6 before first use. You can now start up your device to set up the languages, WLAN setting, and date and time. Power Button Turn ON your device by pressing the power button on the side of the DR6.
- Page 15 1.4.7 Checking the LED status Checking the Battery Status Description Red Light Battery Charging Battery Fully charged Green Light Barcode scan good read Blue Light Message If scanner app is running, LED is controlled by the scanner app. No LED (Red and Green) display when battery is out.
-
Page 16: Chapter 2 - Installation & Operation
Chapter 2 – Installation & Operation 2.1 Barcode Setting On the main screen, scroll up the screen to reach the APPS, and tap Settings and then tap USS (Wasp scan service). Or from the notification bar to tap ScanService. You now enter the USS application. 2.1.1 Settings After you enter the application, please tap the screen... - Page 17 2.1.2 Barcode Scan Please tap Start Scan to get ready for barcodes scan service. You may tap Stop scan to stop scanning, and choose if you want to scan under Auto scan mode. For Save / Load Settings, and Factory Default, Please tap and to select Save / Load Settings, and Factory Default.
- Page 18 To save settings, you can also tap Save on the screen and input path then tap OK. The saved data is stored in Files →Documents...
- Page 19 USSExport → ScannedResults.txt. Note: For more information, please refer to 3.1 USS (Wasp scan service)
-
Page 20: Hf Setting
2.2 HF Setting 2.2.1 HF Setting 1.On the main screen, scroll the screen from bottom to top to reach the APPS, and tap Settings then Connected devices. 2.Tap Connection Preferences to enable NFC... - Page 21 Make sure that both devices are unlocked and have NFC turned on. Also make sure that the NFC antenna area of DR6 and the other phone's NFC area are close to one another. Slightly moving the phones until a connection is made. Tap the screen.
- Page 22 2.2.2 NFCService On the main screen, scroll the screen from bottom to top to reach the APPS, and tap NFCService The saved data is stored in Files →Documents...
-
Page 23: Wwan Setting
For the instruction, please refer to 1.4.1 Inserting the Micro SD/Nano SIM Card 2. Turn on the DR6, LTE signal will show at the top of the screen. 2.3.1 Mobile Network Settings On the main screen, scroll the screen from bottom to top to reach the APPS, and tap Settings and then tap Network &... - Page 24 Tap on the settings icon for more network settings. To switch between 2 SIMs, tap on data preference.
- Page 25 To choose different network type, please tap Preferred network type.
-
Page 26: Wlan Setting
2.4 WLAN Setting On the main screen, scroll the screen from bottom to top to reach the APPS, and tap Settings and then tap Network & internet. Tap Internet and turn WLAN ON to see available networks. Tap to choose available networks. - Page 27 Choose the available networks, and enter the Password and tap Connect. If the wireless network that you want is not listed, tap + Add network to manually add it. When enabled, the icon is displayed on the status bar.
- Page 28 2.4.1 WLAN Advanced WLAN advanced can enhance the roaming behavior when the device is in areas of particularly low coverage or losing its connection to the network infrastructure and provides the power save mode to control the power consumption setting. WLAN advanced will help users to manage the seamless roaming.
- Page 29 Tap on Advanced.
- Page 30 Power Save Mode Tap to enable the power save mode to set the WLAN module to its optimum power consumption setting. ● Roaming Trigger (Default : -65 dBm, Range : -10 dBm ~ - 120 dBm) Roaming trigger will help users to look for a better and stronger signal strength (in dBm) by scanning many access points.
- Page 31 2.4.1.1 Other options for more options to import / export the current data from the device. Initialize is able to restore the default settings.
- Page 32 2.4.2 Share Wi-Fi 1. On the main screen, scroll the screen from bottom to top to reach the APPS, and tap Settings and then tap Network & internet. 2. Tap Internet and turn WLAN ON to see available networks, then tap to choose the available networks.
- Page 33 When Wi-Fi is connected, tap “Share” icon to show QR code.
-
Page 34: Pan Setting
2.5 PAN Setting On the main screen, scroll the screen from bottom to top to reach the APPS, and tap Settings and then tap Connected devices. Tap Connection Preferences to enable Bluetooth ®... - Page 35 Tap ON / OFF to enable / disable Bluetooth ® To pair the available device, turn Bluetooth ® ON to choose the available device.
-
Page 36: Gps Setting
2.6 GPS Setting On the main screen, scroll the screen from bottom to top to reach the Settings and then tap Location. APPS, and tap Tap ON/OFF for the permission to use your location information. -
Page 37: Pc Setting
2.7 PC Setting Connect DR6 to your computer with the USB type C cable. Your computer will recognize it is USB charging. Slide down from top, the system will show as follow picture, then you can tap on Android System Charging this device via USB. - Page 38 Note: If you cannot find the Android System Charging this device via USB notification in step 2, click on CLEAR ALL and try again. Then you can select File Transfer.
-
Page 39: Camera Setting
2.8 Camera Setting Scroll the screen from down to top to reach the APPS, and tap Camera. - Page 40 2.8.1 Introduction For the first time turn on, the screen will show a brief introduction about camera settings.
- Page 41 2.8.2 Settings Please tap to enter the settings section.
- Page 42 Once tap the record button, it will start recording.
-
Page 43: Uss Camera
2.9 USS Camera 1. Scroll the screen from down to top to reach the APPS, and tap USSCamera. - Page 44 2. Select the types of barcodes from the settings.
- Page 45 2.9.1 Laser Line Scan When you select Laser Line Scan, it means only barcodes aligned under the laser line will be decoded.
- Page 46 2.9.2 Scan to Key (floating window) By selecting Scan to Key, start floating window decoding when launched by intent. If enabled, user can start or stop floating window from the notification. The icon will appear on the main screen.
- Page 47 The floating window will appear on the main screen. Note: To close the floating window, simply by not selecting the Scan to Key.
-
Page 48: Performing A Hardware Reset
2.10 Performing a Hardware Reset You may have to perform a reset if the device freezes (i.e., the DR6 no longer responds to the buttons or tapping on the screen). Long press and hold the Power button around 10 seconds to restart the device. -
Page 49: Performing Factory Data Reset
2.11 Performing Factory data reset 1. On the main screen, scroll the screen from bottom to top to reach the APPS, and tap Settings → System, then select Reset Options. Note: When you select Erase all data (factory reset) in the Reset Options, it will erase all folders. -
Page 50: Keyremap
2.12 KeyRemap The DR6’s keys can be programmed for users to be able to perform different functions or applications. Four options to use key remap functions: Volume_Up, Volume_Down, Programmable Key 1, Scanner Trigger Key Left and Scanner Trigger Key Right. - Page 51 2.12.2 Export / Import a remap Key Configuration file ■ Export file 1. Tap 2. Select Export The remap Key configuration can be exported to a text file or imported into the DR6. Note: The configuration file (keys_config.txt is saved in Files.
- Page 52 ■ Import file Before importing the file, please make sure the configuration file (keys_config.txt) is in the Files. 1. Tap 2. Select Import ■ Reset all settings 1. Tap 2. Select Reset all settings...
-
Page 53: Split Screen
2.13 Split Screen Split screen function allows you to have two apps work side by side on the same screen. Please follow the steps to enable split screen multitasking. Note: Some apps may not work with split-screen. 1. Tap Background APP button until you see those background apps on the screen. - Page 54 2. Tap and hold the icon which appears above the APP thumbnail and then select “Split top.” The first APP you chose to “Split top” will be on top of the screen. For another APP to show on the bottom half of the screen, simply tap on the APP thumbnail.
-
Page 55: Network Time Protocol (Ntp) Server
2.14 Network Time Protocol (NTP) Server The Network Time Protocol is used to synchronize the clocks over the Internet. Allow the users to set the clock by using NTP Server. 1. On the main screen, scroll the screen from bottom to top to reach the APPS, go to Settings →... - Page 56 2. Tap set ntp (Network Time Protocol) Server.
-
Page 57: Chapter 3 - Introduction To Applications
Chapter 3 – Introduction to Applications 3.1 USS (Wasp scan service) On the main screen, scroll the screen from bottom to top to reach the Settings and then tap USS ( Wasp scan service ). APPS, and tap Or from the notification bar to tap USS ( Wasp scan service ). You now enter the Wasp scan service application. - Page 58 3.1.1 How to scan Aim the Barcode Scan Engine to the barcode and press one of two scan trigger keys or tap Start Scan button. Scanner Trigger Key 1. After scanning the barcodes, the barcode information is shown as below.
- Page 59 2. To save the scanned data, tap Save and enter the path and filename, then tap OK. 3. More Options For more options and settings, please tap...
- Page 60 3.1.3 Picklist Mode Picklist mode enables DR6 to decode only barcodes that are aligned under the laser crosshair or LED aiming dot. For picklist mode demonstration, please click on our Youtube channel for more information : https://www.youtube.com/watch?v=QjT2E6hxD_k...
- Page 61 3.1.4 More information about USS For more information about USS, please download the document from the below link: http://w3.tw.ute.com/pub/cs/manual/uss/USS-RA-1-MANUAL_en20210326.pdf...
-
Page 62: Enterprise Keyboard
3.2 Enterprise Keyboard Introduction Enterprise Keyboard is an AI-assisted virtual keyboard that offers both the traditional typing experience as well as the enterprise-focused typing experiences such as a dedicated number pad, dedicated symbol pad, and a tightly integrated keyboard wedge for collecting barcode and RFID inventory data. -
Page 63: Logger
3.3 Logger Introduction The Logger app offers an intuitive way to collect error logs from a device for troubleshooting. No technical skills required. Simply use the Start-Stop buttons to start recording vital system and app logs as one snapshot or as a time- lapse, and then the logs can be automatically submitted to the Wasp support team for analysis. - Page 64 3. Tap on settings to view more.
-
Page 65: Software Update
3.4 Software Update On the main screen, scroll the screen from bottom to top to reach the APPS, and tap Software Update To update or check the latest version of each application, please tap CHECK UPDATE. Select the Apps to be updated, and click Update. - Page 66 3.4.1 Software Update Settings for more settings on Software Update. Operation Mode Normal Mode → User can manually select apps to update Auto Mode → Apps are automatically checked and updated each time Software Update is run. ...
-
Page 67: Stagego
3.5 StageGO StageGO is a barcode-based device staging solution for Wasp mobile devices. StageGO helps IT admins to swiftly set up a device by just a few barcode scans. Features Swift and effortless device staging for Wasp Android Mobile Devices. ... - Page 69 Step 3. Scan QRCode:...
Need help?
Do you have a question about the DR6 and is the answer not in the manual?
Questions and answers