Table of Contents
Advertisement
Quick Links
Advertisement
Table of Contents

Subscribe to Our Youtube Channel
Related Manuals for Toro 22198


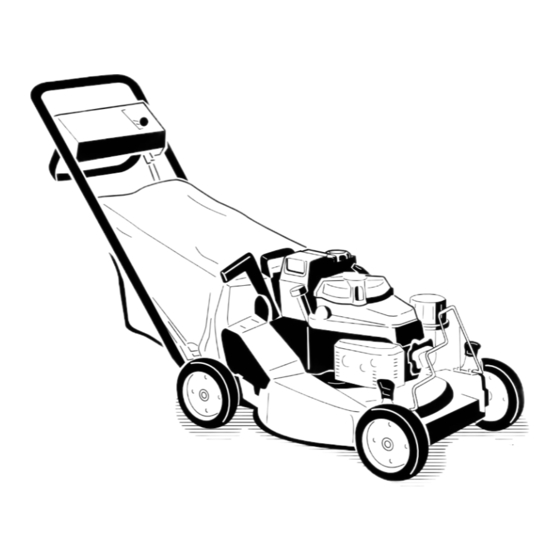
Summary of Contents for Toro 22198
- Page 1 Form No. 3357-403 Rev B 21in Heavy-Duty Recycler ® /Rear Bagger Lawn Mower Model No. 22198—Serial No. 310000001 and Up To register your product or download an Operator's Manual or Parts Catalog at no charge, go to www.Toro.com. Original Instructions (EN)
-
Page 2: Introduction
You are responsible for operating the product properly and safely. You may contact Toro directly at www.Toro.com for product and accessory information, help finding a dealer, or to register your product. -
Page 3: Table Of Contents
Contents Cleaning under the Belt Cover......26 Storage............... 26 Preparing the Fuel System........26 Introduction..............2 Preparing the Engine.......... 26 Safety ................4 General Information .......... 26 General Lawn Mower Safety ......... 4 Removing the Lawn Mower from Storage.... 27 Training.............. -
Page 4: Safety
Preparation injury, comply with these safety instructions. • Evaluate the terrain to determine what accessories Toro designed and tested this lawn mower for to offer and attachments are needed to properly and safely reasonably safe service; however, failure to comply perform the job. -
Page 5: Maintenance And Storage
• Slow down and use caution when making turns and when changing directions on slopes. • Never raise deck with the blades running. • Do not change the engine governor setting or overspeed the engine. • Stop equipment and inspect blades after striking objects or if an abnormal vibration occurs. -
Page 6: Safety And Instructional Decals
Safety and Instructional Decals Safety decals and instructions are easily visible to the operator and are located near any area of potential danger. Replace any decal that is damaged or lost. Manufacturer's Mark 1. Indicates the blade is identified as a part from the original machine manufacturer. -
Page 7: Setup
Setup Loose Parts Use the chart below to verify that all parts have been shipped. Procedure Description Qty. Handle Bolt (5/16 x 1-1/4 inches) Washer Thin locknut (5/16 inch) Bolt (5/16 x 1-1/2 inches) Install the handle. Locknut (5/16 inch) Bag support rod Cap locknut Cable tie... -
Page 8: Installing The Fuel Tank
3. Slide the bag support rod through the second from the top mounting holes in the handle and secure each end with a cap locknut (Figure 3). 4. Use a cable tie to secure the control cables to the left Installing the Discharge Tunnel handle below the bag support rod. -
Page 9: Filling The Crankcase With Oil
Filling the Crankcase with Oil No Parts Required Procedure The engine crankcase is shipped without oil. You Figure 6 must fill the engine crankcase with oil before starting the 1. Spring clip engine. Refer to Checking the Engine Oil Level for oil specifications and instructions. -
Page 10: Product Overview
Product Overview Operation Note: Determine the left and right sides of the machine from the normal operating position. Each time before you mow, make sure that the self-propel drive and the blade control bar operate properly. When you release the blade control bar, the blade and self-propel drive should stop. -
Page 11: Filling The Fuel Tank With Gasoline
Filling the Fuel Tank with Gasoline For best results, use clean, fresh, lead-free gasoline with an octane rating of 87 or higher. To ensure freshness, purchase only the quantity of gasoline that you expect to use in 30 days. Using unleaded gasoline results in fewer combustion deposits and longer engine life. -
Page 12: Starting The Engine
DANGER When fueling, under certain circumstances, a static charge can develop, igniting the gasoline. A fire or explosion from gasoline can burn you and others and damage property. • Always place gasoline containers on the ground and away from your vehicle before filling. •... -
Page 13: Stopping The Engine
Stopping the Engine Using the Discharge Tunnel Plug 1. Release the blade control bar and move the throttle control to the Off position. 1. Stop the engine and wait for all moving parts to 2. Disconnect the wire from the spark plug if you do stop. - Page 14 10. Release the blade control bar; refer to position B in Figure 17. You should hear a “bang.” The blade should stop in 3 seconds. Figure 17 Figure 14 11. Immediately push the lawn mower over the newspaper ball. 1. 5 inches (12.7 cm) 12.
-
Page 15: Adjusting The Cutting Height
4. Release the blade control bar (Position B in handle. The bag should begin to inflate, indicating Figure 18). that the blade is engaged and rotating. 5. Release the blade control bar. If the bag does Note: If you hear a loud “bang,” you have raised not immediately deflate, it indicates that the blade the blade control bar too high. -
Page 16: Operating Tips
Check the grass bag frequently. If it is damaged, install a new Toro replacement bag. Removing the Grass Bag 1. Stop the engine and wait for all moving parts to stop. - Page 17 • Replace the blade when necessary with an original • Alternate the mowing direction. This helps disperse Toro replacement blade. the clippings over the lawn for even fertilization. • Mow only dry grass or leaves. Wet grass and leaves...
-
Page 18: Maintenance
Maintenance Note: Determine the left and right sides of the machine from the normal operating position. Recommended Maintenance Schedule(s) Maintenance Service Maintenance Procedure Interval • Change the engine oil without the oil filter. After the first 8 hours • Check the engine oil level. •... -
Page 19: Lubrication
Lubrication Engine Maintenance Lubricating the Pivot Arms Servicing the Air Filter Service Interval: Every 25 hours Service Interval: Every 25 hours—Clean the foam pre-cleaner (more frequently in dusty 1. Move the rear wheel cutting height levers to the conditions). center setting. Every 300 hours—Replace the paper 2. -
Page 20: Changing The Engine Oil
Changing the Engine Oil WARNING Oil may be hot after the engine has been run, Service Interval: After the first 8 hours—Change the and contact with hot oil can cause severe engine oil without the oil filter. personal injury. Every 50 hours Avoid contacting the hot engine oil when you Oil Capacity drain it. -
Page 21: Servicing The Spark Plug
Fuel System 11. Connect the wire to the spark plug. 12. Run the engine for about 3 minutes. Maintenance 13. Stop the engine, wait for all moving parts to stop, and check for oil leakage around the filter. Emptying the Fuel Tank and 14. -
Page 22: Drive System Maintenance
Drive System Controls System Maintenance Maintenance Adjusting the Self-propel Drive Adjusting the Blade Brake Cable Service Interval: Every 100 hours Service Interval: Every 100 hours If the lawn mower does not self-propel or has a tendency to creep forward when the control bar is more than Whenever you install a new blade brake cable assembly 1-1/2 inches (3.8 cm) from the handle, adjust the wheel or replace the belt, adjust the blade brake cable. -
Page 23: Blade Maintenance
Blade Maintenance Maintaining the Cutting Blade Always mow with a sharp blade. A sharp blade cuts cleanly and without tearing or shredding the grass blades. 1. Stop the engine and wait for all moving parts to stop. 2. Disconnect the wire from the spark plug (Figure 11). Figure 32 3. -
Page 24: Cleaning
Figure 35 Installing the Blade 1. Kickers 1. Install a sharp, balanced Toro blade, the accelerator, the anti-scalp cup, and the blade nuts. The sail of the blade must point toward the top of the lawn mower Washing Method housing for proper installation. -
Page 25: Cleaning The Discharge Tunnel And Plug
Scraping Method Cleaning the Blade Brake Clutch Shield If washing does not remove all debris from under the lawn mower, scrape it clean. Service Interval: Every 50 hours 1. Disconnect the wire from the spark plug (Figure 11). Clean the blade brake clutch shield at the end of each 2. -
Page 26: Cleaning Under The Belt Cover
Storage bolts on tabs to secure the blade brake clutch shield to the deck. To prepare the lawn mower for off-season storage, 9. Install the blade, the accelerator, the anti-scalp cup, perform the recommended maintenance procedures. and the 2 blade nuts. Refer to Maintenance. -
Page 27: Removing The Lawn Mower From Storage
4. Check the condition of the blade. Refer to Maintaining the Cutting Blade. 5. Clean the blade brake clutch shield; refer to Cleaning the Blade Brake Clutch Shield. 6. Service the air filter; refer to Servicing the Air Filter. 7. Lubricate the pivot arms; refer to Lubricating the Pivot Arms. -
Page 28: Troubleshooting
Troubleshooting Problem Possible Cause Corrective Action Engine does not start 1. The fuel tank is empty or the fuel 1. Drain and/or fill the fuel tank with system contains stale fuel. fresh gasoline. If the problem persists, contact an Authorized Service Dealer. 2. - Page 29 Notes:...
- Page 30 Notes:...
- Page 31 Notes:...
- Page 32 Countries Other than the United States or Canada Customers who have purchased Toro products exported from the United States or Canada should contact their Toro Distributor (Dealer) to obtain guarantee policies for your country, province, or state. If for any reason you are dissatisfied with your Distributor's service or have difficulty obtaining guarantee information, contact the Toro importer.
Need help?
Do you have a question about the 22198 and is the answer not in the manual?
Questions and answers