Table of Contents
Advertisement
Quick Links
Zusammengeführte PDF Datei. Die Originale sind im folgenden Verzeichnis verlinkt. / Merged PDF File. Original files are linked in the following list. / Sloučený soubor PDF.
Originály jsou propojeny v následujícím adresáři. / Egyesített PDF fájl. Az eredetiek a következő könyvtárban találhatók. / Zlúčený súbor PDF. Originály sú prepojené v
nasledujúcom adresári. / Združena datoteka PDF. Izvirniki so povezani v naslednjem imeniku. / Spojena PDF datoteka. Izvornici su povezani u sljedećem imeniku.
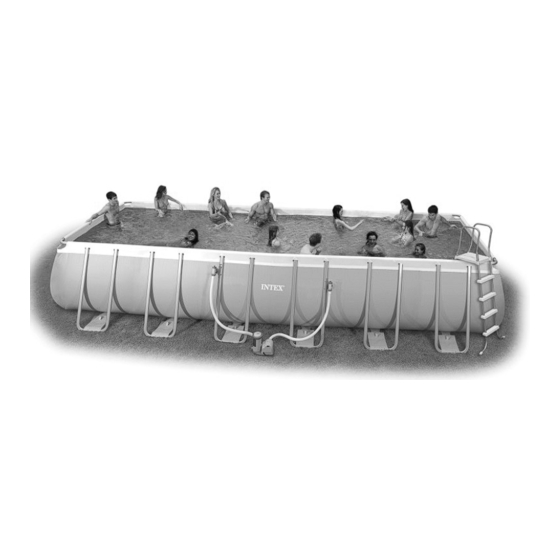
128352NP - Frame Pool Set Ultra Quadra 549 x 274 x
132 cm
Above Ground Pool
165IO
193IO
Overview Pool Size vs Pump Running Time
Air Valve For Water Revitalization Set
Mounting
2
17
29
51
53
54
Advertisement
Chapters
Table of Contents

Related Manuals for Intex 128352NP


Summary of Contents for Intex 128352NP
- Page 1 Originály jsou propojeny v následujícím adresáři. / Egyesített PDF fájl. Az eredetiek a következő könyvtárban találhatók. / Zlúčený súbor PDF. Originály sú prepojené v nasledujúcom adresári. / Združena datoteka PDF. Izvirniki so povezani v naslednjem imeniku. / Spojena PDF datoteka. Izvornici su povezani u sljedećem imeniku. 128352NP - Frame Pool Set Ultra Quadra 549 x 274 x 132 cm...
- Page 2 Ländern der Welt in Lizenz von/Intex Marketing Ltd. to/à/a/an Intex Trading Ltd., Intex Development Co. Ltd., G.P.O Box 28829, Hong Kong & Intex Recreation Corp., P.O. Box 1440, Long Beach, CA 90801 • Distributed in the European Union by/Distribué dans l’Union Européenne par/Distribuido en la unión Europea por/Vertrieb in der Europäischen Union durch/Intex Trading B.V., Venneveld 9, 4705 RR Roosendaal –...
-
Page 3: Table Of Contents
Limited Warranty................15 Special Introductory note: Thanks for buying an Intex pool. Please read this manual before setting up your pool. This information will help extend the pool life and make the pool safer for your family's enjoyment. View the video included before installation. A team of 2-4 people is recommended for pool set up. -
Page 4: Warnings / Important Safety Rules
(119IO) RECTANGULAR ULTRA FRAME POOL ENGLISH 7.5” X 10.3” PANTONE 295U 06/17/2016 English 119A IMPORTANT SAFETY RULES Read, Understand and Follow All Instructions Carefully Before Installing and Using this Product. WARNING • Continuous and competent adult supervision of children and the disabled is required at all times. •... - Page 5 (119IO) RECTANGULAR ULTRA FRAME POOL ENGLISH 7.5” X 10.3” PANTONE 295U 06/17/2016 English 119A IMPORTANT SAFETY RULES Please read, understand, and follow all instructions carefully before installing and using this product. These warnings, instructions, and safety guidelines address some common risks of water recreation, but they cannot cover all risks and dangers in all cases.
-
Page 6: Parts References
(119IO) RECTANGULAR ULTRA FRAME POOL ENGLISH 7.5” X 10.3” PANTONE 295U 06/17/2016 English 119A PARTS REFERENCE Before assembling your product, please take a few minutes to check the contents and become familiar with all the parts. NOTE: Drawings for illustration purpose only. Actual product may vary. Not to scale. SAVE THESE INSTRUCTIONS Page 5... - Page 7 (119IO) RECTANGULAR ULTRA FRAME POOL ENGLISH 7.5” X 10.3” PANTONE 295U 06/17/2016 English 119A PARTS REFERENCE (CONTINUED) Before assembling your product, please take a few minutes to check the contents and become familiar with all the parts. POOL SIZE & QUANTITIES REF.
- Page 8 (119IO) RECTANGULAR ULTRA FRAME POOL ENGLISH 7.5” X 10.3” PANTONE 295U 06/17/2016 English 119A POOL SETUP IMPORTANT SITE SELECTION AND GROUND PREPARATION INFORMATION WARNING • The pool location must allow you to secure all doors, windows, and safety barriers to prevent unauthorized, unintentional or unsupervised pool entry. • Install a safety barrier that will eliminate access to the pool for young children and pets. • Failure to set up the pool on flat, level, compact ground and to assemble and fill with water in accordance with the following instructions could result in the pool’s collapse or the possibility that a person lounging in the pool could be swept out/ejected, resulting in serious injury or property damage.
- Page 9 English 119A POOL SETUP (continued) You may have purchased this pool with the Intex Krystal Clear™ filter pump. The pump has its own separate set of installation instructions. First assemble your pool unit and then set up the filter pump.
- Page 10 (119IO) RECTANGULAR ULTRA FRAME POOL ENGLISH 7.5” X 10.3” PANTONE 295U 06/17/2016 English 119A POOL SETUP (continued) CORNER CORNER JOINT JOINT LINER CORNER CORNER JOINT JOINT 32’ X 16’ Be sure the liner is opened and spread out to its fullest extent on top of the ground cloth.
- Page 11 (119IO) RECTANGULAR ULTRA FRAME POOL ENGLISH 7.5” X 10.3” PANTONE 295U 06/17/2016 English 119A POOL SETUP (continued) The tops of the U-shaped side supports have a double button spring loaded clip (10) that is factory pre-installed. Insert the side supports into the “A-B-C & D-E-F” beam holes by squeezing the bottom button inward with your fingers.
- Page 12 (119IO) RECTANGULAR ULTRA FRAME POOL ENGLISH 7.5” X 10.3” PANTONE 295U 06/17/2016 English 119A POOL SETUP (continued) Position the long wall top rails so they are leaning over the short wall top rails. Installe the corner joints (8) at the 4 corners (see drawing 9).
- Page 13 2. Never mix chemicals together. Add the chemicals to the pool water separately. Thoroughly dissolve each chemical before adding another one to the water. 3. An Intex pool skimmer and an Intex pool vacuum are available to assist in maintaining clean pool water. See your pool dealer for these pool accessories.
- Page 14 Do not add chemicals if the pool is occupied. This can cause skin or eye irritation. Concentrated chlorine solutions can damage the pool liner. In no event is Intex Recreation Corp., Intex Development Co. Ltd., their related companies, authorized agents and service centers, retailers or employees liable to the buyer or any other party for costs associated with the loss of pool water, chemicals or water damage.
- Page 15 6. Add the appropriate chemicals for the winter period. Consult your local pool dealer as to which chemicals you should use and how to use them. This can vary greatly by region. 7. Cover pool with Intex Pool Cover. IMPORTANT NOTE: INTEX POOL COVER IS NOT A SAFETY COVER.
- Page 16 Other than this warranty, and other legal rights in your country, no further warranties are implied. To the extent possibly in your country, in no event shall Intex be liable to you or any third party for direct or consequential damages arising out of the use of your Intex Pool, or Intex or its agents’...
- Page 17 Marcas registradas utilizadas en algunos países del mundo bajo licencia de/Warenzeichen verwendet in einigen Ländern der Welt in Lizenz von/Intex Marketing Ltd. to/à/a/an Intex Trading Ltd., Intex Development Co. Ltd., G.P.O Box 28829, Hong Kong & Intex Recreation Corp., P.O. Box 1440, Long Beach, CA 90801 • Distributed in the European Union by/Distribué dans l’Union Européenne par/Distribuido en la unión Europea por/Vertrieb in der Europäischen Union durch/Intex Trading B.V., Venneveld 9, 4705 RR...
- Page 18 (165IO) 48”, 52" LADDER WITH REMOVABLE STEPS ENGLISH SIZE: 7.5” X 10.3” PANTONE 295U 05/27/2016 English 165A TABLE OF CONTENTS Warnings..................3 Parts References................4 Setup Instructions................5-10 Long Term Storage................11 General Aquatic Safety..............11 Limited Warranty................12 SAVE THE CARTON FOR STORAGE AND THE INSTRUCTIONS FOR RE-ASSEMBLY SAVE THESE INSTRUCTIONS Page 2...
- Page 19 (165IO) 48”, 52" LADDER WITH REMOVABLE STEPS ENGLISH SIZE: 7.5” X 10.3” PANTONE 295U 05/27/2016 English 165A IMPORTANT SAFETY RULES Read, Understand and Follow All Instructions Carefully Before Installing and Using this Product. WARNING • Supervise children and those with disabilities at all times. •...
- Page 20 C SIDE - LOWER U-SHAPED SIDE LEG (MARKED “C”) 12519 12523 SUPPORT BASE 11356 11356 CLASP 12190 12190 This ladder is designed and manufactured for Intex pool wall height: Item # Pool Wall Height 28073 48in (122cm) 28074 52in (132cm) SAVE THESE INSTRUCTIONS Page 4...
- Page 21 (165IO) 48”, 52" LADDER WITH REMOVABLE STEPS ENGLISH SIZE: 7.5” X 10.3” PANTONE 295U 05/27/2016 English 165A LADDER SETUP Estimated assembly time 30-60 minutes. (Note the assembly time is only approximate and individual assembly experience may vary.) These assembly instructions are the same for the 3-step and 4-step ladders. The assembly drawings show the 4-step ladder.
- Page 22 (165IO) 48”, 52" LADDER WITH REMOVABLE STEPS ENGLISH SIZE: 7.5” X 10.3” PANTONE 295U 05/27/2016 English 165A LADDER SETUP (continued) 2. SIDE A LEGS ASSEMBLY (refer to figures 2.1 through 2.4): Press, hold and insert Spring pin IMPORTANT: Make sure the legs are securely connected and locked. Check the spring pins have snapped out before proceeding to the next step.
- Page 23 (165IO) 48”, 52" LADDER WITH REMOVABLE STEPS ENGLISH SIZE: 7.5” X 10.3” PANTONE 295U 05/27/2016 English 165A LADDER SETUP (continued) 3. SIDE B LEGS ASSEMBLY (refer to figures 3.1 through 3.4): Press, hold and Spring pin insert IMPORTANT: Make sure the legs are securely connected and locked. Check the spring pins have snapped out before proceeding to the next step.
- Page 24 (165IO) 48”, 52" LADDER WITH REMOVABLE STEPS ENGLISH SIZE: 7.5” X 10.3” PANTONE 295U 05/27/2016 English 165A LADDER SETUP (continued) 4. TOP PLATFORM INSTALLATION (refer to figure 4): 5. U-SHAPED TOP RAIL INSTALLATION (refer to figure 5.1 through 5.2): IMPORTANT: One side at a time. Do not attach the other side of the ladder until the U-shaped top rail is installed.
- Page 25 (165IO) 48”, 52" LADDER WITH REMOVABLE STEPS ENGLISH SIZE: 7.5” X 10.3” PANTONE 295U 05/27/2016 English 165A LADDER SETUP (continued) 6. SIDE B LEGS INSTALLATON (refer to figure 6): WARNING BEFORE EACH USE, ENSURE THE REMOVABLE STEPS SIDE IS ANCHORED INTO THE SUPPORT BASE AND SECURELY LOCKED IN THE CLASPS LOCATED AT THE FRONT EDGE OF THE TOP PLATFORM.
- Page 26 (165IO) 48”, 52" LADDER WITH REMOVABLE STEPS ENGLISH SIZE: 7.5” X 10.3” PANTONE 295U 05/27/2016 English 165A LADDER SETUP (continued) 9. AFTER USE OF LADDER (refer to figure 8): Press Pull Press Pull 10. Removing the steps from the secured position (refer to figure 9): a) With your right hand pull and hold the latch towards you, while at the same time with your left hand press the white protruding buttons and simultaneously lift that leg out of the cavity exposing the lower white protruding buttons.
- Page 27 (165IO) 48”, 52" LADDER WITH REMOVABLE STEPS ENGLISH SIZE: 7.5” X 10.3” PANTONE 295U 05/27/2016 English 165A WINTERIZING/LONG TERM STORAGE 1. Remove the “removable steps” as shown in the After Use of Ladder section, see figure 8. 2. Remove the ladder from the pool, and make sure the ladder and the removable steps are thoroughly dry before long term storage.
- Page 28 Other than this warranty, and other legal rights in your country, no further warranties are implied. To the extent possibly in your country, in no event shall Intex be liable to you or any third party for direct or consequential damages arising out of the use of your Intex Pool Ladder, or Intex or its agents’...
- Page 29 Ländern der Welt in Lizenz von/Intex Marketing Ltd. to/à/a/an Intex Trading Ltd., Intex Development Co. Ltd., G.P.O Box 28829, Hong Kong & Intex Recreation Corp., P.O. Box 1440, Long Beach, CA 90801 • Distributed in the European Union by/Distribué dans l’Union Européenne par/Distribuido en la unión Europea por/Vertrieb in der Europäischen Union durch/Intex Trading B.V., Venneveld 9, 4705 RR Roosendaal –...
- Page 30 Warnings..................3 Parts References................Setup Instructions ............... 6-13 Product Specifications..............Operating Instructions ..............14-16 Intex Pools Operating Time Table..........17 Non-Intex Pools Operating Time Table........18 Maintenance.................. Long Term Storage................ 19 Troubleshooting Guide..............20 Common Pool Problems............... 21 General Aquatic Safety..............21 Limited Warranty................
-
Page 31: Warnings
(193IO) MODEL SF90220T SAND FILTER PUMP ENGLISH 7.5” X 10.3” PANTONE 295U 05/16/2016 English 193A IMPORTANT SAFETY RULES Read, Understand and Follow All Instructions Carefully Before Installing and Using this Product. READ AND FOLLOW ALL INSTRUCTIONS WARNING • Always supervise children and those with disabilities. •... -
Page 32: Parts References
(193IO) MODEL SF90220T SAND FILTER PUMP ENGLISH 7.5” X 10.3” PANTONE 295U 05/16/2016 English 193A PARTS REFERENCE Before assembling your product, please take a few minutes to check the contents and become familiar with all the parts. 23 24 23 24 25 26 41 30 29 31... - Page 33 (193IO) MODEL SF90220T SAND FILTER PUMP ENGLISH 7.5” X 10.3” PANTONE 295U 06/10/2015 PARTS REFERENCE Before assembling your product, please take a few minutes to check the contents and become familiar with all the parts. REF. NO. DESCRIPTION QTY. SPARE PART NO. PRESSURE GAUGE 11720 TANK COVER &...
- Page 34 (193IO) MODEL SF90220T SAND FILTER PUMP ENGLISH 7.5” X 10.3” PANTONE 295U 05/16/2016 English 193A POOL OUTLET - STRAINER & PLUNGER VALVE SETUP (optional) The strainer grid prevents large objects from jamming and/or damaging the filter pump. If your pool has an inflatable top ring, install the strainer, nozzle and plunger valve before inflating the pool liner top ring.
- Page 35 (193IO) MODEL SF90220T SAND FILTER PUMP ENGLISH 7.5” X 10.3” PANTONE 295U 05/16/2016 English 193A POOL INLET - NOZZLE & PLUNGER VALVE SETUP (optional) In a counter-clockwise motion unscrew plunger valve union from the inlet threaded air connector (39) (see drawing 5).
-
Page 36: Setup Instructions
(193IO) MODEL SF90220T SAND FILTER PUMP ENGLISH 7.5” X 10.3” PANTONE 295U 05/16/2016 English 193A PRODUCT SPECIFICATIONS The sand filter removes suspended particles but does not sanitize your pool. Pool chemistry is a specialized area and you should consult your local pool service specialist for details. - Page 37 (193IO) MODEL SF90220T SAND FILTER PUMP ENGLISH 7.5” X 10.3” PANTONE 295U 05/16/2016 English 193A SETUP INSTRUCTIONS (continued) In a clockwise motion screw the center pipe (7) onto the filter grid (8) securely by hand (see drawing 11.2). Vertically insert the filter grid and center pipe assembly into the tank. Ensure filter grid assembly is securely fitted to the bottom of the tank, and the center pipe is vertically centered inside the tank (see drawing 11.3).
- Page 38 (193IO) MODEL SF90220T SAND FILTER PUMP ENGLISH 7.5” X 10.3” PANTONE 295U 05/16/2016 English 193A SETUP INSTRUCTIONS (continued) WARNING Improper tank valve and clamp assembly could cause the valve and clamp to blow off and cause serious injury, property damage or death. 6-way valve installation: Make sure the tank o-ring (5) is in place (see drawing 16).
- Page 39 (193IO) MODEL SF90220T SAND FILTER PUMP ENGLISH 7.5” X 10.3” PANTONE 295U 05/16/2016 English 193A SETUP INSTRUCTIONS (continued) Motor installation: Place an L-shape o-ring (18) on the pump motor outlet. In a clockwise motion connect the sand filter interconnecting hose (13) to the pump motor outlet (see drawing 20). Connect the pump motor unit to the tank support base (see drawing 21.1).
- Page 40 (193IO) MODEL SF90220T SAND FILTER PUMP ENGLISH 7.5” X 10.3” PANTONE 295U 05/16/2016 English 193A SAND FILTER PUMP HOSE CONNECTION SETUP WARNING • Keep this product more than 2 m away from the pool. • Keep this product more than 3.5 m away from the pool (for France only). • Keep the plug of this product more than 3.5 m away from the pool. • Position this product away from the pool, so as to prevent children from climbing on it and accessing the pool. The 6-way valve has three hose connection ports. 1.
- Page 41 Tighten securely. LARGE HOSE CLAMP POOL For INTEX pool size 16' and below: Make sure the air jet valve (38) is securely tighten onto the pool inlet air adaptor (40) and facing (Adaptor B) (Adaptor B) SAVE THESE INSTRUCTIONS Page 13...
-
Page 42: Operating Instructions
(193IO) MODEL SF90220T SAND FILTER PUMP ENGLISH 7.5” X 10.3” PANTONE 295U 05/16/2016 English 193A OPERATING INSTRUCTIONS WARNING • Risk of electric shock. Connect this product only to a grounding type receptacle protected by a ground-fault circuit interrupter (GFCI) or residual current device (RCD). Contact a qualified electrician if you cannot verify that the receptacle is protected by a GFCI/RCD. - Page 43 (193IO) MODEL SF90220T SAND FILTER PUMP ENGLISH 7.5” X 10.3” PANTONE 295U 05/16/2016 English 193A OPERATING INSTRUCTIONS (continued) Initial startup and operation: Before operating, be sure that: • All the hoses have been connected and tightened securely, and correct amount of filter sand have been loaded.
- Page 44 “BACKWASH” under “initial startup and operation” section. Vacuuming device (i.e. Intex auto pool cleaner) attached to the system may also cause the flow to diminish and the pressure to rise. Remove any vacuuming device from the system and check if the pressure gauge reading has dropped from the yellow zone to the green zone.
-
Page 45: Intex Pools Operating Time Table
This table shows the required operating time for average use of the sand filter pump with above ground pools. If the system is attached to an “Intex Saltwater System” unit, the filter pump running time should be longer than the required operating time of the Intex Saltwater System unit. -
Page 46: Non-Intex Pools Operating Time Table
(193IO) MODEL SF90220T SAND FILTER PUMP ENGLISH 7.5” X 10.3” PANTONE 295U 05/16/2016 English 193A NON-INTEX POOLS OPERATING TIME TABLE This table shows the required operating time for average use of the sand filter pump with above ground pools. Sand filter pump operating... -
Page 47: Long Term Storage
(193IO) MODEL SF90220T SAND FILTER PUMP ENGLISH 7.5” X 10.3” PANTONE 295U 05/16/2016 English 193A POOL CARE & CHEMICALS • All pools require care to keep the water clear and hygienically clean. With proper chemical control, your filter will help attain this objective. Consult your pool supply dealer for instructions regarding the proper use of chlorine, algaecide and other chemical agents required for sparkling clear water. -
Page 48: Troubleshooting Guide
• An air leak on the intake hose. • Tighten hose nuts, check hose for damage. • Faulty motor or the impeller is jammed. • Contact Intex service center. • Sand tank o-ring missing. • Remove 6-way valve cover and ensure the 6-WAY VALVE/ •... -
Page 49: Common Pool Problems
• Finger tighten all caps. • The drain valves are loose. SEDIMENT ON • Dirt or sand on pool • Heavy use, getting in and • Use Intex pool vacuum to clean POOL BOTTOM floor. out of pool. of pool. -
Page 50: Limited Warranty
Other than this warranty, and other legal rights in your country, no further warranties are implied. To the extent possibly in your country, in no event shall Intex be liable to you or any third party for direct or consequential damages arising out of the use of your Sand Filter Pump, or Intex or its agents’... - Page 51 G ROUND SIZE/Taille du terrain/ SUPERFICIE NECESARIA/Grundgröße Pump running time (Hours) / Temps de fonctionnement recommandé par jour (heures) / H oras recomendadas por día (Horas) / Empfohlene Betriebsstunden pro Tag (Stunden) / O re di funzionamento /DIMENSIONI A TERRA/GRONDMAAT/MEDIDAS DA PISCINA/GRUND (ore) / ...
- Page 52 G ROUND SIZE/Taille du terrain/ SUPERFICIE NECESARIA/Grundgröße Pump running time (Hours) / Temps de fonctionnement recommandé par jour (heures) / H oras recomendadas por día (Horas) / Empfohlene Betriebsstunden pro Tag (Stunden) / O re di funzionamento /DIMENSIONI A TERRA/GRONDMAAT/MEDIDAS DA PISCINA/GRUND (ore) / ...
- Page 53 (1701) Aeration adaptor air valve EN, FR, SP, GE, IT, DU, PT, DA, PL, RU, CH SIZE: 3.5” X 2.5” 05/05/2016 1701 NOTE: When the pump is off there might be some tear drop water coming out of the air jet valve. This is normal! NOTE: Lorsque la pompe est arrêtée, des gouttes d’eau peuvent apparaître au niveau de la valve d’entrée d’air.
- Page 54 (287) IO LARGE STRAINER GRID MANUAL SIZE: 3.5” X 2.5” 12/28/2015 #10744 #12198 287-***-R0-1606...
Need help?
Do you have a question about the 128352NP and is the answer not in the manual?
Questions and answers