Table of Contents
Advertisement
Available languages
Available languages
MASTER FORGE and logo design are trademarks or
registered trademarks of LF, LLC. All rights reserved.
WARNING
FOR YOUR SAFETY:
DO NOT LEAVE THIS APPLIANCE UN-
ATTENDED WHILE IN USE, ESPECIAL-
LY COOKING THE FATTY MEAT AND
CLOSE THE LID TOO LONG TIME.
WARNING
FOR YOUR SAFETY:
For Outdoor Use Only!
(outside any enclosure)
WARNING
FOR YOUR SAFETY:
Improper installation, adjustment,
alteration, service or maintenance can
cause injury or property damage. Read
this instruction manual thoroughly
before installing or servicing this
equipment.
WARNING
This product can expose you to
chemicals including carbon monoxide
and soot, which are known to the
State of California to cause cancer
and birth defects or other reproductive
harm. For more information go to
www.P65Warnings.ca.gov.
ATTACH YOUR RECEIPT HERE
Serial Number
Questions, problems, missing parts? Before returning to your retailer, call our cus-
tomer service department at 800.963.0211, 8 a.m. - 8 p.m., EST, Monday - Sunday.
You could also contact us at partsplus@lowes.com.
AS22462
Never operate this appliance unattended.
1. Do NOT store or use gasoline or other
flammable liquids or vapors in the
vicinity of this or any other appliance.
2. When cooking with oil/grease, do not
allow the oil/grease to exceed 350ºF
(176.5ºC). Do not store or use extra
cooking oil in the vicinity of this or any
other appliance.
Purchase Date
CHARCOAL OFFSET SMOKER
DANGER
WARNING
CBC23032L-RA-ES-OM-F102
ITEM#5139524
MODEL#CBC23032L
Español p.17
Advertisement
Chapters
Table of Contents

Related Manuals for Master Forge CBC23032L


Summary of Contents for Master Forge CBC23032L
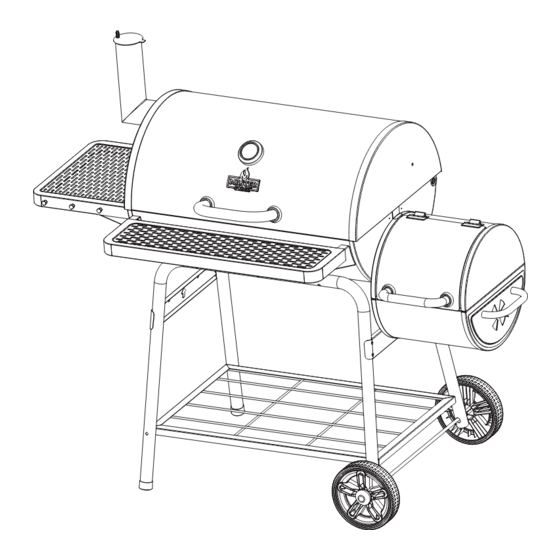
- Page 1 ITEM#5139524 CHARCOAL OFFSET SMOKER MODEL#CBC23032L Español p.17 MASTER FORGE and logo design are trademarks or registered trademarks of LF, LLC. All rights reserved. WARNING FOR YOUR SAFETY: DO NOT LEAVE THIS APPLIANCE UN- ATTENDED WHILE IN USE, ESPECIAL- LY COOKING THE FATTY MEAT AND CLOSE THE LID TOO LONG TIME.
-
Page 2: Table Of Contents
TABLE OF CONTENTS Safety Information ............Page 2 Preparation . - Page 3 SAFETY INFORMATION W Do NOT operate this appliance without reading “Operating Instructions” in this manual. W To avoid burns, do NOT touch metal parts of grill until they have completely cooled, unless you are wearing protective gear (pot holders, gloves, BBQ mittens, etc.). W Never touch grids (charcoal, cooking or warming), ashes or coals to see if they are hot.
-
Page 4: Preparation
PREPARATION Before beginning assembly of product, make sure all parts are present. Compare parts with package contents list and hardware contents list. If any part is missing or damaged, do not attempt to assemble the product. Estimated assembly time: 25 minutes by two people. Tools required for assembly: Philips screwdriver (included). -
Page 5: Hardware Contents
PACKAGE CONTENTS Part Description Quantity Part Description Quantity Temperature Gauge Foot* Lid Handle Bottom Mesh Hub Cap Smoke Stack Axle Warming Rack Wheel SFB Lid Cooking Grid SFB Lid Handle Charcoal Pan SFB Body Top Left Side Shelf SFB Body Bottom Bowl SFB Cooking Grid Charcoal Pan Handle... -
Page 6: Assembly Instructions
ASSEMBLY INSTRUCTIONS Step 1: Attach Long Legs, Short Legs and Leg Braces Second Align the holes in the long legs (N), short legs (O) and leg braces (M). Then attach them together with eight M6x20 bolts (CC) show in Fig.1 . Connect the long legs (N) and short legs (O). - Page 7 ASSEMBLY INSTRUCTIONS Step 3: Attach Axle, Wheels and Hub Caps Insert the axle (S) through the short legs (O). Attach wheels (T) and hub caps (R) onto the axle (S) with two Ø20x10.5 washers (FF) and Ø1.4x30 cotter pins (II). Hardware Used Ø20x10.5 Washer...
- Page 8 ASSEMBLY INSTRUCTIONS Step 5: Attach Lid Handle and Temperature Gauge Remove the nut and washer pre-assembled on the temperature gauge (A). Then attach the temperature gauge (A) onto the lid (D) with the nut and washer. Attach lid handle (B) onto the lid (D) with two M6x20 bolts (CC) and Ø16x6.2 washers (EE) and Ø6 lock washers (HH).
- Page 9 ASSEMBLY INSTRUCTIONS Step 8: Attach Front Shelf Attach the front shelf (L) to the bottom bowl (I) with four M6x12 bolts (BB). Hardware Used M6x12 Bolt Step 9: Attach Left Side Shelf First Attach the left side shelf (H) to the bottom bowl (I) with four M6x12 bolts (BB).
- Page 10 ASSEMBLY INSTRUCTIONS Step 11: Attach SFB First Hang the SFB body top onto the bottom bowl (I). Attach the SFB body (X) to the Leg Brace (M) with two M6x12 bolts (BB). Hardware Used Second M6x12 Bolt Third Step 12: Attach SFB Side Handle, SFB Damper and SFB Charcoal Pan Attach the SFB side handle (AA) onto the SFB charcoal pan (Z) with two M6x20 bolts (CC).
- Page 11 ASSEMBLY INSTRUCTIONS Step 13: Attach Warming Rack Attach the warming rack (E) onto the lid (D) and bottom bowl (I) with two M6x45 bolts (DD) and M6 nuts (GG). Note: Please attach each corner of the warming rack (E) in order shown in Fig.13. First Hardware Used Second...
- Page 12 ASSEMBLY INSTRUCTIONS Step 15: Place Cooking Grid and SFB Cooking Grid Place the cooking grids (F) onto the bottom bowl (I) and SFB cooking grids (Y) onto the SFB body (X). Note: Always lift the cooking grids (F) with the cooking grid handle (K) shown in Fig 15.
-
Page 13: Operating Instructions
OPERATING INSTRUCTIONS W WARNING: NEVER EXCEED 400°F BECAUSE THIS WILL DAMAGE THE FINISH AND CONTRIBUTE TO RUST. PAINT IS NOT WARRANTED AND WILL REQUIRE TOUCH-UP. THIS UNIT IS NOT WARRANTED AGAINST RUST. W CAUTION: Never use charcoal that has been pre-treated with lighter fluid. Use only a high grade plain charcoal, charcoal/wood mixture, lump charcoal or cooking wood. -
Page 14: Care And Maintenance
OPERATING INSTRUCTIONS(CONTINUED) Turning Off 1. Allow charcoal to completely extinguish itself. W WARNING: Do NOT use water to extinguish. This can be dangerous and cause damage. 2. Dispose of the ashes in a proper location. Controlling Flare-ups: W CAUTION: Do NOT use water on a grease fire. This can cause the grease to splatter and could result in serious burns, bodily harm or other damage. -
Page 15: Limited Warranty
CARE AND MAINTENANCE(CONTINUED) 1. Knock any ashes that did not fall into the ash pan from the fire grate. (If there are pieces of partially burned charcoal on the fire grate you can save them for next time. They are still good). 2. -
Page 16: Replacement Parts List
REPLACEMENT PARTS LIST For replacement parts, call the customer service department at 800.963.0211, 8 a.m. - 8 p.m., EST, Monday - Sunday. You could also contact us at partsplus@lowes.com. Part Description Part# Part Description Part# Temperature Gauge B0104-C70 Foot* B0305-M00 Lid Handle C2303-010 Bottom Mesh... - Page 17 ARTÍCULO #5139524 AHUMADOR HORIZONTAL A CARBÓN MODELO #CBC23032L MASTER FORGE y el diseño del logotipo son marcas comerciales o marcas registradas de LF, LLC. Todos los derechos reservados. ADVERTENCIA PARA SU SEGURIDAD: NO DEJE ESTE ARTEFACTO SIN SUPERVISIÓN MIENTRAS ESTE EN USO,...
-
Page 18: Información De Seguridad
ÍNDICE Información de seguridad ..........Página 18 Preparación . - Page 19 INFORMACIÓN DE SEGURIDAD W Nunca toque las rejillas (para el carbón, de cocción o para calentar), las cenizas ni el carbón para comprobar si están calientes. W NO use la parrilla sobre plataformas o muebles de madera u otra superficie combustible. W Esta parrilla NO debe usarse en vehículos recreativos ni en botes.
-
Page 20: Preparación
PREPARACIÓN Antes de comenzar a ensamblar el producto, asegúrese de tener todas las piezas. Compare las piezas con la lista del contenido del paquete y la lista de aditamentos. No intente ensamblar el producto si falta alguna pieza o si están dañadas. -
Page 21: Aditamentos
CONTENIDO DEL PAQUETE Pieza Descripción Cantidad Pieza Descripción Cantidad Medidor de temperatura Pata* Manija de la tapa Malla inferior Tapacubos Acumulador de humo Tapa Rejilla para calentar Rueda Rejilla de cocción Tapa del SFB Manija de la tapa del SFB Bandeja para carbón Parte superior del cuerpo del Repisa lateral izquierda... -
Page 22: Instrucciones De Ensamblaje
INSTRUCCIONES DE ENSAMBLAJE Paso 1: fije las patas largas, las patas cortas y los soportes de las patas Segundo Alinee los orificios de las patas largas (N), las patas cortas (O) y los soportes de las patas (M). A continuación, sujételos con ocho pernos M6x20 (CC) como se muestra en la Fig.1. - Page 23 INSTRUCCIONES DE ENSAMBLAJE Paso 3: fije el eje, las ruedas y los tapacubos Inserte el eje (S) por las patas cortas (O). Coloque las ruedas (T) y los tapacubos (R) en el eje (S) con dos arandelas Ø20X10.5 (FF) y pasadores de chaveta Ø1.4X30 (II).
- Page 24 INSTRUCCIONES DE ENSAMBLAJE Paso 5: fije la manija de la tapa y el medidor de temperatura Retire la tuerca y la arandela preensambladas en el medidor de temperatura (A). Luego, coloque el medidor de temperatura (A) en la tapa (D) con la tuerca y la arandela. Coloque la manija de la tapa (B) en la tapa (D) con dos pernos M6x20 (CC), arandelas Ø16X6.2 (EE) y arandelas de seguridad Ø6 (HH).
- Page 25 INSTRUCCIONES DE ENSAMBLAJE Paso 8: fije el estante frontal Fije el estante frontal (L) a la fuente inferior (I) con cuatro pernos M6x12 (BB). Aditamentos utilizados Perno M6x12 Paso 9: fije la repisa lateral izquierda Primero Fije la repisa lateral izquierda (H) a la fuente inferior (I) con cuatro pernos M6x12 (BB).
- Page 26 INSTRUCCIONES DE ENSAMBLAJE Paso 11: fije el SFB Primero Cuelgue la parte superior del cuerpo del SFB en la fuente inferior (I). Fije el cuerpo del SFB (X) al soporte de la pata (M) con dos pernos M6x12 (BB). Aditamentos utilizados Segundo Perno M6x12...
- Page 27 INSTRUCCIONES DE ENSAMBLAJE Paso 13: fije la rejilla para calentar Coloque la rejilla para calentar (E) en la tapa (D) y la fuente inferior (I) con dos pernos M6x45 (DD) y tuercas M6 (GG). Nota: coloque cada esquina de la rejilla para calentar (E) en el orden que se muestra en la Fig.13.
- Page 28 INSTRUCCIONES DE ENSAMBLAJE Paso 15: coloque la rejilla de cocción y la rejilla de cocción del SFB Coloque las rejillas de cocción (F) en la fuente inferior (I) y las rejillas de cocción del SFB (Y) en el cuerpo del SFB (X). Nota: siempre levante las rejillas de cocción (F) con su mango (K), que se muestra en la Fig 15.
-
Page 29: Instrucciones De Funcionamiento
INSTRUCCIONES DE FUNCIONAMIENTO W ADVERTENCIA: NUNCA SUPERE LOS 204 °C PORQUE ESTO DAÑARÁ EL ACABADO Y CONTRIBUIRÁ A LA OXIDACIÓN. LA PINTURA NO ESTÁ GARANTIZADA Y REQUERIRÁ UN RETOQUE. ESTA UNIDAD NO ESTÁ GARANTIZADA CONTRA LA OXIDACIÓN. W PRECAUCIÓN: no utilice carbón que se haya pretratado con líquido encendedor. Use solo carbón puro, mezcla de carbón y madera, carbón de leña o madera para leña de alta calidad. -
Page 30: Cuidado Y Mantenimiento
INSTRUCCIONES DE FUNCIONAMIENTO (CONTINUACIÓN) Apagado Deje que el carbón se extinga solo. W ADVERTENCIA: NO use agua para extinguirlo. Esto puede ser peligroso y causar daños. Deseche las cenizas en un lugar adecuado. Control de las llamaradas: W PRECAUCIÓN: NO use agua sobre un incendio provocado por grasa. Esto puede hacer que la grasa salpique pudiendo ocasionar quemaduras, lesiones corporales u otros daños graves. -
Page 31: Garantía Limitada
CUIDADO Y MANTENIMIENTO (CONTINUACIÓN) Retire de la rejilla las cenizas que no hayan caído en la bandeja para cenizas. (Si hay trozos de carbón parcialmente quemados en la rejilla del fuego, puede guardarlos para la próxima vez. Aún sirven). Golpee los lados del tazón para desprender las cenizas que se encuentran en los lados. Desenganche la bandeja para cenizas de la parte inferior de la parrilla y deslícela hacia la parte delantera. -
Page 32: Lista De Piezas De Repuesto
LISTA DE PIEZAS DE REPUESTO Para obtener piezas de repuesto, llame al Departamento de Servicio al Cliente al 800.963.0211, de lunes a domingo de 8 a.m. a 8 p.m., hora estándar del Este. También puede ponerse en contacto con nosotros en partsplus@lowes.com. Pieza Descripción Pieza #...
Need help?
Do you have a question about the CBC23032L and is the answer not in the manual?
Questions and answers