Advertisement
Quick Links
Model #
549W
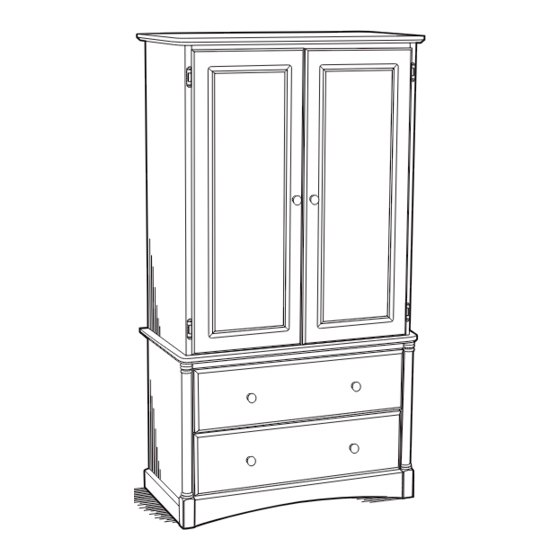
Monterey Armoire
Assembly Instructions
Congratulations!
This fine piece of furniture will make a handsome
addition to your home. For the best results, start by
reading both the Assembly Instructions and
Finishing Hints before you begin your project.
For normal household use only.
recommended for commercial use.
Do not climb, sit or stand on this piece of
furniture.
Unload items from this unit prior to moving.
Do not overload drawers or shelves on this unit.
Before loading or moving this unit, check all screws
and supports for tightness.
For maximum stability, attach unit to the wall using
the enclosed hardware as per instructions.
Presented by Whittier Wood Products
P.O. Box 2827
Eugene, OR 97402 USA
Service Policy:
which are defective, missing or damaged
during assembly. Please contact Whittier
Wood Products customer service department
directly (by phone, fax, mail or email) for
replacement parts.
Hours:
Our friendly customer service staff
can be reached Monday-Friday 7:00 a.m. to
5:00 p.m. (Pacific Time). A message can be
left 24 hours a day, 7 days a week.
To Order:
Provide the complete furniture
model number (upper left corner of this
page), part letter, production code, quantity
needed, reason for replacement and your full
name and address along with a telephone
number in case we need to contact you.
Parts ship from our Eugene, Oregon factory
within 1 or 2 business days from the time
we receive the request. Please allow 5-10
business days for delivery.
Outside U.S. or Canada: 541-687-0213
Outside U.S. or Canada: 541-687-0213
Fax: 541-687-2060 • Email: info@whittierwood.com
Fax: 541-687-2060 • Email: info@whittierwood.com
Mail: P.O. Box 2827 • Eugene, Oregon 97402, U.S.A.
Mail: P.O. Box 2827 • Eugene, Oregon 97402, U.S.A.
Read both the Assembly Instructions and Finishing
Hints completely before beginning.
Store the parts: 1) in their box; 2) in a dry place; 3) in
temperatures ranging from 40° to 90°. (Not on a cold,
possibly damp, cement floor.)
Inspect your furniture periodically for any loose glue
joints or screws, or any other problem which may
be affecting the stability of your furniture. Tighten or
repair as needed.
Production Code:
We will replace any parts
Rev. 10/05
Advertisement

Related Manuals for Chaparral Monterey Armoire 549W

Summary of Contents for Chaparral Monterey Armoire 549W
- Page 1 Model # 549W Monterey Armoire Assembly Instructions Service Policy: We will replace any parts which are defective, missing or damaged during assembly. Please contact Whittier Wood Products customer service department directly (by phone, fax, mail or email) for replacement parts. Hours: Our friendly customer service staff can be reached Monday-Friday 7:00 a.m.
- Page 2 549W Monterey Armoire — Parts List Before beginning assembly, check that the quantities of the parts received match those on the parts list below. E — Upper Top — Qty. 1 J — Middle Back — Qty. 1 A — Left Upper Side Assembly —...
- Page 3 549W Monterey Armoire — Parts List (cont.) BZ — #6 x 1/2" Undercut S — Wood Dowel — Qty. 10 Screw — Qty. 36 T — #8 x 1¾" Pan Head Screw — Qty. 6 CZ — Knob — Qty. 6 DZ —...
-
Page 4: Special Instructions
549W Monterey Armoire SPECIAL INSTRUCTIONS If the top or a panel should become cupped, do not be alarmed. The panel was flat when it was manufactured. It is a natural characteristic of wood in an unfinished state to cup from uneven moisture conditions. The Figure at the right shows an exaggerated view of what could happen. - Page 5 x 10 2. Glue Wood Dowels (S): • One in Left Upper Side Assembly (A) FIG. 2 • One in Right Upper Side Assembly (D) • Four in Lower Top (C) • Two in Left Lower Side Assembly (F) • Two in Right Lower Side Assembly (H) FLUSH FIG.
- Page 6 FIG. 4 4. Attach Lower Top (C) to Left Upper Side Assembly (A) gluing all Wood Dowels (S) and securing through the pre-drilled holes in the Lower Top (C) using Screw (V). See Figure 4. FIG. 5 5. Attach the Right Upper Side Assembly (D) to the Lower Top (C) gluing all Wood Dowels (S) and securing through the pre-drilled holes in the Lower Top (C) using Screw (V).
- Page 7 Profile edge FIG. 6 Flush Profile edge 6. Place the Upper Top (E) on a protective surface with bottom side and the profile on the edge up. Position the upper assembly (A, C, D) on top of the Upper Top (E) as shown in Figure 6.
- Page 8 FIG. 8 8. Rotate left side assembly and set in place on the Right Lower Side Assembly (H). Repeat Step 3 and attach the Right Lower Side Assembly (H) to the two Sleepers (B) using Screw (T) and to the Base (G) through the cleat using Screws (V). See Figure 8. Upper Assembly Flush FIG.
- Page 9 10. With the unit laying face down on a protective surface, measure from top left to bottom right ( ) and from bottom left to top right ( ). Measurements should be equal. If the line is longer, tap bottom of Left Lower Side Assembly (F) until measurements are equal.
- Page 10 x2 drawers x2 drawers x2 drawers FIG. 12A FIG. 12B READ CAM-LOCK INSTRUCTIONS 12. Insert four Cam Connectors (Y) in the Drawer Front (L). Attach Left Drawer Side (M) and Right Drawer Side (N) to Drawer Front (L) with four Cam Housings (Z). Make sure that the Cam Housings are facing out from the drawer and the grooves for the drawer bottom match.
- Page 11 x2 drawers x2 drawers FIG. 14 14. Attach Knobs (CZ) to Drawer Fronts (L) using Machine Screws (DZ). See Figure 14. FIG. 15 15. To install the drawer, tilt down slightly and place the wheels in the cabinet side slides. Raise to level and push in.
- Page 12 FIG. 17 17. Attach Doors (Q) to unit’s side panels using Screw (BZ). To properly align the door, the upper hole in the top hinge should go over the uppermost pre-punched hole in the side panel. Likewise, the lower hole in the bottom hinge should go over the lowest pre-punched hole in the side panel.
- Page 13 Modelo # 549W Armario Monterey Normas para obtener servicio: Reemplaza- Instrucciones para Armar remos las piezas que tengan defectos, falten o se dañen durante el armado. Sírvase comunicarse con el departamento de servicio al cliente de Whittier Wood Products directamente (por teléfono, fax, correo o e-mail) para obtener piezas de repuesto.
- Page 14 549W Armario Monterey Lista de piezas ANTES DE ENSAMBLAR, verifique que haya recibido todas las piezas que se listan en la lista de piezas que se presenta a continuación. Descripción Cantidad Descripción Cantidad Descripción Cantidad A Conjunto lateral izquierdo M Parte izquierda del cajón ..2 AZ Guías de deslizamiento superior .
- Page 15 FIG. 4 — Glue All Dowels = Encole todas las Inserte dos tornillos (V) a través de la escuadra de espigas de madera unión para fijar la base (G) en su lugar. 4. Una la placa inferior (C) al conjunto lateral izqui- 8.
- Page 16 Fije las tres partes posteriores (I, J y K) a la 14. Instale los tiradores (CZ) en la parte delantera de unidad utilizando los tornillos (X) en los orificios los cajones (L) usando los tornillos para metal de fábrica de las partes posteriores. Verifique que (DZ).
- Page 17 No. de modèle 549W Armoire Monterey Politique de service : Nous remplacerons toutes les pièces défectueuses, manquantes ou endom- Instructions de Montage magées pendant le montage. Veuillez contacter directement le service clientèle de Whittier Wood Products (par téléphone, fax, courrier ou e-mail) pour obtenir les pièces de remplacement.
-
Page 18: Instructions De Montage
549W Armoire Monterey Nomenclature des pièces AVANT DE COMMENCER LE MONTAGE, assurez-vous que les quantités de pièces reçues correspondent à celles de la nomenclature des pièces figurant ci-dessous. ID Description Qté ID Description Qté ID Description Qté A Assemblage du côté M Côté... - Page 19 bord de la traverse (B) reste droit et à ras du bord Placez la base (G) de manière à ce que l’arc soit en de l’assemblage du côté supérieur gauche (A). Voir bas et que le bord arrondi soit en haut et hors du la Figure 3.
- Page 20 l’arrière inférieur (K) doit être placé de manière à 14. Fixez les boutons (CZ) aux avants de tiroirs (L) au ce que les trous préforés soient sur les côtés et sur moyen des vis à usiner (DZ). Voir la Figure 14. le milieu (décalés vers le bord supérieur).
Need help?
Do you have a question about the Monterey Armoire 549W and is the answer not in the manual?
Questions and answers