Table of Contents
Advertisement
Quick Links
Installation and Operation instructions
INDOOR MODEL
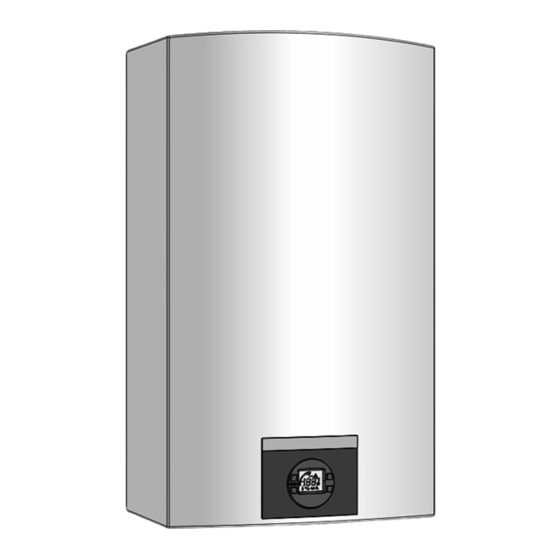
TL-Pro 175C/199C
TL-Pro 175/199 C - Natural Gas
TL-Pro 175/199 C- Propane (LP Gas)
Temperature Modulated with Electronic Ignition Suitable for heating potable water and space heating
(Intended for variable flow applications)
Warning: If the information in this manual is not followed exactly,
a fire or explosion may result causing property damage, personal
injury or death.
Do not store or use gasoline or other flammable vapors and liq-
uids in the vicinity of this or any other appliance.
Installation and service must be performed by a trained and cer-
tified installer, service agency or the gas supplier.
Improper installation, adjustment, alteration, service or mainte-
nance can cause injury or property damage. Refer to this man-
ual. For assistance or additional information consult a qualified
installer, service agency or the gas supplier.
Upon completion of the installation, these instructions should
be handed to the user of the appliance for future reference.
What to do if you smell gas
• Turn off the gas shut-off valve. Open windows and doors.
• Do not try to light any appliance.
• Do not touch any electrical switch, telephone, and do not use
outlets.
• Extinguish all open flames. Do not smoke! Do not use lighters!
• Warn all occupants of the building. Do not ring doorbells!
• If you can hear gas leaking, leave the building immediately.
Prevent others from entering the building and notify the
police and fire department from outside the building.
• From outside the building, call the gas utility company and a
trained and certified installer.
Advertisement
Table of Contents

Related Manuals for PurePro TL-Pro 175C

Summary of Contents for PurePro TL-Pro 175C
- Page 1 Installation and Operation instructions INDOOR MODEL TL-Pro 175C/199C Warning: If the information in this manual is not followed exactly, a fire or explosion may result causing property damage, personal injury or death. Do not store or use gasoline or other flammable vapors and liq- uids in the vicinity of this or any other appliance.
-
Page 2: Table Of Contents
Table of contents Table of contents Key to symbols and safety instructions ....3 Troubleshooting ........48 Key to symbols . -
Page 3: Key To Symbols And Safety Instructions
Key to symbols and safety instructions Function Key to symbols and safety instructions ▶ To ensure that the water heater functions properly, follow these installation and maintenance Key to symbols instructions. Warnings ▶ Never close the blow-off line of the T&P safety Warnings in this document are identified by a warning valve. - Page 4 ▶ Use only PurePro spare parts! Damage caused by ▶ Use metal fittings for potable water heating systems the use of parts not supplied by PurePro may void with plastic piping. the warranty. ▶ Use only original accessories from the Instruct the customer manufacturer.
- Page 5 Key to symbols and safety instructions For your safety WARNING: Damage to the appliance from over ▶ Do not store or use gasoline or other flammable, pressure. combustible or corrosive vapors and liquids in the ▶ The heater must be disconnected from vicinity of this or any other appliance.
-
Page 6: Fcc Rules
FCC rules WARNING: Risk of scalding and property damage. ▶ Precautions must be taken prior to manually operating the relief valve to avoid contact with hot water discharged from the relief valve and to prevent water damage. NOTICE: Appliance damage! ▶... -
Page 7: Appliance Details
- The freeze prevention kit will not protect plumbing outside the appliance from freezing. Precautions should be taken. PurePro is constantly improving its products, therefore specifications are subject to change without prior notice. TL-Pro 175/199 C – 6 720 821 954 (2017/06) -
Page 8: Specifications (Technical Data)
Appliance details Specifications (Technical data) Approved in US/Canada Technical characteristics Units TL-Pro 175 C TL-Pro 199 C Capacity Maximum flow rate at a 45 °F (25 °C) rise GPM (l/min) 7.3 (27.6) 8.3 (31.4) Maximum flow rate at a 55 °F (30.6 °C) rise GPM (l/min) 6.0 (22.6) 6.8 (25.7) -
Page 9: Unpacking The Heater
Appliance details Safety devices 3.3.2 Remove front cover • Flame failure device (ionization flame rod sensor) ▶ Loosen the two Phillips head screws located on bottom rear of cover. • Overheat prevention (temperature limiter) • Inlet temperature sensor • Outlet temperature sensor •... -
Page 10: General Rules To Follow For Safe Operation
Appliance details 3.3.3 Remove combustion cover (service only) • 8. Should overheating occur or the gas supply fail to shut off, turn off the gas supply at the manual gas shut off valve, on the gas line. Note: ▶ Open the four clips and remove the combustion cover. manual gas shutoff valve is not supplied with the heater but must be field installed. -
Page 11: Dimensions And Minimum Installation Clearances
Appliance details Dimensions and minimum installation clearances Fig. 6 Dimensions On/Off button Reset button Program key LCD display Up button Down button TL-Pro 175/199 C – 6 720 821 954 (2017/06) -
Page 12: Installation Instructions
Installation instructions Installation instructions Specialized tools The following specialized tools may be required for installation: • Manometer • Multi-meter • Combustion Gas Analyzer Introduction Please follow these instructions. Failure to follow instructions may result in: ▶ Damage or injury. ▶ Improper operation. ▶... - Page 13 Installation instructions 4.3.1 Vent options ABS. Generic PP twin pipe can be used if certified to ULC-S636 and only with 90° elbow or T terminals. Maximum vent lengths and equivalent The water heater is approved with the following venting options: lengths per tables 8 and 9 apply.
- Page 14 Installation instructions 4.3.2 Vent specifications 4" Venting Maximum Maximum Maximum Elbow Establish vent clearances that comply with the vent manufacturer's allowable allowable allowable Equivalency specifications and all applicable national/local codes. total vent Exhaust Intake 90° 45° Length Length Length Venting specifications Twin pipe 126ft 63ft...
- Page 15 Installation instructions For this example, the maximum allowable exhaust pipe For this example, the maximum allowable combustion length is 13 feet. air pipe length is 48 feet. Combustion air Calculation example for 2" PVC venting: Exhaust System used Concentric System used Twin pipe Number of 90°...
- Page 16 Installation instructions Required direct vent terminal clearances (twin pipe / concentric penetration) for PVC, CPVC, ABS, and PP. Fig. 10 Canadian installations U.S. installations Clearance above grade, veranda, porch, deck or balcony 12 in. 12 in. Clearance to window or door that may be opened 36 in.
- Page 17 Installation instructions Required other than direct vent terminal clearances (single pipe penetration) for PVC, CPVC and ABS systems. Fig. 11 Canadian installations U.S. installations Clearance above grade, veranda, porch, deck or balcony 12 in. 12 in. Clearance to window or door that may be opened 36 in.
- Page 18 Installation instructions 4.3.3 Vent configuration examples for PP, PVC, CPVC, or ABS WARNING: systems ▶ Single pipe penetration should be used in non- Below are approved examples of vertical and horizontal venting freezing climates only and steps must be taken to installations.
- Page 19 Installation instructions ▶ If using 4" venting, a 3" to 4" increaser should be installed directly after this accessory. If using 2" venting, a 3" to 2" reducer should be installed directly after this accessory. If using the PP twin pipe system, adapters from the appliance adapter (3"...
- Page 20 Installation instructions NOTICE: Risk of appliance freezing! ▶ Do not install condensate drain tubing in areas where it may freeze. The condensate must be disposed of in accordance with local codes. See chapter 4.12 “Filling the condensate trap”. Use materials approved by the authority having jurisdiction.
- Page 21 Installation instructions Installation For this solution to be effective, the internal flapper must be 100% closed when the water heater is not running. Refer to Figures 24 and25 for preferred installation positions in the vent system. Installation considerations: • Install damper per the supplied manufacturer‘s instructions. •...
- Page 22 Installation instructions 4.3.7 Common venting of 2 to 4 units 2 to 4 unit cascades can be common vented using the optional PP common venting system. The water heaters can be installed in a back to back configuration as shown in fig. 27, or side by side as shown in fig. The systems are custom configurable for vent lengths from 40”...
- Page 23 Installation instructions 4.3.8 Fan speed adjustment necessary adjustments to fan speed values may result in improper operation of the appliance. NOTICE: IMPORTANT INFORMATION! First calculate the total equivalent vent length. This is the straight pipe ▶ Natural gas heaters with installation altitudes below length of both exhaust and combustion air plus the number of elbows 2,000 ft above sea level disregard this section.
- Page 24 (610 - 1372 m) system 12 - 19 ft Table 30 TL-Pro 175C Fan speed adjustment for 2" piping 1) Full equivalent length (inlet + outlet piping + fittings) 2) When installing in altitude, the unit may not reach the rated Input 3) When adjusting the unit, CO2 levels must be checked with a combustion gas analyzer, see chapter 7.5 for instructions.
- Page 25 38 - 62 ft * Above 2000 ft, CO2 levels must be checked with a combustion gas analyzer, see chapter 7.5 for instructions. Table 31 TL-Pro 175C Fan speed adjustment for 3" piping 1) Full equivalent length (inlet + outlet piping + fittings)
- Page 26 Installation instructions PP Concentric up and out venting - only TL-Pro 199 C Adjusting minimum power fan speed (P2) To select fan speed: Altitude NG P2 LP P2 NG P1 LP P1 ▶ Press ON/OFF button into ON. 0 - 2000 no change no change no change...
-
Page 27: Combustion Air Requirements
Installation instructions every dwelling, building or structure used in whole or in part for 2. The "special venting systems" shall be product approved by the residential purposes, including those owned or operated by the Board, and the instructions for that system shall include a parts list and Commonwealth and where the side wall exhaust vent termination is less detailed installation instructions. -
Page 28: Proper Location For Installing Your Heater
Installation instructions – b) In unconfined spaces in buildings of conventional frame, Hanging appliance on the wall masonry, or metal construction, infiltration air is normally WARNING: Severe personal injury and property adequate to provide air for combustion. damage! • Appliances located in confined spaces: Before mounting appliance: The confined space must be provided with two permanent openings, one commencing within 12 inches (304.8mm) of the top and one... -
Page 29: Mounting Installation
Installation instructions bottom of the unit as shown in fig. 31. Fig. 32 Leveling wall mounting bracket Fig. 34 Mounting the heater Fig. 33 Mounting the heater CAUTION: Personal injury and property damage. ▶ Appliance must be installed vertically. Mounting installation When installing this appliance the unit must be additionally secured at the bottom of the water heater as shown in fig. -
Page 30: Gas Piping & Connections
Installation instructions Gas piping & connections GAS LINE SIZING The gas supply piping for a single heater should be sized for a maximum Before connecting the gas supply, check the rating plate on the right side draw of 199,000 BTU/hr. Measure the length of gas supply line from the of the heater to be sure that the heater is rated for the same gas to which building's gas main to the heater and use the chapter 4.9.1 and 4.9.2, it will be connected. - Page 31 Installation instructions 4.9.1 Gas Line Sizing Tables for NATURAL GAS For your convenience see below for an excerpt from gas line sizing tables for a single NG appliance. For details see the current NFPA 54. Required input for 175C is 175000 BTU/hr and 199000 BTU/hr for the 199C. The gas supply system must be sized for the combined total maximum BTU/hr load requirements of all gas appliances running simultaneously.
- Page 32 Installation instructions 4.9.2 Gas Line Sizing Tables for LP GAS For your convenience see below for an excerpt from gas line sizing tables for a single LP appliance. Their intended use of is for pipe sizing between the the 2nd stage (low pressure) regulator and the appliance. For details see the current NFPA 54 or NFPA 58. Required input for 175C is 175000 BTU/hr and 199000 BTU/hr for the 199C.
-
Page 33: Water Connections
Installation instructions 4.10 Water connections ▶ If the cold and hot connections to the heater are reversed, the heater will not function. Be certain there are no loose particles or dirt in the NOTICE: piping. Blow out or flush the lines before connecting to the water ▶... -
Page 34: Filling The Condensate Trap
Installation instructions ▶ Open the four clips and remove the combustion cover, see fig. 5, page 10. ▶ Remove the clip and disconnect the drain tube, see fig. 40. Fig. 40 Disconnect drain tube ▶ Fill the condensate trap by pouring approx.14 oz. (400ml) of water into the top of the drain tube. -
Page 35: Domestic Hot Water Recirculation
PurePro tankless water heaters are approved for use in combination DHW and space heating applications (open-loop setup). These water heaters are not approved for use in space heating only applications (closed-loop setup). - Page 36 Installation instructions Fig. 45 Pressure drop curve Fig. 46 Space heating diagram Hot water outlet [11] Thermostatic mixing valve Cold water inlet [12] Thermometer (optional) Pressure relief valve [13] DHW outlet Gas supply [14] Water to water heat exchanger Shut off gas valve [17] Thermostat Thermal expansion tank (as required) [18] Space heating zone...
-
Page 37: Measuring Gas Pressure
Electrical connections 4.15 Measuring gas pressure Confirm gas pressure upon installation. Connecting manometer ▶ Shut off gas supply at installer supplied shutoff valve for this water heater. ▶ Remove front cover and locate inlet gas pressure test port (see Fig.48). ▶... -
Page 38: Position Of The Fuses In Control Unit
Electrical connections Note: The outlet the appliance is plugged into should be clear from possible water damage. Position of the fuses in control unit To check fuses, proceed as follows: ▶ Remove the front cover, see fig. 4, page 9. ▶... -
Page 39: Operation Instructions
Operation instructions Operation instructions Fig. 52 On/Off button Reset button Program Key LCD display Up button Down button Description LCD Display WARNING: Fig. 56 Locked condition indicator (only with remote control) ▶ Do not use any cleaning aggressive or corrosive agents to clean the window. -
Page 40: For Your Safety Read Before Operating Your Water Heater
Operation instructions ▶ Press buttons in order to reach desired temperature. Fig. 60 Activation water flow (see chapter 12) For your safety read before operating your water heater Fig. 62 DANGER: Explosion hazard! Setting the water temperature ▶ If you do not follow these instructions exactly, a fire The desired temperature of the hot water can be adjusted on the front or explosion may result causing property damage, control panel of the heater. -
Page 41: Operation
Operation instructions Fig. 66 Reset button If the problem persists, contact your installer. Program button Fig. 63 Operation ▶ When a hot water tap is opened, main burner ignites and LCD displays indication Fig. 67 “Program” key 6.7.1 Memorizing selected temperature ▶... -
Page 42: Maintenance And Service
Maintenance and service Fin Coils Maintenance and service • Inspect heat exchanger fin coils for soot build-up or blockage. If there is evidence of soot build-up or blockage, the heat exchanger should DANGER: be removed by a professional and cleaned thoroughly. ▶... -
Page 43: Condensing Heat Exchanger Unit
Maintenance and service ▶ Fill tank with descaling solution so both lines inside are submersed. ▶ Disconnect power cord. We recommend a straight white vinegar solution. If using a ▶ Drain water heater. commercial descalant, refer to manufacturer's instructions for Note: be sure to remove condensing heat exchanger rear proper dilution ratio. -
Page 44: Adjusting Co2
Maintenance and service Adjusting CO2 B. Measuring CO (Combustion cover Installed): ▶ Open all hot water taps to achieve a flow rate of at least 6 gpm. (1 tub The CO2 can only be adjusted by a certified gas technician with a and 2 sinks should be sufficient). - Page 45 Maintenance and service D. Returning to Service: 1. Return slotted screw cover to original position. 2. Reinstall Torx cover. 3. Remove CO analyzer probe and reinstall flathead screw with gasket in exhaust collar. 4. Press ON/OFF button to turn OFF the heater and then turn ON the heater.
-
Page 46: Program Values
Maintenance and service Program values Refer to chapter 7.7 Control board diagnostics (page 46) regarding how to access these P-modes. This section describes details on programming the appliance. For most applications the factory default values will provide robust and stable CAUTION: Appliance malfunction! operation. - Page 47 Maintenance and service ▶ Select the sub-mode “C0”. Diagnostic menu Write the number that shows in the display. ▶ Select the sub-mode “C1”. 5th most recent error Write the number that shows in the display. 6th most recent error ▶ Select the sub-mode “C2”. Write the number that shows in the display.
-
Page 48: Troubleshooting
Troubleshooting Troubleshooting 4. Confirm the heater's gas type coincides with the type of gas being CAUTION: supplied. See fig. 2, page 9 for location of rating plate. ▶ If you are unable to perform the tasks listed below, or 5. Avoid restrictive outlets. Clean all shower heads and faucet aerators. need additional assistance please contact your It may be necessary to upgrade to higher flow rate shower heads if original installer or a licensed gas technician. -
Page 49: Hot Water Temperature Fluctuates At Tap
Troubleshooting Hot water temperature fluctuates at tap 1. Hot water is very hot out of the water heater, requiring mixing in cold water in order to attain a usable hot water temperature. The addition of too much cold will overpower hot water flow from the tankless water heater. -
Page 50: Problem Solving
Problem solving Problem solving Error code diagnostics To remove error code from the display, press the reset button. Display Cause Solution Fault in the flue gas limiter. 1. Check continuity of the flue gas limiter (see fig. 80, #11, page 56). Go to steps two Temperature above 230°F (110 °C) and three to determine flue gas limiter fault and repair it. - Page 51 Problem solving Display Cause Solution Over-temperature detected by outlet 1. Check wire connection at outlet temperature sensor. temperature sensor. 2. In areas where water has a high mineral content, periodic descaling may be Temperature > 185°F necessary. See chapter7.3, page 42 for directions. 3.
- Page 52 Problem solving Display Cause Solution Parameter in memory not found 1. Replace ECU (Electronic Control Unit) if there are repeated errors. Internal Operations error Internal memory parameter error Internal memory error Analog test fail Gas type parameter error Appliance parameter not defined Burner Control routine state error Burner Control error Burner Control routine check sum...
-
Page 53: Electrical Diagram
Electrical diagram Electrical diagram Fig. 76 Electrical scheme Inlet water temperature sensor Outlet water temperature sensor Backflow temperature sensor By-pass water valve Cascading output connection Cascading input connection Ionization sensor Water flow sensor Flue gas limiter [10] Heat exchanger overheat sensor (ECO) [11] Gas valve [12] Temperature Heat Exchanger [13] Exhaust temperature sensor... -
Page 54: Sensor Resistance Charts
Sensor resistance charts Sensor resistance charts Fig. 77 Outlet / Inlet and HE immersion sensor characteristics Fig. 78 TL-Pro 175/199 C – 6 720 821 954 (2017/06) -
Page 55: Functional Scheme
Functional scheme Functional scheme Fig. 79 Functional scheme TL-Pro 175/199 C – 6 720 821 954 (2017/06) -
Page 56: Interior Components Diagram
Interior components diagram Interior components diagram 13.1 Interior components Fig. 80 Components Exhaust temperature sensor [13] Ignition electrodes Flue gas collector [14] Observation window Heat exchanger [15] Backflow temperature sensor Ionization sensor [16] Secondary air fan Primary fan (Mixer) [17] Gas valve Hot water temperature sensor [18] Condensate trap LCD display... -
Page 57: Protecting The Environment
Protecting the environment Protecting the environment Packing The packing box may be fully recycled as confirmed by the recycling symbol Components Many parts in the heater can be fully recycled in the end of the product life. Contact your city authorities for information about the disposal of recyclable products. -
Page 58: Limited Tankless Heater Warranty
LIMITED TANKLESS HEATER WARRANTY LIMITED TANKLESS HEATER WARRANTY MODELS COVERED This limited warranty is provided by Bosch Thermotechnology Corp. (BTC) and covers models PROTL199CN, PROTL199CL, PROTL175CN, PROTL175CL, PROTL199N, PROTL199L, PROTL175N, PROTL175L (hereinafter referred to as "Water Heater"). This warranty is provided as long as the Water Heater remains in the possession of the original purchaser and installed at its original place of installation. - Page 59 LIMITED TANKLESS HEATER WARRANTY CONDITIONS OF WARRANTY The warranty herein is void under the following circumstances: 1. Failure or malfunction resulting from improper or negligent operation, accident, abuse, freezing, misuse, unauthorized alteration or improper installation, repair or maintenance. See the Installation Manual for installation and maintenance information. 2.
-
Page 60: Installer Checklist To Be Completed By Installer Upon
Installer Checklist to be completed by installer upon installation Installer Checklist to be completed by installer upon installation Serial Number ___ ___ ___ ___ ___ ___ ___ ___ (8 digit serial number is located on rating plate on right side panel) Gas Pressure Reading Static... - Page 61 Notes TL-Pro 175/199 C – 6 720 821 954 (2017/06)
- Page 62 Notes TL-Pro 175/199 C – 6 720 821 954 (2017/06)
- Page 63 Notes TL-Pro 175/199 C – 6 720 821 954 (2017/06)
- Page 64 6720821954...
Need help?
Do you have a question about the TL-Pro 175C and is the answer not in the manual?
Questions and answers