Advertisement
Quick Links
IMPORTANT: PUT ALL SCREWS INTO PLACE BEFORE TIGHTENING EACH ONE GRADUALLY IN SEQUENCE.
THIS IS IMPORTANT TO ENSURE THAT ALL THE BOLTS LINE UP CORRECTLY TO START WITH
ASSEMBLY & PRODUCT CARE
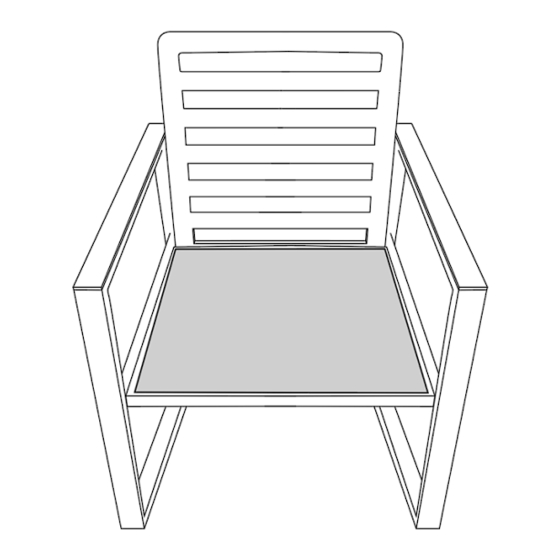
DINING CHAIR (2PK)
5059413795008
Thank you for purchasing this PRODUCT. Please read the instructions carefully before use to
ensure safe and satisfactory operation of this product.
Pre-assembly preparation
Please ensure instructions are read in full before attempting to assemble this product
You will need
Allen Key (included)
Please check the pack contents before attempting to assemble this product. A full checklist of
components is given in this leaflet. If any components are missing, please contact the retailer from
whom you bought this product.
TAKE CARE WHEN LIFTING to avoid personal injury and (or) damage to the product.
This product takes approximately 10 MINUTES to assemble with 1 PEOPLE.
The fittings pack contains SMALL ITEMS which should be KEPT AWAY FROM YOUNG
CHILDREN.
Advertisement

Related Manuals for John 5059413795008

Summary of Contents for John 5059413795008
- Page 1 THIS IS IMPORTANT TO ENSURE THAT ALL THE BOLTS LINE UP CORRECTLY TO START WITH ASSEMBLY & PRODUCT CARE DINING CHAIR (2PK) 5059413795008 Thank you for purchasing this PRODUCT. Please read the instructions carefully before use to ensure safe and satisfactory operation of this product.
- Page 2 IMPORTANT: PUT ALL SCREWS INTO PLACE BEFORE TIGHTENING EACH ONE GRADUALLY IN SEQUENCE. THIS IS IMPORTANT TO ENSURE THAT ALL THE BOLTS LINE UP CORRECTLY TO START WITH Read this leaflet in full before commencing assembly. Fittings and parts checklist Part Description Image...
- Page 3 IMPORTANT: PUT ALL SCREWS INTO PLACE BEFORE TIGHTENING EACH ONE GRADUALLY IN SEQUENCE. THIS IS IMPORTANT TO ENSURE THAT ALL THE BOLTS LINE UP CORRECTLY TO START WITH Step by step assembly instructions Step One With the Left Leg (C) on the ground, using Washer (H), Bolt (E) or Bolt (F) as specified, fix the Seat (B) into the bolt holes provided, finger tight.
- Page 4 IMPORTANT: PUT ALL SCREWS INTO PLACE BEFORE TIGHTENING EACH ONE GRADUALLY IN SEQUENCE. THIS IS IMPORTANT TO ENSURE THAT ALL THE BOLTS LINE UP CORRECTLY TO START WITH Step Three With the Right Leg (D) on the ground, using Washer (H), Bolt (E) or Bolt (F) as specified, fix the Seat (B) into the bolt holes provided, finger tight.
- Page 5 IMPORTANT: PUT ALL SCREWS INTO PLACE BEFORE TIGHTENING EACH ONE GRADUALLY IN SEQUENCE. THIS IS IMPORTANT TO ENSURE THAT ALL THE BOLTS LINE UP CORRECTLY TO START WITH Step Five Put Caps (I) over Bolts (E) on armrest position. Finish.
-
Page 6: Safety Instructions
IMPORTANT: PUT ALL SCREWS INTO PLACE BEFORE TIGHTENING EACH ONE GRADUALLY IN SEQUENCE. THIS IS IMPORTANT TO ENSURE THAT ALL THE BOLTS LINE UP CORRECTLY TO START WITH OUTDOOR FURNITURE Thank you for purchase, we hope you enjoy your furniture for the upcoming summer and years to come. -
Page 7: Care And Maintenance
IMPORTANT: PUT ALL SCREWS INTO PLACE BEFORE TIGHTENING EACH ONE GRADUALLY IN SEQUENCE. THIS IS IMPORTANT TO ENSURE THAT ALL THE BOLTS LINE UP CORRECTLY TO START WITH Care and Maintenance WHEN CARED FOR PROPERLY, THIS HAND CRAFTED FURNITURE WILL PROVIDE YOU WITH YEARS OF ENJOYMENT AT YOUR HOME. - Page 8 IMPORTANT: PUT ALL SCREWS INTO PLACE BEFORE TIGHTENING EACH ONE GRADUALLY IN SEQUENCE. THIS IS IMPORTANT TO ENSURE THAT ALL THE BOLTS LINE UP CORRECTLY TO START WITH Metal (Outdoor) Metal furniture is weatherproof powder coated paint which requires minimal maintenance: Cleaning your metal furniture is very simple.
- Page 9 IMPORTANT: PUT ALL SCREWS INTO PLACE BEFORE TIGHTENING EACH ONE GRADUALLY IN SEQUENCE. THIS IS IMPORTANT TO ENSURE THAT ALL THE BOLTS LINE UP CORRECTLY TO START WITH Waxed furniture will need to be given a coat of beeswax a couple of times a year to help maintain its luster.
Need help?
Do you have a question about the 5059413795008 and is the answer not in the manual?
Questions and answers