
Summary of Contents for mobl MOBL-URBN
- Page 1 Electric Urban Bike USER MANUAL Model Number MOBL-URBN After Sales Support (AU) 1300 886 649 (NZ) 0800 836 761 | tempo.org/support E209...
-
Page 2: Welcome
Welcome Welcome to your new MOBL bicycle! As part of our brand philosophy, all of our products are manufactured to the highest standards of performance and safety. This product includes a comprehensive 1 Year Warranty, as part of our commitment to ensuring an excellent user experience. -
Page 3: Table Of Contents
Contents 02 Welcome 04 General Safety Instructions 07 Product Overview 08 Getting Started 09 Assembly 14 Battery Charging 17 Instructions 20 FAQs and Troubleshooting Guide 21 Other Useful Information After Sales Support (AU) 1300 886 649 (NZ) 0800 836 761 | tempo.org/support... -
Page 4: General Safety Instructions
General Safety Instructions IMPORTANT SAFETY INSTRUCTIONS READ CAREFULLY AND KEEP FOR FUTURE REFERENCE Read this manual thoroughly before first use, even if you are familiar with this type of product. The safety precautions enclosed herein reduce the risk of injury and product damage. - Page 5 General Safety Instructions (Cont.) • Check the tyre pressure: The tyre pressure of this bicycle is 240 kPa (35 psi), which is marked on the tyre. Please ensure that the tyre pressure is within this range to avoid accidents (1 psi = 6.895 kPa). •...
- Page 6 General Safety Instructions (Cont.) • • Appropriate environment: Appropriate environment: We recommend that you do not use the bike in We recommend that you do not use the bike in temperatures outside the appropriate range from -10°C to 50°C. The best temperatures outside the appropriate range from -10°C to 50°C.
-
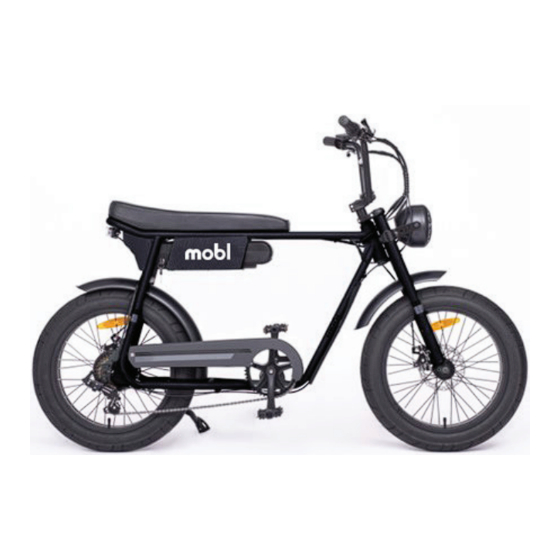
Page 7: Product Overview
Product Overview Scope of delivery Electric Urban Bike Handlebar with grips Saddle and display Front Battery brake Front light Fork Front Rear brake tyre Seat post Motor Spokes Chain Rear Pedal Kick tyre stand B Other inclusions Battery Multipurpose Battery charger charger tool Multipurpose tool... -
Page 8: Getting Started
Getting Started Before first use • Unpack this bike, making sure to remove all parts from the packaging carton. The carton staples may be sharp, take care that you do not hurt yourself when reaching into the carton to remove parts. •... -
Page 9: Assembly
Assembly Step 1: Assembling the Stem and Handlebar 1. Loosen the screws on the stem and remove the stem cover (Fig. 2). 2. Fit the handlebars to the stem, ensuring they are centered. Put the stem cover and partially tighten the screws. Check the handlebars are in the correct position and, once satisfied, fully tighten the screws (Fig. - Page 10 Assembly (Cont.) Gear shifter on the handlebar Fig. 5 The bike is equipped with a SHIMANO 7 speed system and the shifter is at the right side of the handlebar (Fig. 5). Pull the lever to get a bigger tooth ratio (higher gear, and therefore more torque when you pedal).
- Page 11 Assembly (Cont.) Step 2: Installing the Pedals WARNING! • For safe operation, the pedal spindle must be securely tightened against the crank arm. • Always replace damaged pedals, and always wear fully enclosed shoes or sneakers when riding a bicycle. 1.
- Page 12 Assembly (Cont.) Step 3: Installing the Reflectors and Bell 1. Remove the clamp screw from the reflector (or bell) bracket. 2. Push open the bracket “loop” and slide it onto the handlebar. (If there is a sizing insert included with the bracket, please be sure it is inside the clamp loop before mounting.) 3.
- Page 13 Assembly (Cont.) Front light Fig. 10 3. The front light comes pre-assembled - these instructions are only necessary if adjustment or reinstallation is needed. 4. Use the M6 hexagonal key on the multi- tool to loosen the screws on both sides of the front light (Fig.
-
Page 14: Battery Charging
Battery Charging Battery The bicycle comes with a removable lithium battery installed on the frame of the bike. Also supplied is a key (and a duplicate), attached to the brake cables, which you should have removed earlier in the assembly process. The key is required for locking the battery in place or unlocking it for removal of the battery. - Page 15 Battery Charging (Cont.) 5. To show the battery status, press the button on the battery. The LED light will illuminate to show the battery status (Fig. 14): Five lights: Approximately 80%–100% battery charge Four lights: Approximately 60%–80% battery charge Three lights: Approximately 40%–60% battery charge Two lights: Approximately 20%–40% battery charge...
- Page 16 Battery Charging (Cont.) Charger The bicycle comes with a smart charger for easy charging. 1. Insert the AC plug into an appropriate electrical outlet. 2. Open the battery cover and insert the DC connector into the battery (Fig. 15). 3. When the battery is charging, the charging light illuminates red (Fig. 16). 4.
-
Page 17: Instructions
Instructions Control Panel The bicycle's control panel (Fig. 17), located on the left side of the handlebar, allows you turn on the bike for electric power, select riding modes and check the battery status. Light button Battery status Fig. 17 POWER button Mode /... - Page 18 Instructions (Cont.) Electric-assisted mode (pedal assistance) Power assistance helps increase your riding speed with the help of the motor. When the user brakes, the motor will stop working immediately. Power assistance will turn itself off when the bicycle has reached the maximum speed of 25 km/h. You must turn on the battery to use the e-bike in electric-assisted mode.
- Page 19 Instructions (Cont.) Getting Ready to Ride Wear appropriate clothing To protect yourself from injury, always wear appropriate clothing and equipment when riding a bike: an Australian standards-approved helmet, elbow pads, knee pads, long sleeve shirt, gloves, long pants. Always wear fully enclosed shoes. Make sure your shoe laces or buckles are done up properly before riding.
-
Page 20: Faqs And Troubleshooting Guide
FAQs and Troubleshooting Guide If you experience problems with your bicycle, check in the table below for solutions to common problems. If the problem persists after checking the suggested solutions, please contact our after sales support centre for advice. Problems Possible cause Solution When turned on, the... -
Page 21: Other Useful Information
Other Useful Information Cleaning and care WARNING! Clean the bicycle properly and maintain it in good working condition. The warranty will not apply in case of corrosion due to lack of maintenance. • After every ride, wash your bike with soapy water (liquid dish soap is recommended for its ability to remove grease without damaging the bike), but do not wash any electrical parts. - Page 22 Other Useful Information (Cont.) Storage When it is not in use, store the bicycle in a cool, dry place, protected from dust, high humidity and frequent temperature changes, and out of reach of children. For prolonged storage we recommend using the original carton for the bike and storing the battery separately.
- Page 23 Other Useful Information (Cont.) Technical specifications Electric Urban Bike Model number MOBL-URBN EPAC cut-off speed 25 km/h Mass of EPAC in the most usual configuration 36 kg (weight) Electric motor max. continuous rated power 250 W Max. permissible total weight...
- Page 24 Other Useful Information (Cont.) Responsible disposal Packaging materials are recyclable. Please dispose of them responsibly for recycling. At the end of its working life, make the battery unserviceable by unplugging it from the power outlet and cutting the power cord. Do not throw this bicycle out with your household waste.
- Page 25 This page has been left blank intentionally. After Sales Support (AU) 1300 886 649 (NZ) 0800 836 761 | tempo.org/support...
- Page 26 This page has been left blank intentionally. After Sales Support (AU) 1300 886 649 (NZ) 0800 836 761 | tempo.org/support...
- Page 27 This page has been left blank intentionally. After Sales Support (AU) 1300 886 649 (NZ) 0800 836 761 | tempo.org/support...
- Page 28 Warranty returns Should you for any reason need to return this product for a warranty claim, make sure to include all accessories with the product. Product does not work? If you encounter problems with this product, or if it fails to perform to your expectations, make sure to contact our After Sales Support Centre on (AU) 1300 886 649 or (NZ) 0800 836 761 for advice.
Need help?
Do you have a question about the MOBL-URBN and is the answer not in the manual?
Questions and answers