Table of Contents
Advertisement
Advertisement
Table of Contents

Related Manuals for Oasis Aquatics Oasis SE Series

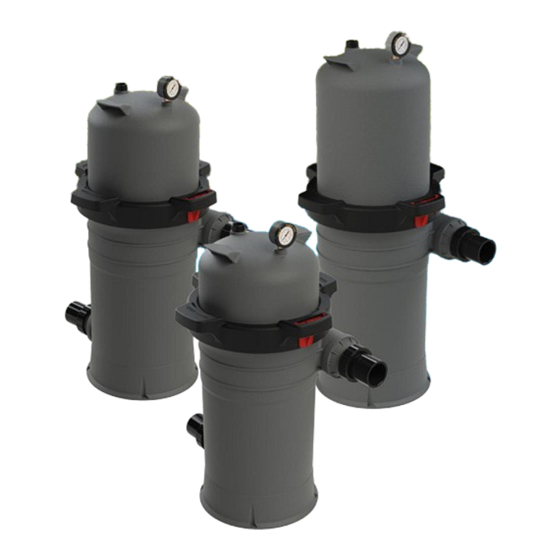
Summary of Contents for Oasis Aquatics Oasis SE Series
- Page 2 FOR QUICK REFERENCE, RECORDS YOUR DETAILS HERE. Model No: Serial No: Purchase Date: Installer: Warranty Registered Online: Yes / No See page 15 for details PRESSURE GAUGE READING RECORD Initial Reading Date Date Date Date Date Date Date Date Date Date Date Date...
-
Page 3: Table Of Contents
TABLE OF CONTENTS IMPORTANT WARNINGS & SAFETY INSTRUCTIONS .............. 3 GENERAL OVERVIEW ........................ 5 HOW IT WORKS .......................... 6 INSTALLATION..........................6 STARTING THE PUMP AND FILTER SYSTEM ................7 BEFORE STARTING THE PUMP .................... 7 STARTING PUMP ........................8 OPERATION ........................... 8 MAINTAINING YOUR FILTER ..................... -
Page 4: Important Warnings & Safety Instructions
IMPORTANT WARNINGS & SAFETY INSTRUCTIONS THESE OPERATING INSTRUCTIONS CONTAIN IMPORTANT INFORMATION ON THE SAFE, PROPER, AND ECONOMICAL OPERATION OF THIS SWIMMING POOL APPLIANCE. STRICT OBSERVATION OF THE OPERATING INSTRUCTIONS WILL HELP TO AVOID DANGERS, REDUCE REPAIR COSTS, AND INCREASE THE RELIABILITY AND WORKING LIFE OF THE PRODUCT. - Page 5 READ UNDERSTAND AND FOLLOW ALL SAFETY AND OPERATION: Do not operate the filter until you have read and clearly understand all the operating instructions and warnings for you pool filtration system equipment. The following instructions are intended as a guide for the initial operation and ongoing maintenance of the filter in a general pool installation.
-
Page 6: General Overview
• Your entitlements under the product warranty. Oasis Aquatics have developed their product line to provide you with the ultimate experience and are sure you will be delighted with your purchase. Please note: This manual has been designed to cater for installation rules and codes in Australia. -
Page 7: How It Works
With maximum flow ratings between 380 and 455 litres per minute (LPM), they are designed for continuous or intermittent operation, when installed both above or below the pool waterline. Oasis Aquatics SE Series Filters are compatible with freshwater, saltwater and mineral pools and spas. INSTALLATION The filter should be installed as close to the pool as possible while keeping a minimum distance of 1.5m... -
Page 8: Starting The Pump And Filter System
STARTING THE PUMP AND FILTER SYSTEM BEFORE STARTING THE PUMP 1. Ensure that all unions, clamps, fasteners, lids and other accessories are properly fitted, and that any glued fittings have had ample time to cure. 2. Ensure that the pressure gauge, air relief valve and drain plug are installed. Note that each of these contains a sealing o-ring. -
Page 9: Starting Pump
STARTING PUMP Stand clear of pump during start-up Pool and spa circulation systems operate under high pressure. When any part of the pool filtration system is serviced, air can enter the system and become pressurised. Pressurised air can cause the cartridge filter top assembly to separate, resulting in severe injury, death, or property damage. -
Page 10: Maintaining Your Filter
MAINTAINING YOUR FILTER FILTER DISASSEMBLY INSTRUCTIONS Switch off all pumps and electrical power in pool equipment area. Set any pool system valves in a position that prevents water from flowing to the filter. Loosen the air relief valve approximately one and a half turns. Remove the filter drain plug to release all water from the filter. -
Page 11: Restarting Filter Pump
Gently close valve only enough to seat the seal (do not overtighten). WINTERISING Is it important to protect your Oasis Aquatics Cartridge Filter from freezing water conditions in areas where sub-freezing temperatures can be expected. As water freezes it expands and that can cause the internals of the Cartridge Filter to break under the intense pressure of expanding water. -
Page 12: Troubleshooting
TROUBLESHOOTING If you suspect for any reason your Oasis Aquatics SE Series Single-Element Cartridge Filter is not performing or running as it should be, here are some handy troubleshooting tips that may assist you. This table should assist with the majority of problems... -
Page 13: Pro-Active Maintenance
PRO-ACTIVE MAINTENANCE Your new Oasis Aquatics Cartridge Filter has been designed to withstand harsh outdoor conditions and withstand high velocity water with chemicals. Some of these parts will wear in the normal course of use and require regular checks and maintenance. A well thought out pro-active maintenance schedule will identify faults early and extend the lifespan of your Cartridge Filter. -
Page 14: Replacement Parts Of Filter
REPLACEMENT PARTS OF FILTER REPLACEMENT PARTS OF MULTIPORT VALVE Item Part No Description 117068519 Pressure gauge 60psi, plastic casing 550188198 Upper Body ICF100 550188199 Upper Body ICF150 550188200 Upper Body ICF200 570818164 Nut D22X15 550058153 Lock Ring 550058196 Latch 11000036 O-ring D306Xd7.5 430178159 Union nut 2"... -
Page 15: Warranty
This warranty is subject to the conditions and limitations herein after stated and is applicable to workmanship and materials only. You must notify Oasis Aquatics of the failure of any component of your product within seven (7) days of the recognised fault. -
Page 16: Technical Support
TECHNICAL SUPPORT For all warranty enquiries please contact your local distributor or contact Oasis Aquatics directly and we will either direct you to your nearest authorised repairer for assistance. OASIS AQUATICS Ph: 1800 815 913 Website: oasisaquatics.com.au Email: sales@sunloverheating.com.au DISCLAIMER Information in this guide is intended to provide general information on a particular subject(s) in good faith and is not an exhaustive treatment of such subject(s). -
Page 17: Notes
NOTES SE SERIES SINGLE-ELEMENT CARTRIDGE FILTER INSTALLATION AND OPERATION MANUAL Page 16 of 19... - Page 18 SE SERIES SINGLE-ELEMENT CARTRIDGE FILTER INSTALLATION AND OPERATION MANUAL Page 17 of 19...
- Page 19 SE SERIES SINGLE-ELEMENT CARTRIDGE FILTER INSTALLATION AND OPERATION MANUAL Page 18 of 19...
- Page 20 A part of the Victoria New South Wales Queensland 6-8 Austral Place Unit 2, 10 Boden Road 11 Andys Court Hallam VIC 3803 Seven Hills NSW 2147 Upper Coomera QLD 4209 Australia Australia Australia T: 03 9887 2131 T: 02 9838 0000 T: 07 5679 6821 oasisaquatics.com.au sales@sunloverheating.com.au...
Need help?
Do you have a question about the Oasis SE Series and is the answer not in the manual?
Questions and answers