
Related Manuals for Phcbi MCO-5AC


Summary of Contents for Phcbi MCO-5AC
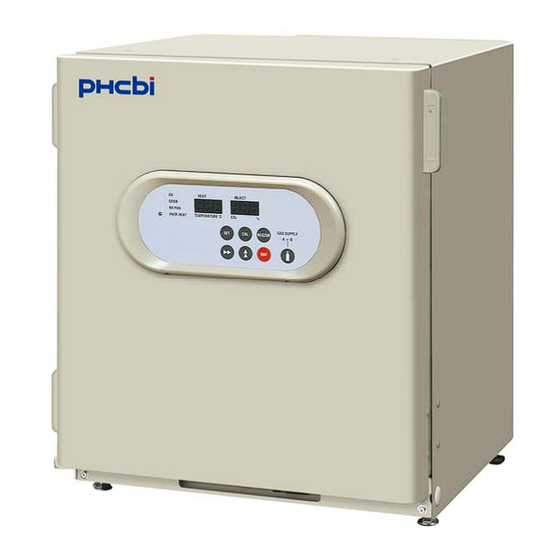
- Page 1 Operating Instructions Incubator MCO-5AC Please read the operating instructions carefully before using this product, and keep the operating instructions for future use. See page 43 for model number. ...
-
Page 3: Table Of Contents
CONTENTS INTRODUCTION ....................2 PRECAUTIONS FOR SAFE OPERATION ............3 LABELS ON INCUBATOR ................... 7 ENVIRONMENTAL CONDITIONS ..............7 INCUBATOR COMPONENTS ................8 Control panel and keypad ................10 Remote alarm terminal ................... 12 INSTALLATION SITE ..................13 INSTALLATION ....................14 Connecting a CO gas cylinder .............. -
Page 4: Introduction
INTRODUCTION ■ Read the operating instructions carefully before using the Product and follow the instructions for safety operation. ■ PHC Corporation disavows any responsibility for safety if the Product is used for other than the intended use or used with any procedures other than those given in the operating instructions. ■... -
Page 5: Precautions For Safe Operation
PRECAUTIONS FOR SAFE OPERATION It is imperative that the user complies with the operating instructions as it contains important safety advice. Items and procedures are described so that you can use this unit correctly and safely. If the precautions advised are followed, this will prevent possible injury to the user and any other person. - Page 6 PRECAUTIONS FOR SAFE OPERATION WARNING Do not use the unit outdoors. Current leakage or electric shock may result if the unit is exposed to rain water. Only qualified engineers or service personnel should install the unit. The installation by unqualified personnel may cause electric shock or fire. Install the unit on a sturdy floor and take an adequate precaution to prevent the unit from turning over.
- Page 7 WARNING Ensure you do not inhale or consume medication or aerosols from around the unit at the time of maintenance. These may be harmful to your health. Never splash water directly onto the unit as this may cause electric shock or short circuit. Never put containers with liquid on the unit as this may cause electric shock or short circuit when the liquid is spilled.
- Page 8 PRECAUTIONS FOR SAFE OPERATION CAUTION This unit must be plugged into a dedicated circuit protected by branch circuit breaker. Use a dedicated power source as indicated on the rating label attached to the unit. A multiple-tap may cause fire resulting from abnormal heating. Never store corrosive substances such as acid or alkali in this unit if the container cannot be sealed.
-
Page 9: Labels On Incubator
LABELS ON INCUBATOR Warning and caution labels are attached to the incubator. The following table describes the labels. This label is attached to covers that access high-voltage electrical components to prevent electric shock. Only a qualified engineer or service personnel should be allowed to open these covers. -
Page 10: Incubator Components
INCUBATOR COMPONENTS 7 (inside) When MCO-19UVS is installed. 12 ,14 ,15 (inside) Chageabl Switch cover Connecting port for CO When MCO-19UVS is installed. Rear right side Rear left side... - Page 11 1. Outer door: Sticks to frame with magnetic seal. Door heater is installed in the door panel. The door opening is reversible. Contact our sales representative or agent to change the door hinge from left to right or vice versa. 2.
-
Page 12: Control Panel And Keypad
INCUBATOR COMPONENTS Control panel and keypad 1. Digital temperature indicator (TEMPERATURE C): Normally, this indicator shows the chamber temperature. In the setting mode, it shows the set value of the chamber temperature. If the self diagnostic function detects any abnormality, an error code will be displayed. 2. - Page 13 10. Set key (SET): Pressing this key to enter the setting mode, and the digits to be set will blink. 11. Calibration key (CAL): By pressing this key for approximately 5 seconds, the unit enters the function mode to calibrate. See page 35 for the details. Also, used to change the UV lamp ON period. See page 32 for the details.
-
Page 14: Remote Alarm Terminal
INCUBATOR COMPONENTS Remote alarm terminal The remote alarm terminal is located at the rear right side of the incubator. Remote alarm terminal The alarm is outputted from this terminal. Contact capacity is DC 30 V, 2 A. Normal : OPEN Abnormal , blackout : CLOSE Note: •... -
Page 15: Installation Site
INSTALLATION SITE For correct operation of the incubator, install it in a location with the following conditions. WARNING When using CO gas for control, make sure that there is adequate ventilation. Using CO gas in a small room without adequate ventilation may cause gas poisoning or oxygen deprivation. In addition, when opening the incubator doors, do not directly inhale the air in the chamber. -
Page 16: Installation
INSTALLATION 1. Remove the packing tape and clean up. Remove all the tape that is securing the doors and the inner attachments. Open the doors for ventilation. If the outer panels are dirty, dampen a cloth with a diluted neutral detergent and wipe them. (Using an undiluted solution may damage the plastic. -
Page 17: Connecting A Co Gas Cylinder
Connecting a CO gas cylinder WARNING When connecting a gas cylinder to the incubator, confirm the gas type. Confirm that the connections are secure and that no gas will escape. Be sure to use the specified pressure. Using an incorrect gas or pressure may result in explosion or fire, or in gas poisoning or oxygen deprivation due to escaping gas. -
Page 18: Preventing Contamination
PREVENTING CONTAMINATION To prevent contamination of the chamber, select a suitable installation site. Avoid locations with high temperatures or humidity. Avoid locations with high temperatures or humidity, because of a greater presence of microorganisms in the air. Avoid locations with passers-by or drafts. Avoid locations near doors, air conditioners, fans, etc., where passers-by or drafts can facilitate the entry of microorganisms into the chamber. -
Page 19: Precautions For Cultures
PRECAUTIONS FOR CULTURES Leave space between culture containers. Always leave space for ventilation between culture containers (Petri dishes, flasks, etc.). Inadequate spacing may result in uneven temperature distribution and CO gas density. Do not place harmful materials in the chamber. Never place samples that release acidic, alkali, or corrosive gas in the chamber. -
Page 20: Initial Cleaning Method
INITIAL CLEANING METHOD Before using the incubator for the first time, clean dirt (tape residue, smear, etc.) from the chamber and the inner attachments thoroughly. To keep the chamber clean is essential to get the proper performance out of the incubator. Use the following steps to clean the incubator properly. -
Page 21: Removing Inner Attachments
REMOVING INNER ATTACHMENTS CAUTION Wear rubber gloves when performing maintenance on the chamber. Failure to wear gloves may result in cuts or abrasions from sharp edges or corners. Be careful not to damage the water level sensor or the UV lamp in the rear duct. (When an optional UV system set MCO-19UVS is installed.) Do not use detergents or antiseptic solutions with acid, alkali, or chlorine. - Page 22 REMOVING INNER ATTACHMENTS 8. Lift the rear duct and remove it from the pins at the rear side. (Fig. 7) 9. Remove the fan by pulling out the central spring and then by pulling out the fan. (Fig. 8) 10. Remove the silicon caps of the access port, one each from interior (Fig. 9) and exterior (Fig. 10). Rear duct 1.
-
Page 23: Installing Inner Attachments
INSTALLING INNER ATTACHMENTS Use the following steps to install the inner attachments properly. 1. To reinstall all the attachments, perform the procedure in reverse order from step 10 on page 20. 2. When installing the fan, insert it to the motor shaft securely. Lightly turn the fan manually to make sure that it does not touch the rear panel. -
Page 24: Filling Humidifying Pan
FILLING HUMIDIFYING PAN Use the following procedure to fill the humidifying pan or to replace the water. 1. Lift the front side of the humidifying pan cover. (Fig. 1) 2. Pull out the humidifying pan toward you. (Fig. 2) 3. Dispose of the remaining water in the humidifying pan and clean the humidifying pan with a diluted detergent. -
Page 25: Water Level Sensor
WATER LEVEL SENSOR This incubator is equipped with a water level sensor. The water level sensor is set automatically when the humidifying pan is installed. Take care not to damage the water level sensor when removing or installing the humidifying pan. When the humidifying pan is removed (side view) Water level sensor Humidifying pan... -
Page 26: Routine Maintenance
ROUTINE MAINTENANCE To use this unit in a clean condition, clean the chamber and all the inner attachments at least once a month. 1. Remove all the inner attachments by the procedures shown on page 19. 2. Clean the chamber and all the inner attachments by the procedures shown on page 18. 3. -
Page 27: Setting Of Chamber Temperature And Co Density
SETTING OF CHAMBER TEMPERATURE AND CO DENSITY Table below shows the basic procedure for setting the chamber temperature and CO density. The high limit alarm temperature setting is also shown in the table. Perform key operations in the sequence indicated in the table. The example in the table is based on the assumption that the desired temperature is 36.5 C and CO density is 5 %. -
Page 28: Setting Of Alarm Resume Time
SETTING OF ALARM RESUME TIME The alarm buzzer is silenced by pressing the alarm buzzer stop key (BUZZER) on the control panel during alarm condition. (The remote alarm is not canceled.) The buzzer will be activated again after certain suspension if the alarm condition is continued. The suspension time can be set by following the procedure shown in the table below. -
Page 29: Key Lock Function
KEY LOCK FUNCTION This unit is provided with the key lock function. When the key lock is ON, change of temperature, CO density setting through the key pad is not available. Note: The key lock is set in OFF mode at the factory. Display Mode Function... -
Page 30: Automatic Co Cylinder Changeover
AUTOMATIC CO CYLINDER CHANGEOVER A gas auto changer MCO-5GC is available as an optional accessory. This system switches the CO supply line when one CO gas cylinder becomes empty. Note: The installation of MCO-5GC should be implemented by a qualified service personnel. Install the MCO-5GC and then perform the following procedure 1. - Page 31 The MCO-5GC detects that there is no more CO gas in a CO gas cylinder when the CO density in the chamber does not increase for a while even after opening the CO gas valve in the incubator. The CO supply line may also be switched for other reasons even though there is CO gas left in the CO cylinder: blocking or restricting of gas tube, reduction of CO...
-
Page 32: Uv Lamp
UV LAMP The clauses below are applicable when an optional UV system set MCO-19UVS is installed. A UV lamp is located inside the rear duct to sterilize the water in the humidifying pan and air circulating in the chamber. • The UV light is exposed only to the inside of the rear duct and the humidifying pan cover when all chamber components are installed properly. -
Page 33: Precautions When Using The Uv Lamp
Precautions when using the UV lamp The cautions below are applicable when an optional UV system set MCO-19UVS is installed. ● Always use humidifying pan and humidifying pan cover The humidifying pan and humidifying pan cover prevent the UV light from escaping. Make sure they are installed even if you do not need humidity. -
Page 34: Change Of Setting For Uv Lamp On Period
UV LAMP Change of setting for UV lamp ON period The cautions below are applicable when an optional UV system set MCO-19UVS is installed. Follow the procedure below when changing the setting for UV lamp ON period. Basic operation sequence (Example: change of UV lamp ON period from 5 minutes to 3 minutes) Description of operation Key operated Indication after operation... -
Page 35: Lighting The Uv Lamp For 24 Hours
Lighting the UV lamp for 24 hours Follow the procedure below when lighting UV lamp for 24 hours. Before sterilization by UV lamp, remove all attachments in the chamber (tray, side support, rear duct, fan, humidifying pan, humidifying pan cover) and clean the interior, inner door and UV lamp thoroughly. Description of operation Key operated Indication after operation... -
Page 36: Alarms, Safety And Self-Diagnosis
ALARMS, SAFETY AND SELF-DIAGNOSIS This unit has the alarms and safety functions shown in table below, and also self diagnostic functions. Alarms, safety and self-diagnosis for culture operation Alarm & Safety Situation Indication Buzzer Safety operation Over heat lamp lights. If the chamber temperature exceeds High limit E12 or E16 and chamber... -
Page 37: Calibration Temperature Calibration
CALIBRATION Temperature calibration 1. Press the calibration key (CAL) for approximately 5 seconds. 2. The left digit of the digital temperature indicator blinks, and the digital CO density indicator goes out. 3. Set the present correct temperature with the digit shift key ( ) and numerical value shift key ( then press the enter key (ENT). -
Page 38: Co 2 Calibration
CALIBRATION calibration [Zero setting] Zero setting should be done when CO has not been injected yet and the stable condition (about 8 hours) of temperature/humidity inside the unit has been attained. 1. Press the calibration key (CAL) for 5 seconds. 2. -
Page 39: Troubleshooting
TROUBLESHOOTING If the unit malfunctions, check out the following before calling for service. Malfunction Check/Remedy • The unit is not plugged correctly into a power outlet. • The circuit breaker at the power source is active or a power failure The unit does not operate has occurred. - Page 40 TROUBLESHOOTING Malfunction Check/Remedy If normal cultivation cannot • The environment around the unit is not normal. The source of be done and chamber gas the contaminated gas is nearby. density is suspect • HEPA filter is provided in the CO gas piping.
-
Page 41: Disposing Of The Co Incubator
DISPOSING OF THE CO INCUBATOR When disposing of the CO incubator, contact our sales representative or agent. WARNING The CO incubator must be dismantled and disposed of by qualified personnel only. If the CO incubator is left where outsiders enter, it may result unexpected accident (for example, children to become locked inside). -
Page 42: Stacking Incubators
STACKING INCUBATORS Use the following procedure to stack incubators. This work is potentially dangerous, so contact our sales representative or agent. CAUTION Select a floor that is strong enough to support the stacked incubators. Never stack 4 or more incubators. Doing so is dangerous. (When stacking 2 incubators) 1. - Page 43 Front panel Stacking plate A Stacking plate B Protective sticker Fig. A <View from quarter rear side>...
-
Page 44: Specifications
SPECIFICATIONS Incubator MCO-5AC Product name External dimensions W480 mm x D548 mm x H575 mm (W18.9 inch x D21.6 inch x H22.6 inch) Internal dimensions W350 mm x D378 mm x H375 mm (W13.8 inch x D14.9 inch x H14.8 inch) Interior volume 49 L (1.73 cu.ft.) -
Page 45: Performance
PERFORMANCE Product name Incubator MCO-5AC Model number MCO-5AC-PK Temperature control range Ambient temperature+5 C to 50 C (ambient temperature; 5 C to 35 Temperature distribution ±0.25 C (ambient temperature; 25 C, setting; 37 C, CO : 5 %, no load) Temperature variation ±0.1... -
Page 46: Safety Check Sheet
CAUTION Please fill in this form before servicing. Hand over this form to the service engineer to keep for his and your safety. Safety check sheet 1. Unit contents □ □ Risk of infection: □ □ Risk of toxicity: □ □... - Page 48 1-1-1 Sakada, Oizumi-machi, Ora-gun, Gunma 370-0596, Japan Printed in Japan LDCL039300-0 © PHC Corporation 2018 S0418-0...
Need help?
Do you have a question about the MCO-5AC and is the answer not in the manual?
Questions and answers