Table of Contents
Advertisement
Quick Links
Advertisement
Table of Contents

Related Manuals for Airflow Adroit DV110


Summary of Contents for Airflow Adroit DV110
- Page 1 DV110 (Integral CO Sensor) DV110 (Integral CO Sensor) Instruction Manual...
- Page 2 DV110 (Integral CO Sensor)
-
Page 3: Table Of Contents
● 5. CERTIFICATE OF CONFORMITY 6. EXPLODED VIEW AND PARTS LIST 7. COMMISSIONING THE SYSTEM 8. WARRANTY NOTE: You can sign into your Adroit account at: www.airflowadroitcontrol.com © Airflow • We reserve the right to make changes without prior notice... -
Page 4: Introduction
Heat recovery cell Digital Controller (optional) Heat Recovery cell bypass damper Humidity sensor (optional) Coarse filter for supply air Carbon dioxide sensor (optional) Coarse filter for extract air VOC sensor (optional) Post-heater (Optional) Cable gland (behind the extract air duct) NOTE For more detailed instructions, go to www.airflow.com... -
Page 5: System Description
Following requirements: d. Password Firefox, version 31 or higher 6. Press the create account button. Opera, version 25 or higher 7. A n e-mail with your log-in details will be sent to the e-mail given Chrome, version 31 or higher during the registration process. Safari, version 7 or higher 8. A verification e-mail will be sent to the e-mail address given during The lastest browser versions on the registration process. mobile devices. 9. C lick on the link given in this e-mail to verify your e-mail address. 10. You are now connected to the Adroit Cloud. © Airflow • We reserve the right to make changes without prior notice... -
Page 6: General Safety Instructions
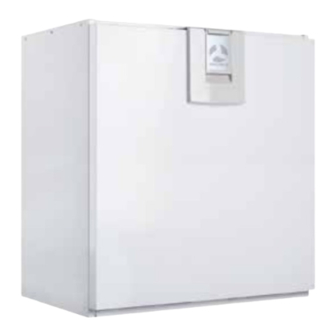
DV110 (Integral CO Sensor) INTRODUCTION GENERAL INFORMATION ABOUT THE UNIT • DV110 Adroit units can be equipped with either one or two IMPORTANT optional electric post heaters. (900W; 900W+900W) For further information, go to www.airflow.com Mounting options: • Unit supplied with wall mounting bracket; optional ceiling mount available. These units can also be floor mounted if raised up to give clearance for condensate drain. GENERAL SAFETY INSTRUCTIONS For safe and proper handling, it is necessary to know the basic safety regulations and the intended usage of the ventilation system. Read this manual before operating the ventilation unit. Keep this manual for later use. In case of loss, you can download the manual from our website. This user manual contains all important tips for operating the system safely. This user manual must be observed by all persons who operate... -
Page 7: Adroit Digital Controller
Edit. Allows you to edit settings. controller. The controller does not Plus. Allows you to: have a touch screen. Increase the value of the selected setting. Move to the next menu item. Move from a one-day view to a week view in the temperature, relative humidity of air and carbon dioxide level graphs. Minus. Allows you to: Reduce the value of the selected setting. Return to the previous menu item. Move from a week view to a one-day view in the temperature, relative humidity of air and carbon dioxide level graphs. Up arrow. Allows you to scroll upwards in the menu. Down arrow. Allows you to scroll downwards in the menu. Statistics. Allows you to open the temperature, relative humidity of air and carbon dioxide level graphs (1 day or 1 week). Indicate the chosen user level. Indicates when the feature is locked at your user level. The parental controls lock code is 1001. © Airflow • We reserve the right to make changes without prior notice... - Page 8 DV110 (Integral CO Sensor) INTRODUCTION INTRODUCTION Ventilation has to be constant for the indoor air to stay healthy for the building’s occupants. Even for longer holidays, it is not advisable to stop the ventilation, because the indoor air will become stuffy and during the heating season, the indoor air humidity may condense in the ventilation ductwork and structures, causing moisture damage. You can control and automate the ventilation unit operation in the following ways: • By using a Digital Controller installed in the building • Through the Adroit Home local network connection and the Web interface • Through the Adroit Cloud Service and the Web interface • Through a remote monitoring service or building automation system (BMS) by using voltage signals or Modbus messages The required ventilation may also be adjusted automatically with the optional room mounted between carbon dioxide and humidity sensors. In this case, ventilation remains optimal even if the dwelling is unoccupied. By using the week clock, you can create just the right ventilation for your individual lifestyle. WARNING The unit is not intended for use by children (under 8 years) or by persons with reduced sensory, physical, or mental capabilities, or lack of knowledge and experience that limit the safe operation of the unit. These people can use the product under the supervision of a person responsible for their safety or as directed.
- Page 9 The first launch of the unit may take a while, the Service menu. as the controller will format its software and verify that it has the latest software version. UPDATING THE UNIT SOFTWARE NOTE However, it is recommended that the Disconnect the ventilation unit from the mains ventilation be kept turned ON without electrical supply.or turn off the fuse. disruptions. Connect the computer to the digital controller of the ventilation unit using a USB MicroB connector. Start the ventilation unit. A USB sign will appear on the display of the controller. The controller cannot be used when it is connected to the computer. © Airflow • We reserve the right to make changes without prior notice...
-
Page 10: Installation
• It is recommended that the unit is not positioned in sound sensitive areas unless some acoustic deadening measures are taken. Mount the DV110 on the wall with a mounting bracket, as shown in the adjacent figure. Make sure that the unit is horizontally level after mounting. MEASURING TUBES The accessory bag with the unit includes four airflow measuring tubes. These can be inserted in the ducts to allow for easier ventilation adjustment. NOTE CEILING MOUNTING BY USING THE When installing the unit, please CEILING MOUNTING BRACKET consider having sufficient space in front of the unit for servicing purposes. - Page 11 You can detach the unit from the ceiling mounting bracket by pulling the spring-loaded moulding to the direction shown by the arrow (more detailed information provided with the ceiling mounting bracket). ATTIC FLOOR PENETRATION PLATE The attic floor penetration plate (F) is optional. When an attic floor penetration plate is used, the tightness of the vapour barrier has to be ensured. The minimum distance of the attic floor penetration plate from the rear wall is 5 mm. The minimum distance of the attic floor penetration plate from the side walls is 15 mm. © Airflow • We reserve the right to make changes without prior notice...
-
Page 12: Condensing Water Outlet
DV110 (Integral CO Sensor) INSTALLATION CONDENSING WATER In the heating season, the extract air humidity condenses into water. Water formation may be abundant in new buildings, or if the ventilation is low, compared to the humidity production of residents. Condensed water must be able to get out of the unit without obstruction. Check in conjunction with maintenance, for example, during the autumn before the heating season begins, that the condensate collection tray positioned inside the unit at its base is not clogged and that there is no leakage. You can 75 mm check it by pouring a little water into the condensate collection tray positioned inside the unit at its base. Clean, if necessary. Water must not be allowed to enter the electrical system. MOUNTING THE CONDENSING WATER OUTLET 1. Push the main body of the condensing water outlet downward from above, through the hole in the bottom plate of the ventilation unit. 2. Push the tension pin downward from below NOTE towards the main body. 3. Place the valve ball inside the housing of the condensing water outlet. The standard Silent Klick condensing water outlet 4. Attach the housing to the condensing water installation requires 75 mm of free space below outlet. - Page 13 ALTERNATIVE WATER SEAL, WHICH CAN BE INSTALLED IN LOW SPACES 47 mm NOTE If you use the alternative condensing water outlet, move the gasket ring and the locking part to the tube joint part that will be mounted on the wall. NOTE The alternative condensing water outlet installation requires 47mm of free space below the ventilation unit. ALTERNATIVE WATER SEAL DIMENSIONS FIGURE DV110 © Airflow • We reserve the right to make changes without prior notice...
-
Page 14: Maintenance
There are two unit models, left- (L) and right-handed (R). The figure shows the right-handed model. FILTERS When the maintenance reminder alerts, check the cleanliness of the filters and replace them if required. The Adroit unit has three air filters: • 2 x ISO Coarse > 75% (G4) - complies to ISO 16890, coarse filter filters insects, heavy pollen and other relatively large foreign objects out of the outdoor air (A). • 1 x ISO ePM1 50% (F7) filters - complies to ISO 16890 fine filter filters microscopic pollen and dust particles out of the supply air (B). NOTE • T he coarse filter filters the extract air and keeps the heat recovery cell clean (C). The filter change interval depends on the ambient concentrations of DV110 Adroit: dust and particulates. It is recommended that the filters be changed The service space in front of the every spring and autumn, or at the very least once a year. unit must be at least 450 mm. Using original Airflow filters ensures that the ventilation unit remains in top condition, giving the best results. The filter replacement interval depends on the ambient dust concentration. It is recommended that the filters be replaced every spring and autumn, or at the very least once a year. Failure to follow these recommendations may void any warranties. -
Page 15: Heat Recovery Cell
6. Lift and pull the heat recovery cell (D) out of the unit. 7. If the heat recovery cell is dirty, clean it by immersing it in warm water with a mild detergent. 8. Rinse the heat recovery cell clean with a water spray. Do not use a pressure washer. 9. When the water has drained from between the laminae, WARNING reassemble the ventilation unit in the reverse order. 10. Close the door. Make sure that the door safety switch Handle the heat recovery cell penetrates the door switch and allows the unit to be switched carefully! Do not handle the heat recovery cell by its thin membrane 11. The heat recovery cell has now been checked and cleaned. airflow dividers, as they can be easily damaged. © Airflow • We reserve the right to make changes without prior notice... -
Page 16: Fans
DV110 (Integral CO Sensor) MAINTENANCE INSTRUCTIONS FANS Check the cleanliness of the fans when carrying out the filters and heat recovery cell maintenance. Clean the fans, if necessary. You can clean the fan blades with compressed air or by brushing them gently. Do not remove or move the fan blade balancing pieces. WARNING The fans can be easily damaged and should be handled carefully. We recommend that you clean the fans in place where they are mounted. CLEANING THE SUPPLY AIR FAN When you want to clean the supply air fan, proceed as follows: 1. Isolate the power to the ventilation unit. 2. Open the ventilation unit door by lifting the latch up. 3. Lift the door off. 4. As described in the Filters and Heat Recovery Cell section remove the extract air filter (C), the cell top bracket (E) and the heat recovery cell (D). - Page 17 P ry the plastic lock to the right of the fan with, for example, a screwdriver (figure 10). d. T he fan falls down. e. P ull the fan out of the unit (figure 11). f. D isconnect the fan wire quick connector (figure 12). The fan has now been removed for cleaning. 11. Reassemble the ventilation unit in the reverse order. When you re-install the temperature sensor, install it with the tip upward in such a way that it does not get squeezed between the bypass plate, and that it does not lean against the post-heater frame. 12. Close the door and reconnect the unit back into the mains. 13. The fan has now been checked and cleaned. © Airflow • We reserve the right to make changes without prior notice...
- Page 18 DV110 (Integral CO Sensor) MAINTENANCE INSTRUCTIONS CLEANING THE EXTRACT AIR FAN When you want to clean the extract air fan, proceed as follows: 1. I solate the power to the ventilation unit. 2. Open the ventilation unit door by lifting the latch. 3. Lift the door off. Please note that the door is heavy. 4. R emove the filters, the cell top support and the heat recovery cell, as described in sections Filters and Heat Recovery Cell. 5. O pen the four screws (PZ2) (figure 1) on the extract air fan cover and remove the cover (figure 2). 6. T he fan can now be cleaned in place. 7. I f you want to remove the fan for cleaning, proceed as follows. a. P ush the fan gently upward (figure 3). b. P ry the plastic lock to the right of the fan with a suitably sized screwdriver. (figure 4).
-
Page 19: Troubleshooting
The ventilation unit is not Power input to the unit is lost. Check: working; the controller is not • Fuse in the fusebox working. • Fuse in the unit • Check isolation switch is in the ON position. The ventilation unit is working, Either the controller 24 VDC Check the cables from the unit to the controller. but the controller is not power is lost, or the controller is Contact the service centre if necessary. working. damaged. © Airflow • We reserve the right to make changes without prior notice... -
Page 20: Technical Specifications
DV110 (Integral CO Sensor) TECHNICAL SPECIFICATIONS DV110 TECHNICAL SPECIFICATIONS Product codes Product number DV110 (R) Adroit (Integral CO Sensor) 90001267 90001267EPH DV110 (L) Adroit (Integral CO Sensor) 90001268 90001268EPH Air volumes Fans Supply Air 107 l/s, 386 m /h, 100 Pa 0.119kW, 0.9A EC Extract Air 113 l/s, 407 m /h, 100 Pa 0.119kW, 0.9A EC Electrical connection 230V, 50Hz 9.6 A Operating Annual efficiency... - Page 21 3. Supply air from the unit to the apartment Measurement points after the connection outlet. 4. Extract air from the apartment to the unit The fan curves indicate the total pressure accounted for by duct losses. © Airflow • We reserve the right to make changes without prior notice...
-
Page 22: Internal Electrical Connection
Post-heating resistor with 90°C and 130°C overheating protection CABLE COLOURS AN/I Analog input 0-10VDC Black RM/I 24V relay input Blue RM/O 24V relay output Brown White Grey Yellow YEGN Yellow-green © Airflow • We reserve the right to make changes without prior notice... -
Page 23: External Electrical Connection
EXTERNAL ELECTRICAL CONNECTION DV110 (Integral CO Sensor) FOR BRINE HEAT EXCHANGER 24 VDC relay/contactor for controlling the pump and solenoid valve Distribution board +24VDC Ethernet connection on top of the unit RJ45 Female MLV control Mains supply cable 1.2m long. Cable exit on top of the unit. - Page 24 EXTERNAL ELECTRICAL CONNECTION DV110 (Integral CO Sensor) DV110 3x1,5S 2x0,5 2x0,5 2x0,5 2x0,5 2x0,5 © Airflow • We reserve the right to make changes without prior notice...
-
Page 25: Certificate Of Conformity
Applied National Standards and Technical Specs. In Particular Basis of self-attestation: Quality Assurance BS EN ISO 9001/2015 – Cert no – FM 00152 Environmental Assurance BE EN ISO 14001/2015 – Cert No – EMS 569454 Any alterations or modifications made to the equipment, without prior consultation with Airflow Developments Ltd, invalidates this declaration. Date: 10/06/2019 Name: Alan Siggins Position: Managing Director Airflow Developments Limited Aidelle House, Lancaster Road, Cressex Business Park High Wycombe, Buckinghamshire. HP12 3QP, U.K. T: +44 (0)1494 425252 E: info@airflow.com W: airflow.com... - Page 26 Applied National Standards and Technical Specs. In Particular Basis of self-attestation: Quality Assurance BS ISO 9001/2015 – Cert no – FM 00152 Environmental Assurance BS ISO 14001/2015 – Cert No – EMS 569454 Any alterations or modifications made to the equipment, without prior consultation with Airflow Developments Ltd, invalidates this declaration. Date: 10/06/2019 Name: Alan Siggins Position: Managing Director Airflow Developments Limited Aidelle House, Lancaster Road, Cressex Business Park High Wycombe, Buckinghamshire. HP12 3QP, U.K. T: +44 (0)1494 425252 E: info@airflow.com W: airflow.com © Airflow • We reserve the right to make changes without prior notice...
-
Page 27: Exploded View And Parts List
EXPLODED VIEW AND PARTS LIST DV110 (Integral CO Sensor) DV110 NO. PART CODE NO. PART CODE NO. PART CODE Fan assembly 60000129 The bypass duct Additional heater (with housing) assembly 900 W Fan motor 60000210 Right hand model 60000246 Right hand model 60000131 (without housing) Left hand model 60000247 Left hand model... -
Page 28: Commissioning The System
Airflow Developments Ltd shall not be liable for any loss, injury or other consequential damage, in the event of a failure of the equipment or arising from, or in connection with the equipment, excepting only that nothing in this condition shall be construed as to exclude or restrict liability or negligence. This warranty does not in any way affect any statutory or other consumer rights. Call: 01494 525252 Visit: airflow.com 80001118 - Issue 2 06/23 Airflow Developments Limited E-mail: info@airflow.com © Airflow Developments Limited. Airflow Aidelle House, Lancaster Road, Telephone: +44 (0) 1494 525252 Developments Limited reserve the right, in the interests of continuous development, to alter Cressex Business Park, specifications without prior notice. All orders Certificate No. EMS 569454 Certificate No.
Need help?
Do you have a question about the Adroit DV110 and is the answer not in the manual?
Questions and answers