Advertisement
Quick Links
Advertisement

Subscribe to Our Youtube Channel
Related Manuals for HJM RADIANT

Summary of Contents for HJM RADIANT
- Page 1 Version:HJM2307 RADIANT...
-
Page 2: Table Of Contents
Green, healthy lifestyle is what we pursue and joyful transportation mode is what we offer. Battery Charging............................Operation..............................Now, before enjoying the easy ride with your new RADIANT ebike, please read this manual carefully and follow the instructions when assembling and operating the bike. Cautions and Warnings........................... Maintenance............................... -
Page 3: Manual Use Instruction
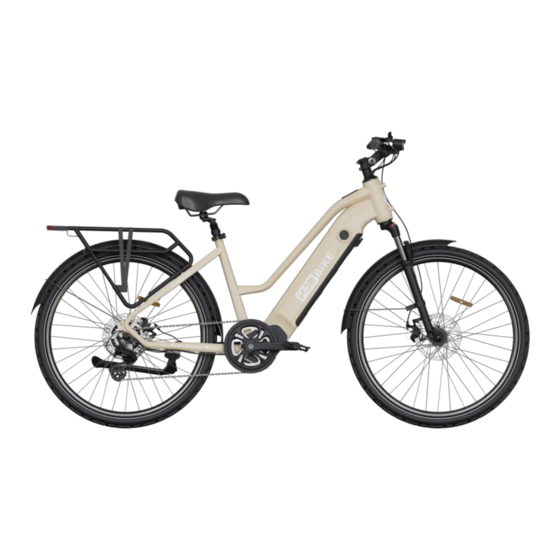
Product Overview Manual Use Instruction Components & Accessories This manual contains details of the product, assembly procedure, operation method, maintenance as well as some useful tips for users. It is necessary to read through the manual carefully before you start to use your new ebike. You should pay the most attention to all tips, suggestions, cautions, and warnings to ensure your safety and enjoy each ride. - Page 4 Specification Electronic Components Aluminum alloy hydraulic Battery 48V15Ah Li-Ion battery Fork Chain KMC chain suspension front fork 48V3A operating during 110V Charger Frame 6061 aluminum alloy Tires 26"x2.35" tire to 240V AC power outlets Hub Motor 500W brushless gear motor Derailleur Shimano 7-speed Rims...
- Page 7 7. Attach the fender bracket to the front fork. Step 4 Use a 5mm Allen wrench to loosen the bolts of the front fender bracket hose clamp and fix the hose clamp to Install the front wheel the proper position of the front fork, make the clearance between the fender and tire evenly,be careful not to 1.
- Page 8 Install the rear rack Loosen two bolts on the two side of rear rack (position 1), but do not to remove them at all Take out the screws on the accessory box, align the frame mounting holes with mounting holes in front of therear rack, tighten two bolts (position 2) on the two side of rear rack with 4mm Allen wrench.
- Page 10 ”+” on the knob. NOTICE If you are unsure about the assembly steps or the assembly video is not available, please contact HJM bike for help, or consult a certified local bike mechanic for assistance.
- Page 11 Recommended Torque Values Hardware Location Hardware Torque Required Continued (Nm) Rear Dropout Area Derailleur Cable Pinch Bolt Handlebar Area Handlebar Stem Clamp Bolts Rear Dropout Area Kickstand Mounting Bolts Handlebar Area Handlebar Stem Face plate Bolts Bottom Bracket and Crank Area Bottom Bracket and Lockring Handlebar Area Brake Lever Clamp Bolt Bottom Bracket and Crank Area Crank Arm Bolt into BB spindle...
-
Page 12: Battery Charging
Battery Charging NOTICE Charging will be indicated by the charge status light: When Installing the Battery into the Bike Red light indicates that the battery’s charging; Green • Do not force the battery onto the battery mount; carefully align and gently push the battery down onto the mount. light indicates that the battery’s fully charged. - Page 13 • Do not charge the battery with any chargers other than the one originally supplied by the HJM Bikes or a charger designed for your specific bike and purchased directly from HJM Bikes.
-
Page 14: Operation
Operation Handlebar Features 1. LCD Display Remote 2. Bell NOTICE 3. LCD Display • Read and understand all sections of this entire manual before operating the bike for the first time. There are 4. Shifter important safety warnings throughout the whole manual that MUST be followed to prevent dangerous situations, 5. - Page 15 Routine Operation LCD Display Function Overview 1. Power on/off The LCD display offers a variety of features to suit your riding needs, including: Long press(2 seconds) to power on/off the display. If there is no operation on the instrument for 5 minutes (speed is 0), it will automatically power off.
- Page 16 5. Light on/off Please refer to the table below for a detailed definition of the error code: Long press for 1 second to turn on the headlight (requires controller support), and the display will show the Error Code Definition Troubleshooting headlight indicator icon lighting up.
-
Page 17: Cautions And Warnings
Safety Warnings Cautions and Warnings • All users must read and understand this manual before riding their bike. Additional manuals for individual General Operating Rules components should also be reviewed before installing or using those components. • When riding, obey the laws applicable in your area as any other vehicles. •... - Page 18 • Always use the lowest assist level until you are comfortable with the bike and feel confident in controlling the • Locking up your bike is recommended so that your bike is secure and the chance of theft is reduced. We do •...
- Page 19 Carrying Cargo Note for Parents and Guardians Carrying a cargo load involves additional risks, which requires special attention and care. Braking, acceleration, As a parent or guardian, you are responsible for the activities and safety of your child. The ebike is not designedfor and balancing are all significantly affected by the cargo loaded on the ebike.
- Page 20 Electrical System Tires and Wheels The electrical system of your e bike offers various levels of power assistance for different operating Your wheels should always spin straight and must be repaired or replaced if they wobble from side to side or up conditions and users' preferences.
- Page 21 Maintenance Quick releases, Accessories, Straps, and Hardware Quick release levers are for securing the seat post and the front wheel to the bike. They allow the user to remove Basic Bike Care the front wheel and to adjust the seatposts without tools. Since quick release levers could be loosened during To ensure safe riding conditions, you must maintain your bike properly.
- Page 22 First Ride Before Each Ride Make sure the bolts and nuts of the e-bike components Make sure the bolts and quick release have been 10. Check the brake system by a bike mechanic every year(according to your riding conditions). are tighten. In particular, check the self-assembled tightened.
-
Page 23: Troubleshooting
Troubleshooting 1. Charger not well connected 1. Adjust the connections 2. Charger damaged 2. Replace The battery will not Symptoms Possible Causes Most Common Solutions 3. Battery damaged 3. Replace charge 4. Wiring damaged 4. Repair or replace 1. Insufficient battery power 1. - Page 24 You can find all of our assembly instruction videos on official HJMBIKE website as well as the official HJMBIKE YouTube channel. If you have any questions, please contact HJMBIKE Technical Support Team at support@hjmbike.com or submit the contact form at www.hjmbike.com. Please refer to www.hjmbike.com for detailed after-sale policies and more helpful information.
Need help?
Do you have a question about the RADIANT and is the answer not in the manual?
Questions and answers