Table of Contents
Advertisement
Quick Links
Advertisement
Table of Contents

Related Manuals for Amensolar N3H-A Series


Summary of Contents for Amensolar N3H-A Series
- Page 1 USER MANUAL N3H-A Series Three Phase Hybrid Inverter...
- Page 2 Copyright Statement Please keep the manual properly and operate in strict accordance with all safety and operating instructions in this manual. Please do not operate the system before reading through the manual. Contact the nearest hazardous waste disposal station when the products or components are discarded.
-
Page 3: Table Of Contents
CONTENTS 1. Introduction ..................1 1.1. Preface ..................1 1.2. Safety Introduction ..............1 1.3. General Precautions ..............3 1.4. Parts List ................. 4 1.5. System Appearance ..............4 1.6. Liability Limitation ..............7 2. Installation ..................8 2.1. Installation Site and Environment ............8 2.2. -
Page 4: Introduction
1. Introduction 1.1. Preface This product is a hybrid inverter, through which solar energy can be connected and stored in batteries as well as power the load. It is an intelligent energy product that incorporates both general needs of customers and industry, and facilitates personalized control. Solar energy can produce direct current through PV panels, partly of which is then transformed into DC by inverter to supply batteries for energy storage, while partly converted into AC to support the load or power grid. - Page 5 1.2.2. Operator Requirements The operators should get a professional qualification, or be trained. The operators should be familiar with the whole storage system, including compositions and working principles of the system. The operators should be familiar with the Product Instruction. While maintaining, the maintainer is not allowed to operate any equipment until all the equipment has been turned off and fully discharged.
-
Page 6: General Precautions
1.2.6. Moisture Protection It is very likely that moisture may cause damages to the system. Repair or maintaining activities in wet weather should be avoided or limited. 1.3. General Precautions DANGER Danger to life due to high voltages of the PV array, electric shock. When exposed to sunlight, the PV array generates dangerous DC voltage which will be present in the DC conductors and the live components of the inverter. -
Page 7: Parts List
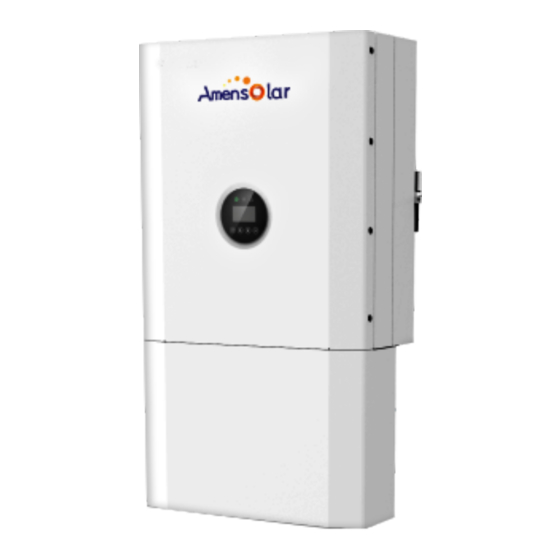
1.4. Parts List Check the following parts list to ensure it is complete. Delivers a total system separately on site to client, this consists of: 1.5. System Appearance Figure 1 N3H-A8.0/10.0/12.0 Delivery Scope Object Description Hybrid Inverter EMS Display Screen Cable Box (connected to Inverter) - Page 8 1.5.1. Cable Box Part Figure 2 Inverter without Cable Box Covers-Front View Figure 3 Cable Box Part without Covers-Front View Object Description Battery circuit breaker Output terminal block(BACK UP) DC isolation switch...
- Page 9 Figure 4 Cable Box Part without Covers Object Description DVC* class Object Description DVC* class PV1, PV2 DVC C BACKUP DVC C ON GRID DVC C DRM OR PARALLEL2 DVC A DVC A METER+DRY DVC A DVC A DVC A PARALLEL1 DVC A Note: The DVC indicates the minimum required level of protection for the circuit.
-
Page 10: Liability Limitation
1.6. Liability Limitation Any product damage or property loss caused by the following conditions, does not assume any direct or indirect liability. Product modified, design changed or parts replaced without authorization; Changes, repair attempts and erasing of series number or seals by non-company technician; ... -
Page 11: Installation
2. Installation This Manual introduces the basic steps to install and set up. NOTE: Please be cautious unpacking the battery, otherwise components could be damaged. 2.1. Installation Site and Environment 2.1.1. General This N3H-A8.0/10.0/12.0 energy storage system is outdoor version and can be installed in an outdoor or an indoor location. - Page 12 (3) within 600mm of any heat source, such as hot water unit, gas heater, air conditioning unit or any other appliance. (4) within 600mm of any exit; (5) within 600mm of any window or ventilation opening; (6) within 600mm of side of other device. A N3H-A8.0/10.0/12.0 installed in any corridor, hallway, lobby or the like and leading to an emergency exit shall ensure sufficient clearance for safe egress of at least 1 meter.
-
Page 13: Installation
Figure 5 Limited Distance of Installation to Neighboring Objects 2.2. Installation 2.2.1. Inverter Installation (1) Remove the product from the packaging box. (2) Fix the mounting panel to the wall. -
Page 14: Electric Connection
(3) Hang the product onto the mounting panels. (4) Adjust the entire product and ensure that the product has been securely hung onto the panel. NOTE: The inverter's built-in residual-current monitoring unit (RCMU) removes DC residual current above 6mA, so an external RCD (type A or type B ) can be used with the system (≥30mA).In addition, the installation of inverter must fulfill AS/NZS 3000, AS/NZS 4777.1 and AS/NZS 5033. - Page 15 below. When locking the power grid cable into the external power grid connector, the RST should be marked on the corresponding cable, because when installing the CT, the three CTs with RST identification need to be buckled on the RST line of the corresponding identification. Step 2.
- Page 16 2.3.1.4. Screw the swivel nut onto the threaded sleeve. This seals the AC connector and provides strain relief for the AC cable. When doing so, hold the bush insert firmly by the locking cap. This ensures that the swivel nut can be screwed firmly onto the threaded sleeve. 2.3.1.5.
- Page 17 2.3.1.9. Tighten the nut. 2.3.1.10. Circuit breaker parameters are recommended: Back-up 25A/400Vac 6KA On-grid 32A/400Vac 6KA 2.3.2. PV Input Connection Step 1: Connect the Backup and Grid cables in advance according to the connector mode, and connect them to the Backup and Grid board connectors in turn. Figure 6 Cable Box Bottom View, Wiring Connectors Step 2:...
-
Page 18: External Ct Connection
Step 3:Close the lid and tighten the screw. NOTE: Recommended AC circuit breaker rating is 32A for grid, 25A for backup. NOTE: It is necessary to disconnect the power line, communication line and communication line between battery pack and inverter to manually sleep all battery packs. -
Page 19: Dred Port Connections (Optional,Only For Drm Function)
(2) Install the waterproof component and screw on the waterproof sheath nut. (3) Open the external CT wiring port, the arrow points to the direction of the power grid, put the wire into the external CT card slot, and buckle the buckle. NOTE: CT should be placed near the power grid. -
Page 20: Comm Port Connections
Figure 8 DRM connector 2.6. COMM Port Connections Description RS485-A RS485-B 2.7. METER+DRY Port Connections Note: (1) The Smart Meter (ADW300W or SDM630MCT are suggested.) with CT is already configured; please do not change any settings on the Smart Meter. (2) One Smart Meter can be used with only one inverter. - Page 21 Figure 9 Smart Meter & CT connection diagram Description DRY contact DRY contact Input signal RS485-B RS485-A...
-
Page 22: Single Line Diagram
2.8. Single Line Diagram The single line diagrams of DC-, AC- and Hybrid-coupled system are as below: Figure 10 DC-coupled system Figure 11 AC-coupled system... - Page 23 Figure 12 Hybrid-coupled system...
-
Page 24: System Operation
3. System Operation 3.1. Switch On When turning on the system, it is very important to follow the steps below to prevent damage to the system. WARNING: Please check the installation again before turning on the system. Step 1: Turn on the battery switch on the battery pack. Step 2: Press power button on all the batteries until the indicator lights turn on. -
Page 25: Switch Off
function before installation. Otherwise, this inverter will trigger overload fault and cut off output to protect your appliance but sometimes it still causes internal damage to the air conditioner. 3.2. Switch Off Step 1: Open cable box outer shell on the inverter. Step 2: Turn off the external grid switch. -
Page 26: Ems Introduction And Set Up
4. EMS Introduction And Set Up 4.1. Function Description Figure 13 N3H-A8.0/10.0/12.0 EMS Interface Object Name Description Grid connection Indicator LED Off-grid Red: The inverter is in fault. Return Button: Escape from current interface or function. Enter the setting interface. Up button: Move cursor to upside or increase value. - Page 27 Menu Menu Menu Menu Menu Menu Menu Menu Default Comment Level 1 Level 2 Level 3 Level 4 Level 5 Level 6 Level 7 Level 8 Selection The energy generated by the charge time 00:00-23:59 solar panels will be used in 100%(After the following order: Feed charging to...
- Page 28 Menu Menu Menu Menu Menu Menu Menu Menu Default Comment Level 1 Level 2 Level 3 Level 4 Level 5 Level 6 Level 7 Level 8 Selection 5. Spain 6. UK 7. Hungary 8. Belgium 9. New Zealand 10. Greece 11.
-
Page 29: Configuration Menus Overview
4.3. Configuration Menus Overview Menu Menu Menu Level Menu Menu Default Menu Level 6 Comment Level 1 Level 2 Level 4 Level 5 Selection The energy generated by the solar panels will be used in the following order: Feed the home loads;... - Page 30 Menu Menu Menu Level Menu Menu Default Menu Level 6 Comment Level 1 Level 2 Level 4 Level 5 Selection Start This is the boot delay from when 20…300Seconds 30Seconds Delay power is applied to the inverter. This function is only applicable Disable CEI SPI to use via DRM for remote...
- Page 31 Menu Menu Menu Level Menu Menu Default Menu Level 6 Comment Level 1 Level 2 Level 4 Level 5 Selection If enabled the battery will constantly monitor state of charge Disable and depth of discharge. If time Enable option is selected, the battery will wake up and check the state of Enable charge and depth of discharge at...
- Page 32 Menu Menu Menu Level Menu Menu Default Menu Level 6 Comment Level 1 Level 2 Level 4 Level 5 Selection 15. 50549 16. Brazil 17. 0126 18. Ireland 19. Israel 20. Poland Chile_BT 21. Chile Chile_HD Chile_LD 22. Local 23. 60Hz Power L0.8~L1.00 Factor...
- Page 33 Menu Menu Menu Level Menu Menu Default Menu Level 6 Comment Level 1 Level 2 Level 4 Level 5 Selection set protection time 500ms set lower limit 45Hz frequency FREQ (S2) set protection time 500ms GRID U Set max Grid voltage 280Vac GRID U Set min Grid voltage...
- Page 34 Menu Menu Menu Level Menu Menu Default Menu Level 6 Comment Level 1 Level 2 Level 4 Level 5 Selection This is the time it takes for the exported reactive power to reach REACT the grid standard level. This 6…60 Seconds 10 Seconds RESP setting should not be changed and...
- Page 35 Menu Menu Menu Level Menu Menu Default Menu Level 6 Comment Level 1 Level 2 Level 4 Level 5 Selection This action must be performed when the inverter is externally connected to the CT. Before the CT self-check, the inverter needs to be connected to Cut off all load then confirm self-check the power grid and the battery.
- Page 36 Menu Menu Menu Level Menu Menu Default Menu Level 6 Comment Level 1 Level 2 Level 4 Level 5 Selection Meter: xx kWh generated since the system was installed. Grid: xx kWh Load: xx kWh Charge: xx kWh Discharge: xx kWh Cancel Factory Resets the system to factory...
-
Page 37: Stick Logger Quick Guide
5. Stick Logger Quick Guide 5.1. Download APP Step 1: Scan the QR Code on the right side and download the APP. IPhone: Search “SOLARMAN Smart” in Apple Store. Android: Search “SOLARMAN Smart” in Google Play. 5.2. Stick Logger Installation Step 1: Assemble logger to the inverter communication interface as shown in the diagram. -
Page 38: Abnormal State Processing
Lights Implication Status Description (All lights are single green lights.) Light off: Fail to connect to the router. On 1s/Off 1s (Slow flash): Successful connection to the router. Communicate Light keeps on: Successful connection to the server. with router On 100ms/Off 100ms (Fast flash): Distributing network fast. Light keeps on: Logger connected to the inverter. -
Page 39: Usage Methods And Notices For Reset Button
1.Check if the wirelessnetwork configured. 1.Stick logger does not have Connection between 2.Check the antenna, if thereis any a network. 2.Antenna Slow flash logger and router damage or loose. abnormal 3.Router WiFi abnormal 3.Enhance router Wi-Fi signalstrength. signal strength weak. Long press Reset button for 10s, reboot stick logger andnetworking again. - Page 40 NOTE: Do not remove waterproof plug.
-
Page 41: Solarman Smart App
6. SOLARMAN Smart APP 6.1. Registration Go to SOLARMAN Smart and register. Click "Register" and create your account here. 6.2. Create a Plant Click "Add Now" to create your plant. Please fill in plant basic info and other info here. 6.3. -
Page 42: Network Configuration
Method 2: Click the icon in the right and scan to enter logger SN You can find logger SN in the external packaging or on the logger body. 6.4. Network Configuration After the logger is added, please configure the network to ensure normal operation. Go to "Plant Details"-"Device List", find the target SN and click "Networking". - Page 43 NOTE: 5G WIFI is not supported. Special characters (e.g. , ; ‘’ =” ” `) in router name and password are not supported. Step 2:Connect to AP network Click "Go to connect" and find the right "AP_XXXXX" network (XXXXX refers to logger SN).If the password is required, you can find the password on the logger body.
- Page 44 Step 3:Auto Configuration Please wait for a while to complete the configuration. Then system will switch to the following page. Click "Done" to check plant data. (Usually, the data will be updated in 10 mins) If configuration failure occurs, please check the following reason and try it again. (1)Make sure WLAN is ON.
-
Page 45: Alarm Code And Error Code
7. Alarm Code and Error Code 7.1. Alarm Code English description Codes Grid Volt Low Grid Volt High Grid Frequency Low Grid Frequency High Solar Loss Bat Loss Bat Under Volt Bat Volt Low Bat Volt High Over Load GFCI Over LN Reverse Fan Fault BAT Power Down... - Page 46 GFCI Sensor Fault Bus Volt Low Bus Volt High Bus Short Circuit PV ISO Under Fault PV Input Short Circuit Bypass Relay Fault INV Curr Over INV DC Over Ambient Over Temp Sink Over Temp Grid Relay Fault DisChg Curr Over Chg Curr Over Current Sensor Fault INV Abnormal...
-
Page 47: Fault Diagnosis And Solutions
8. Fault Diagnosis and Solutions The inverter is easy to maintain. When you encounter the following problems, please refer to the Solutions below, and contact the local distributor if the problem remains unsolved. The following table lists some of the basic problems that may occur during the actual operation as well as their corresponding basic solutions. - Page 48 (1) Restart the inverter, restart the machine after a few minutes of Ambient/ cooling, and observe whether the machine can return to normal. Sink (2) Check if the ambient temperature is outside the normal Temp Over operating temperature range of the machine. (3) Contact customer service if error warning continues.
- Page 49 (1) Check whether the installation follows the instructions; LN Reverse (2) Contact customer service if error warning continues. (1) Restart the inverter and wait until it functions normally. Fan Fault (2) Contact customer service if error warning continues. BMS Fault W14~W27 (1) Please contact the distributor.
-
Page 50: Product Specifications
9. Product Specifications MODEL N3H-A8.0 N3H-A10.0 N3H-A12.0 PV terminal 1100Vd.c. Vmax. PV Rated Voltage 720Vd.c. MPPT Voltage Range 140~1000Vd.c. MPPT Range (full load) 380~850Vd.c. 420~850Vd.c. 480~850Vd.c. MPPT Tracker / Strings Max. continuous PV input 15Ad.c.×2 current Isc PV 20Ad.c.×2 Max. back feed current 0Ad.c. - Page 51 Rated frequency 50/60Hz(Fluctuation range±0.2%) Rated continuous output 7360W 9200W 9200W power Maximum output apparent 8000VA 10000VA 10000VA power Max. output fault current 99Apeak Backup load overcurrent protection General parameters Temperature -25°C to +60°C, derating above 40 °C Protective class Class I Overvoltage Category II(DC side), III(AC side) Ingress protection...
- Page 52 Table 9.1 Grid specification (single-phase) Output Voltage Output Frequency Boot wait Grid Specification Range (Vac) Range (Hz) time(S) China 187~252 49.5~50.2 Germany 184~264 47.5~51.5 Australia-A 180~265 47~52 Australia-B 180~265 47~52 Australia-C 180~265 45~55 Italy(CEI0-21) 195~264 49.8~50.2 Italy (CEI0-21 ACEA) 195~264 49.8~50.2 Spain 196~253...
Need help?
Do you have a question about the N3H-A Series and is the answer not in the manual?
Questions and answers