Table of Contents
Advertisement
Quick Links
Advertisement
Table of Contents

Summary of Contents for ETEK ZD012A190060EU
-
Page 2: Symbols And Their Meanings
Please read this guide first! Dear Customer, Thank you for choosing a Hitachi product. We would like you to achieve the optimal efficiency from this high quality product which has been manufactured with state of the art technology. Please make sure you read and understand this guide and supplementary documentation fully before use and keep it as a reference. -
Page 3: Safety Precautions
Safety precautions Please follow these safety precautions. This section describes safety precautions that must be followed in order to prevent injury to the user or other people, or damage to property. Please thoroughly read and follow the precautions in this manual. ■... - Page 4 WARNING Outlet, plug, cord, and AC adapter ● Use an 100-240V outlet. Do not use an extension cord, and do not plug the AC adapter in the same outlet as other appliances. ● Periodically clean the plug of any dust and debris by using a dry cloth. ●...
-
Page 5: Exhaust Port
WARNING Others ● Do not use the vacuum cleaner near inflammable or combustible items or materials (kerosene, gasoline, paint thinner, benzine, toner, iron powder, detergents, large amounts of flour, aerosol sprays, flammable gas, cigarette butts, etc.), or to clean up such items or materials. ●... - Page 6 CAUTION Others ● When carrying the vacuum cleaner, do not hold the dust case. The vacuum cleaner might fall and cause injury or damage the floor. ● Keep away from fire. Failure to heed this warning might cause short-circuiting due to vacuum cleaner deformation, resulting in fire.
- Page 7 Battery (lithium-ion battery) DANGER ● Do not connect the battery to anything other than this vacuum cleaner. Do not disassemble, modify, or solder the battery. Do not charge the battery when it is not connected to the vacuum cleaner. Replacement of the battery is to be performed by a trained service technician.
- Page 8 CAUTION ● When charging the battery, make sure the ambient temperature is between 5°C and 35°C. Charging the battery in temperatures outside of this range might prevent the battery from being fully charged. As a result, the battery might take a long time to charge, or you might only be able to use the vacuum cleaner for a short time, Failure to heed this warning might cause the battery to deteriorate.
-
Page 9: Important Safety And Environmental Instructions
1 Important safety and environmental instructions Cleaning and care Waste batteries Warning Ensure that the waste batteries are Never use gasoline, solvent, abrasive ■ ■ disposed of in accordance with cleaning agents, metal objects or hard local laws and regulations. brushes to clean the appliance. -
Page 10: Box Content
2 Overview 2.1 Box content Robot Vacuum Cleaner Charging dock Charge adaptor Contents ENGLISH 02-30 Robot THAI 31-59 INDONESIA 60-88 RV-X15N VIETNAM 89-117 HONG KONG 118-146 ARABIC 147-175 01M-8914093600-4822-01 01M-8914103600-4822-01 Mopping tool Mopping cloth User’s manual and product Cleaning brush documentation (2 pcs) Spare accessories supplied 1 side brush... - Page 11 2 Overview ENGLISH 12...
-
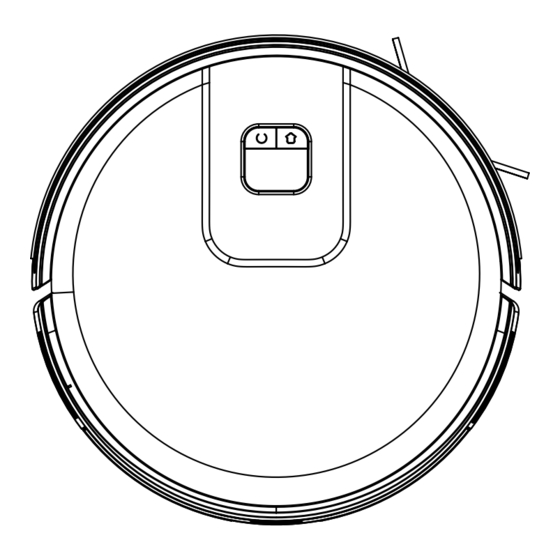
Page 12: Controls And Components
2 Overview 2.2 Controls and 2.3 Technical data components Adapter voltage 100-240V~ 50/60Hz 1. Upper body Adapter output 19.0 V / 0.6A 2. Central body Battery Li-ion: 14.4V / 3.2 Ah 3. Start Cleaning-Pause Button / Sending to Charging period: 5.5 –... - Page 13 2 Overview Parameter of External Power Supply Manufacturer E-TEK Electronics Manufactory Co., LTD Model Identifier ZD012A190060EU : VDE type plug shape ZD012A190060BS : BS type plug shape Input Voltage 100-240V~ Input Frequency 50/60Hz Input Current 0.5A Output Voltage 19.0V DC Output Current 0.6 A...
-
Page 14: Installation
3 Installation 3.1 Remove the protective sponges. 3.2 Remove the protective film. Remove the protective film on the front of the front impactbumper before use. 3.3 Install the side brush. Side brush installation: align the holes and press gently to fix the side brush on the device. - Page 15 3 Installation 3.4 Install the charging station. Install the adaptor plug to the charging station and set the cables up to prevent the adaptor cable from wrapping around the machine during vacuuming. Install the charging station in a location where it can easily be accessed by the vacuum cleaner.
-
Page 16: Operation
4 Operation Please charge the machine before first use. 4.1 Intended use This appliance is intended for household use and it is not suitable for industrial use. Press and hold the for 3 seconds to turn on. Press and hold the for 3 seconds to turn off. - Page 17 4 Operation WARNING: If the charging level is too low, the cleaning cannot be started. Please charge the appliance before starting the cleaning. WARNING: Before the cleaning, tidy up all cables to prevent disconnections due to entanglement/pulling of the cables and to prevent damage to the furniture.
- Page 18 4 Operation Spot Cleaning (supported with the relevant mobile application only) 1.5m Move the sweeping robot to the area to be cleaned, press the twice. After the mode is activated, the sweeping robot will sweep the circular area with a diameter of 1.5 m calculated from its own position.
-
Page 19: Download The Application
4 Operation 4.3.1 Operation with the application Download the application To download the application, search for “HomeDirect-SDA” application in the mobile app store. Review the mobile application manual for detailed information. Reset Wi-Fi Press “ ” “ ” buttons simultaneously until you hear the aural warning and see the light blinking. - Page 20 4 Operation Wi-Fi connection error Wi-Fi Status Indicator Cause Solution Ensure that the modem ● ■ is connected to the The robot has been network. connected to the router, White indicator normally on Contact your network ● but cannot connect to ■...
- Page 21 4 Operation Network security requirements: Use TKIP, PSK and AES/CCMP encrypted WPA and WPA2 networks. 4.4 Operation of the mop WARNING: Do not use the mopping mode on a carpet. WARNING: Do not put bleach or detergent in the water tank. These chemicals may damage the liquid channels that ensure the water flow in the robot vacuum cleaner or the pump.
- Page 22 4 Operation Remove the swab on the Moisten the swab before Place the swab to the mop mop retainer as it is shown. each mopping. retainer. Install the mop retainer to Install the dust container the dust container and the and the water tank water tank assembly (two in assembly (two in one) to...
-
Page 23: Cleaning And Maintenance
5 Cleaning and maintenance Turn off and unplug the appliance before cleaning. WARNING: Never use gasoline, solvent, abrasive cleaners, metal objects or hard brushes to clean the appliance. 5.1 Cleaning the dust container and filters You may call our call center to order a new filter when your filter reaches the end of its expected life, is deformed or needs to be replaced for a reason. - Page 24 5 Cleaning and maintenance 2. Remove the dust container by pulling it in the direction of the arrow. 3. Open the dust container as it is seen below and empty it as it is shown. 4. Remove the high performance filter and clean the filter using the cleaning brush provided together with the appliance.
- Page 25 5 Cleaning and maintenance 5. Wash the water tank, dust container and filter assembly periodically with cold water as required as per the frequency of operation. 6. Leave the water tank, dust container and filter assembly to dry after washing, and ensure that they are completely dried.
- Page 26 5 Cleaning and maintenance 2. Replace the brush after cleaning it and close the cover in the direction of the arrow. 5.3 Cleaning and installation of the side brush In the long term use, wash the side brush with warm water in order to eliminate the shape deformation.
-
Page 27: Clean Sensors
5 Cleaning and maintenance Clean sensors Please clean sensors regularly, and wipe dust off them with a soft dry cloth or sweep brush. Recharge sensor Fall prevention sensor ENGLISH 28... - Page 28 5 Cleaning and maintenance 5.5 Cleaning of the mopping unit We recommend that you remove the mop holder from one side, drain the water tank, rinse the mop with water and then leave it to dry after each operation of the mopping unit. You may wash the mop in a washing machine.
-
Page 29: Troubleshooting
6 Troubleshooting The power indicator will flash in red and the buzzer will give a beep in case that there is an abnormality in the operation of the sweeping robot. Please check the table below to solve your problems. Voice Prompts Solution - Make sure the robot is connected to power supply. - Page 30 6 Troubleshooting Voice Prompts Solution - Clear the charging dock of objects within 0.5m on the left and right sides and within 1.5m ahead. - Make sure that the robot starts sweep from the charging dock without abnormal movement. The robot cannot return - When the robot is near the charging dock, it can return to the charging dock.
Need help?
Do you have a question about the ZD012A190060EU and is the answer not in the manual?
Questions and answers