Table of Contents
Advertisement
Advertisement
Table of Contents

Summary of Contents for Infa Group Infa Secure CS8813
- Page 2 Quick Reference Guide Rearward Facing Mode Seat Belt Installation (Use For Infant)
- Page 3 Quick Reference Guide Rearward Facing Mode Seat Belt Installation (Use For Infant)
- Page 4 Quick Reference Guide Quick Reference Guide Page QR3 ISOFIX Rearward Facing Mode (Use For Infant) ISOFIX Rearward Facing Mode (Use For Infant) INSTALLATION INSTALLATION REFER TO PAGES 24 - 28 RELEASE ISOFIX LIFT COVER TO LOCATE ISOFIX STRAPS PUSH ON SEAT PUSH ON SEAT ATTACH ISOFIX TENSION...
- Page 5 Quick Reference Guide Rearward Facing Mode Seat Belt Installation (Use For Infant)
- Page 6 Quick Reference Guide ISOFIX Forward Facing Mode (Use For Child)
- Page 7 Quick Reference Guide Forward Facing Mode Seat Belt Installation (Use For Child)
- Page 8 Quick Reference Guide ISOFIX Rearward Facing Mode (Use For Infant)
- Page 9 Quick Reference Guide Forward Facing Mode Seat Belt Installation (Use For Child)
- Page 10 Contents Infant Seat Child Car Seat...
- Page 15 Padding / Inserts Combination Guide MODE INF F ANT SE ANT SEA A T T (Small Infant) REARWARD FACING INF F ANT SE ANT SEA A T T (Large Infant) CHILD SE CHILD SEA A T T FORWARD FACING...
- Page 17 CS8813 CONVERTIBLE CAR SEAT either seatbelt or ISOFIX compatible installations. CS8913 CONVERTIBLE CAR SEAT seatbelt installation only.
-
Page 18: Shoulder Height Markers
Infant Seat Shoulder Height Markers Infant (Rearward Facing Mode) Shoulder height markers are provided on this restraint for a visual indication that the child is safe to travel in this restra int. Do not turn to forward facing until the child’s shoulder reaches the lower label. VIEW A Front of Car LOWER... - Page 22 Infant Seat Setup Converting to Infant Seat Reclined Position More Recline Adjuster Assembly Location Figure 1 The position of the adjuster (top tether strap) has been factory set to enable installation in the Rear Passenger Side position. Allowable Twist Figure 2 Figure 3...
-
Page 23: Infant Car Seat
Infant Seat Infant Car Seat Adjuster Assembly Location Change Adjuster Position Step 1: Lower the headrest . Fold the cover forward expose the tether anchor Step 2: plates. Step 3: From the inside of the shell, pull the 3 bar plate and push through the slot . - Page 25 Setup Shoulder Height Zone The child's shoulder region. Slot Position Nearest to the child's shoulders. Level with or just above the child’s shoulders but not lower. Headrest Position Position the headrest above the shoulders, to ensure the shoulder strap are nearest to the child’s shoulders.
- Page 27 Check Shoulder Check Shoulder Height Height M M a a rke rker r...
-
Page 28: Buckle Height Adjustment
Infant Seat Setup Buckle Height Adjustment Figure 1 Figure 2 INDICATOR MARK TO SHORTEN Note: Do not shorten the buckle strap beyond the indicator mark on the strap. Figure 4 TO LENGTHEN Figure 3... -
Page 33: Isofix Compatible Restraint
Infant Seat ISOFIX Compatible Restraint ISOFIX Lower Anchorages IMPORTANT Seat Belt Buckle... - Page 34 Infant Car Seat Infant Seat Accessing the Flexible ISOFIX Lower Anchorage Connectors (LAC) IMPORTANT Step 1: Step 2: Load Indicating Adjuster Adjuster Strap Lower Anchorage Connector (LAC)
-
Page 39: Using Inbuilt Harness
Infant Seat Using Inbuilt Harness Insert either tongue into the buckle until a “CLICK” is Step 4: heard. Ensure secure engagement by pulling the harness strap (refer Figure 5). Figure 5 IMPORTANT If no “Click” can be heard or a secure engagement cannot be achieved refer to “Cleaning Buckle Harness”... -
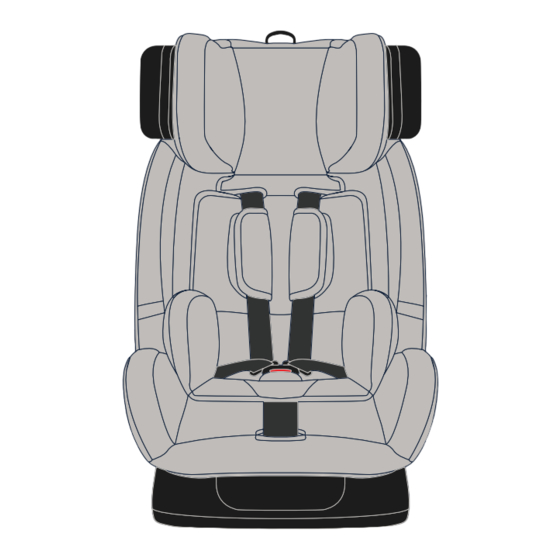
Page 42: Child Car Seat
Child Car Seat (forward Facing) IMPORTANT... - Page 43 Child Car Seat Model CS8013 Forward Facing Shoulder height markers may be hidden under a headrest ISOFIX Compatible 1. Shoulder Height Markers Top Tether Assembly • Tether Strap 2. Headrest Assembly • Adjuster Headrest + Harness adjustment system • Attachment Clip •...
-
Page 44: Shoulder Height Marker
Child Car Seat Shoulder Height Marker Smaller Child (Using Inbuilt Harness) Once the childs shoulders reached the lower shoulder height marker the restaint can either REAR R W W ARD ARD F F ACING ACING • Remain until the middle shoulder height marker is reached (approx 2 to 3 years) or •... -
Page 46: Next Restraint
Child Car Seat Next Restraint Next Type of Restraint Refer to the ‘RESTRAINT GUIDE’ for the selection for the most appropriate next restraint (refer page 6). When the child has outgrown the child restraint, then you can use either of the following; •... - Page 47 Child Car Seat Setup CS8813 Convertible Car Seat ISOFIX and seatbelt compatible CS8913 Convertible Car Seat seatbelt compatible Selection of Appropriate Padding Combinations Determine whether your child requires the additional padding provided with this restraint, to combinations. Converting to Child Car Seat Reclined Position Under the front of the restraint is a *GREY lever.
- Page 48 Child Car Seat Setup Shoulder Height Zone The child's shoulder region. Slot Position Nearest to the child's shoulders, but not more than 25mm below the child's shoulders. Headrest Position Position the headrest above the shoulders, to ensure the straps are nearest to but not more than 25mm below the child’s shoulders.
- Page 50 Child Car Seat Setup Headrest & Harness Strap Height Adjustment Check Shoulder Check Shoulder Height Marker Height Marker IMPORTANT ENSURE THE HARNESS STRAPS ARE ALWAYS THREADED THROUGH THE HEADREST. IMPORTANT • IF THE CHILD’S SHOULDERS TOUCH THE BOTTOM EDGES OF THE HEADREST SIDE WINGS, RAISE THE HEADREST TO THE NEXT HEADREST POSITION.
- Page 51 Child Car Seat Child Car Seat Setup Buckle Height Adjustment Figure 1 Figure 2 INDICATOR MARK TO SHORTEN Note: Do not shorten the buckle strap beyond the indicator mark on the strap. Figure 4 TO LENGTHEN Figure 3...
-
Page 54: Installation
Child Car Seat Installation Installing Using Vehicle Seatbelt Safe Grip (If Supplied) *Can be purchased separately visit https://infagroup.com.au/ ATTACH TO SASH SECTION SASH SECTION ONLY SAFE GRIP BELT CLAMP TOGGLE SECTION (2) The Safe Grip (red belt clamp) locks the lap BARREL SECTION (1) belt slack in the lap belt. - Page 55 Child Car Seat Installation Installing Using Vehicle Seatbelt Step 5: Step 6: Figure 9 Figure 9 PULL TO ATTACH TIGHTEN NOTE FOLLOWING THE INSTALLATION OF THE CHILD RESTRAINT A SMALL ADJUSTER AMOUNT OF MOVEMENT IS DEEMED ACCEPTABLE. CAUTION: CHILDREN CAN BE INJURED OR RESTRAINTS AND Tilt Pull to...
- Page 56 Child Car Seat ISOFIX Compatible Restraint ISOFIX Lower Anchorages IMPORTANT Seat Belt Buckle...
-
Page 57: Infant Seat
Child Car Seat Infant Seat Accessing the Flexible ISOFIX Lower Anchorage Connectors (LAC) IMPORTANT Step 1: Step 2: Load Indicating Adjuster Adjuster Strap Lower Anchorage Connector (LAC) - Page 60 Step 1: Step 2: Step 3:...
-
Page 61: Using Inbuilt Harness
Child Car Seat Using Inbuilt Harness Step 4: Insert either tongue into the buckle until a “CLICK” is heard. Ensure secure engagement by pulling the harness strap (refer Figure 4). Figure 4 IMPORTANT If no “Click” can be heard or a secure engagement Harness”... -
Page 62: Adjusting Recline Angle
Child Car Seat Using Inbuilt Harness Step 6: Check the harness tightness by the PINCH TEST , this is acheived by pinching the harness webbing at the shoulders (refer Figure 7). • If you can pinch the harness strap, tighten more. PINCH •... -
Page 63: Care Of Restraint
Care of Restraint 1. Main Cover 2. Head Rest Cover 4. Shoulder Pads 5. Buckle Pad 3. Insert VERY IMPORTANT Only replace the cover with a InfaSecure supplied replacement cover � with identical shoulder height markers or a replacement cover � meeting AS/NZS 8005. -
Page 65: Harness Buckle
Cleaning Harness Buckle Step 1: Step 2: Figure 1 Step 3: Step 4: Step 5: Figure 2 “CLICK” Figure 3... -
Page 66: Remove & Replace Covers
Remove & Replace Covers Headrest Step 1: Raise the headrest to highest position (refer Figure 1). Step 2: Unclip the press studs which attach to the apron: either side of slots. Step 3: Remove cover Figure 1 Apron Step 1: Unclip the press studs location (refer Figure 2). -
Page 67: Extension Straps
Extension Straps TYPE A If required contact INFA GROUP Customer Care 1300 92 4632 (AU) INFANT SEAT or 067 590 870 (NZ) for nearest supply location. TYPE B CHILD SEAT... - Page 68 Accessories Follow the instructions covering the use of accessories provided with this child restraint or spare parts provided by InfaSecure for this restraint. IMPORTANT Use of unauthorised aftermarket accessories (i.e items not provided in this box with the child restraint), can reduce the safety provided by the child restraint and may cause injury or death.
- Page 69 Accessories SHOULDER PADS Alternative Pads Step 1: Separate press-studs and remove the shoulder pads from harness Step 2: To attach shoulder pads, ensure press studs face away from the child and re-attach.
- Page 70 Accessories SEAT PROTECTOR STANDARD Step 1: Step 1: Step 2: FULL LENGTH *Diagrams used in this accessories section of the manual are indicative of types of cover, pads, inserts & seat protectors and may not resemble the actual product. *Accessories can vary according to model.
-
Page 72: Anchorage Fittings
Anchorage Fittings UPPER ANCHORAGE FITTINGS FOR SEDANS ONLY Attachment Bolt Anchor Fitting WARNINGS Spacer(s) (if required) CHILD RESTRAINTS MUST NOT BE FRONT OF VEHICLE ATTACHED TO UNSOUND METAL OR Vehicle WOOD SYNTHETIC Trim STRUCTURES. WHEN DRILLING THE HOLE DRILL Vehicle THROUGH FUEL LINES,... - Page 74 Notes:...
- Page 75 Notes:...
- Page 76 Notes:...
- Page 77 Notes:...
- Page 78 Notes:...
-
Page 79: Lifetime Warranty
LIFETIME WARRANTY ON SUPER STRONG BLOW MOULDED SHELL PRODUCTS Register your product to receive lifetime warranty*, product updates and information. Please visit https://infagroup.com.au/pages/warranty-information to register your product. InfaGroup Warranty InfaGroup Pty Ltd warrants this product for twelve months from the date of purchase against failure due to manufacturing faults or faulty materials. - Page 80 110 - 114 Old Bathurst Rd, Emu Plains 2750, NSW, Australia P.O Box 487, Emu Plains 2750, NSW Australia...
Need help?
Do you have a question about the Infa Secure CS8813 and is the answer not in the manual?
Questions and answers
Does my car have to have isofix for this model car seat.