
Summary of Contents for HYSUN HY090W-T1
- Page 1 Wallbox EV Charger User Manual Model No. HY090W-T1 Current Charging Plug US Type 1 Power Plug NEMA 14-50...
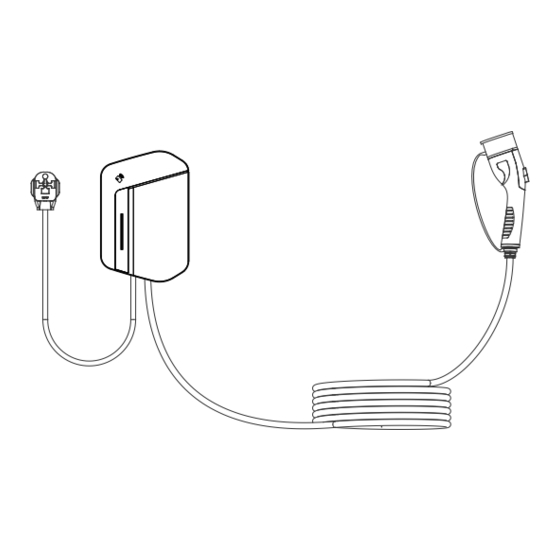
- Page 2 01/Product Appearance and Overview RFID Indicator light NEMA 14-50 Charging Plug • This product is an AC charging station designed for the AC charging of electric vehicles. The charging station includes a charging station body, wall-hanging backboard, and other components. It features charging protection and a card-swiping mechanism.
- Page 3 02/Function and Dimension 17cm/0.56ft N14-50P 37.7cm/1.24ft 671.3cm/22.08ft Control Box Function Temperature Auto Repair Efficient Protection High End Protection Charging Level IP54 Under Voltage Over Voltage Short Circuit Earth Leakage Lightning Over Load Protection Protection Protection Protection Protection Protection - 2 -...
- Page 4 03/Product Parameters Product Code: HY090W-T1 Input Voltage: 200~240Vac Basic Information Rated Current: Rated Power: 9.6KW@240Vac (40A) Charging Type: Level 2 Charging Plug: SAE J1772 (Type 1) Product Specification Power Plug: NEMA 14-50 Charging Cable: 2x8AWG+10AWG+18AWG Working Temp.: -30°C to 50°C...
- Page 5 04/Safety Precautions 1. Ensure that the equipment is well grounded before powering it on. 2. Keep the charging gun head clean and dry. If it gets dirty, wipe it with a clean and dry cloth. 3. Do not touch the charging gun with your hands while charging. 4.
- Page 6 USER MANUAL User manual KA3.5 * 35mm PM3 * 10mm Plastic bolts +Screws Side anti-theft for hanging board x 4 screws for hanging board x2 05/Installation Steps 1. Use the hanging board to mark 2. Use a drill to make holes in the location of the screw holes on the wall where you marked the the wall where you plan to mount...
- Page 7 5. Hang the WALLBOX station on 6. Assemble the anti-theft screws the board that is now affixed to the from side. wall. 7. Remove the transparent protec- 8. Wrap the cable and connector tive film from WALLBOX station. around the WALLBOX station. 06/Charging Steps (Part 1) 1.
- Page 8 3. Carefully plug the charging 4. Make sure the charging connector connector into the vehicle socket. is fully inserted until it clicks into place. 5. Use the swipe card to activate the 6. Once the charging process has charging process. started, the electric vehicle should charge normally.
- Page 9 06/Charging Steps(Part 2-Checking list) Before initiating the charging operation, please carefully review and ensure the following checklist is complete: a. The AC charging station is installed in a convenient location for operation and maintenance. b. The charging station and all accessories are correctly connected and securely installed.
- Page 10 (2) Common Trouble Handling Fault Reasons Suggstions 1. If the voltage exceeds 270Vac for level 2 and 140Vac for level 1 for a short period of time, the charger will go into standby mode. Wait for the power network to restore itself to the normal voltage range, then the charger will automatically High Input AC Over-Voltage...
-
Page 11: Customer Support
Customer Support For Technical Assistance Call: T: 0086-180-254-31819 E: Sales@hysunpower.com For additional products and information, please visit our website at: www.hysunpower.com.
Need help?
Do you have a question about the HY090W-T1 and is the answer not in the manual?
Questions and answers